


Quick-Start Guide
Mount a Laptop
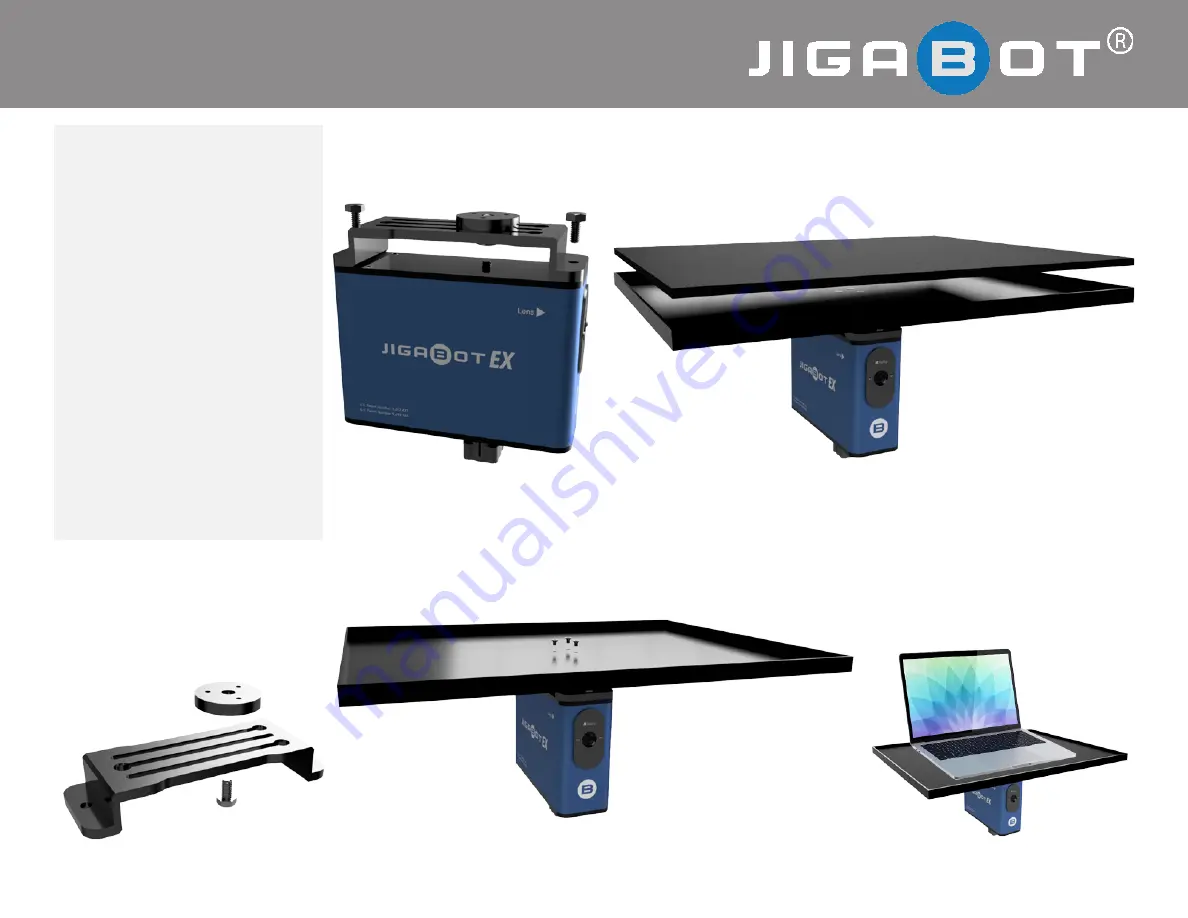
Jigabot EX
Confidential & proprietary. Copyright 2022 Jigabot LLC, all rights reserved. [email protected] www.Jigabot.com Ph. 801-995-3680
Once you verify how to track with your
Jigabot EX, and rather than mounting
an iPad or camera, you can mount a
laptop as follows:
First power OFF your Jigabot and
DOTdriver, then do this setup:
1. Attach the disk to the
Top Mount;
2. Attach the Top Mount to the
Jigabot EX;
3. Screw in the Laptop Mount to
the Disk;
4. Cover the screws;
5.
Place the Laptop on top.
These steps presuppose that your
Jigabot EX is already attached to a
stable tripod (not shown).
This procedure is intended to be done
initially, not regularly.
1 Attach the Disk to the Top Mount
using the provided 3/8-16” screw. The
included rubber washer (not shown)
goes between the Disk and Top Mount.
3 Screw in the Laptop Mount to the Disk using the
provided 3/16 screws.
5. Place the Laptop on top of the
foam, and place the included strap
(not shown) across the Laptop.
4 Cover the screws using the included foam.
2 Attach the Top Mount to the
Jigabot EX using the two provid-
ed 1/4-20” screws.


