6
Chapter 2
Hardware installation
2-1 Hardware installation Steps
Before using your computer, you had better complete the following steps:
1.
Check motherboard setting
2.
Install CPU
3.
Install Memory
4.
Install Expansion cards
5.
Connect Ribbon cables, Panel wires, and power supply
6.
Setup BIOS
7.
Install software driver & utility
2-2 Checking Motherboard’s Jumper Setting
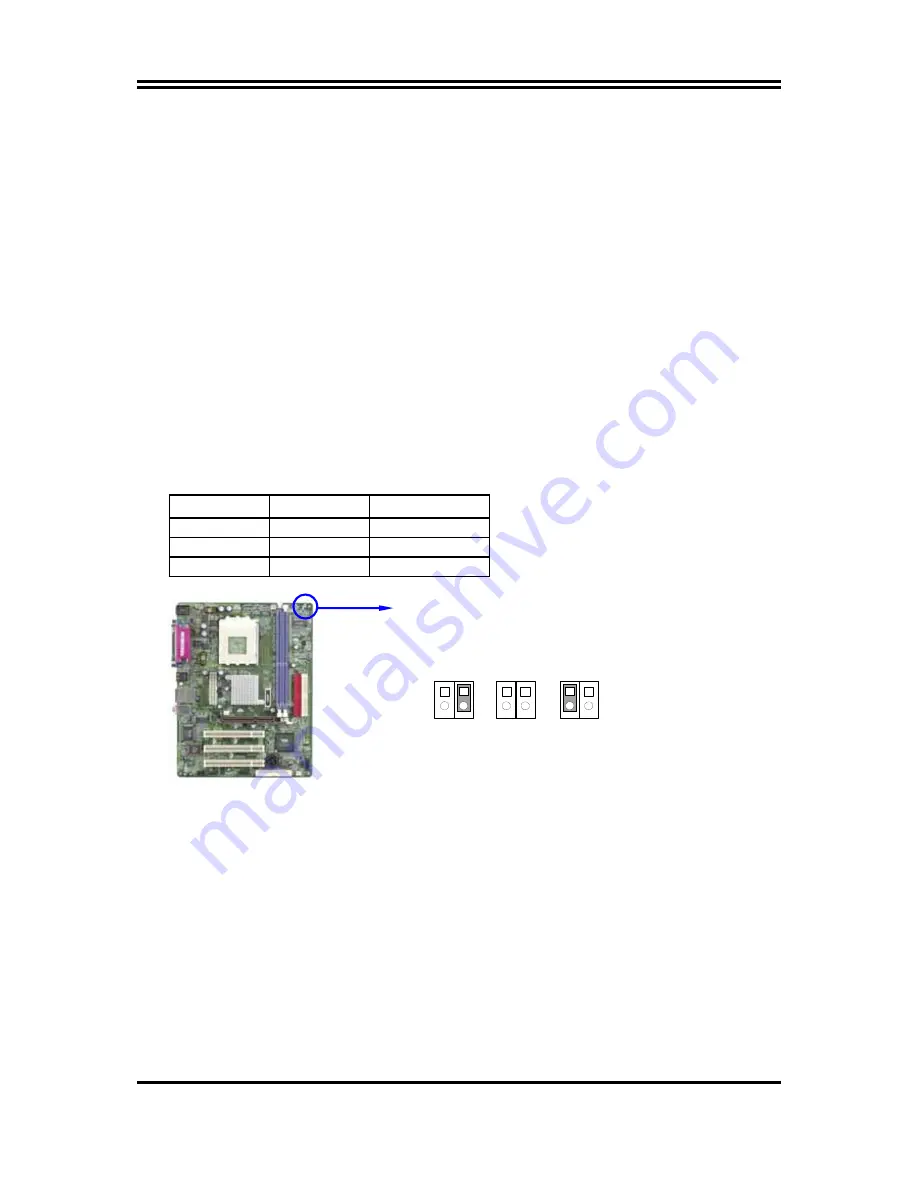
(1) CPU Front Side Bus Frequency Setting (2-pin) : JP2, JP3
JP2 JP3
CPU
CLK
OFF ON 100MHz
OFF OFF 133MHz
(Default)
ON OFF 166MHz
CPU Front Side Bus Frequency Setting
100MHz
JP2
1
2
JP3
133MHz
JP2
1
2
JP3
166MHz
JP2
1
2
JP3
(Default)
Note: CPU Front Side Bus Frequency also can setting step by step in BIOS SETUP,
please refer page
33
Miscellaneous Control in Host Clock at Next.
(2) CMOS RAM Clear (3-pin) : JBAT
A battery must be used to retain the motherboard configuration in CMOS RAM short 1-2
pins of JBAT to store the CMOS data.
To clear the CMOS, follow the procedure below:
1.
Turn off the system and unplug the AC power
2.
Remove ATX power cable from ATX power connector
3.
Locate JBAT and short pins 2-3 for a few seconds
4.
Return JBAT to its normal setting by shorting pins 1-2
5.
Connect ATX power cable back to ATX power connector


