7
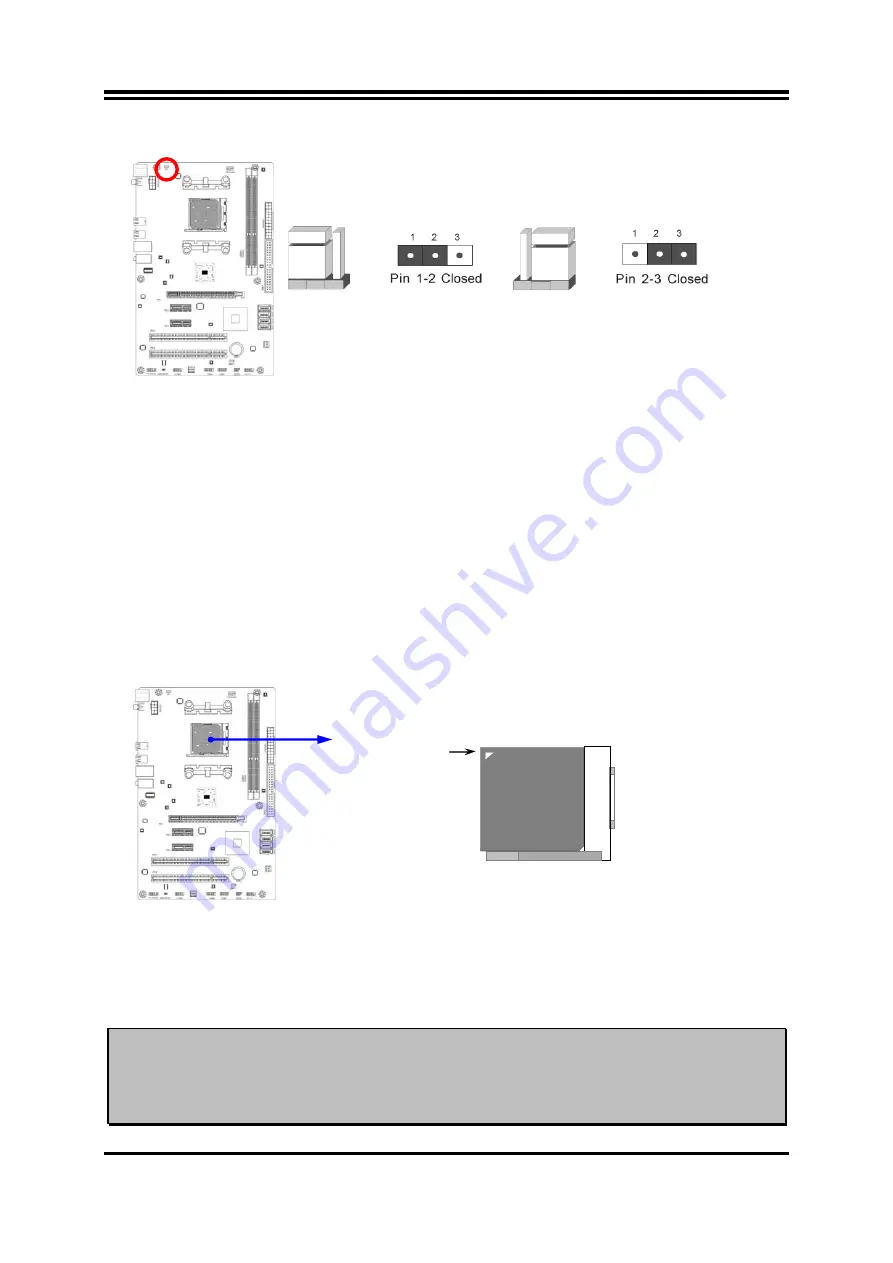
(2) KB/USB Power on Function Enabled/Disabled: JP1
KB/USB Power On Setting
2-3 Closed: KB/USB Power ON Enabled
JP1
JP1
1-2 Closed: KB/USB Power ON Disable (Default
)
2-3 CPU Installation
This motherboard provides a surface mount, Zero Insertion Force (ZIF) CPU socket.
Depending on the model you selected, there are two type of CPU socket available for
this motherboard series. One model comes with AMD AM2 CPU socket, and the other
comes with AMD AM3+ CPU socket. They support different range of AMD CPU
(please visit our website for detailed CPU support list or consult your dealer).
The installation steps are basically the same. Please refer to the following CPU
installation guide.
To install a CPU, first turn off your system and remove its cover. Locate the ZIF socket
and open it by first pulling the level sideways away from the socket then upward to a
90-degree angle. Insert the CPU with the correct orientation as shown below. The
notched corner should point toward the end of the level. Because the CPU has a
corner pin for two of the four corners, the CPU will only fit in the orientation as shown.
CPU ZIF mPGAB Socket
Colden Arrow
CP
U So
ck
et
When you put the CPU into the ZIF socket, no force required to insert of the CPU, and
then press the level to locate position slightly without any extra force.
The CPU that comes with the motherboard should have a cooling FAN attached to
prevent overheating. If this is not the case, then purchase a correct cooling FAN
before you turn on your system.
WARNING!
Be sure that there is sufficient air circulation across the processor’s
heat sink and CPU cooling FAN is working correctly, otherwise it
may cause the processor and motherboard overheat and damage,
you may install an auxiliary cooling FAN, if necessary.


