


19.0 TFT Active Matrix LCD Panel User Manual
English 19
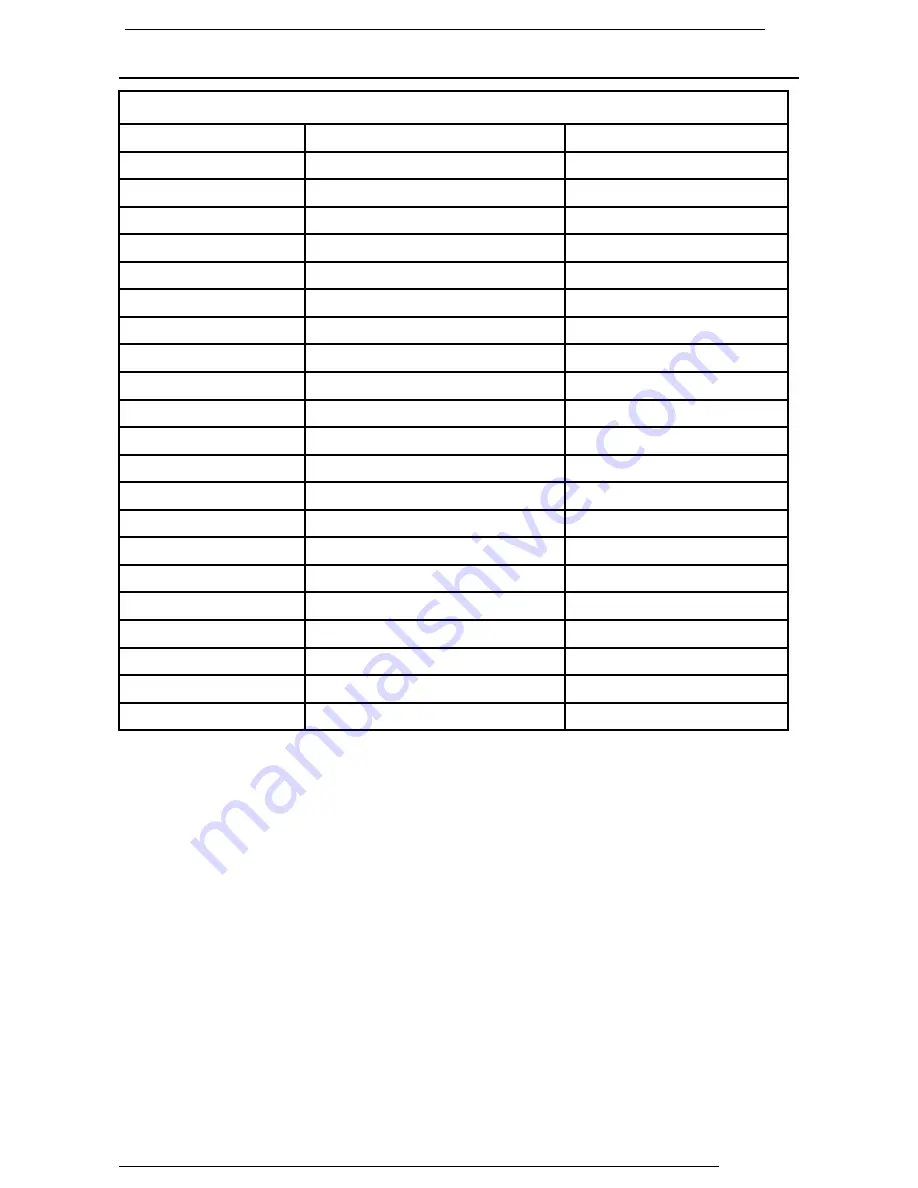
Display Mode
Incoming Display Mode
Resolution Horizontal
Frequency
(KHz)
Vertical Frequency (Hz)
720X400 (50Hz)
31.5KHz
50.0Hz
720X400 (60Hz)
31.5KHz
59.9Hz
720X400 (70Hz)
31.5KHz
70.1Hz
640X480 (50Hz)
31.5KHz
50.0Hz
640X480 (60Hz)
31.5KHz
59.9Hz
640X480 (66Hz)
35.0KHz
66.7Hz
640X480 (72Hz)
37.9KHz
72.8Hz
640X480 (75Hz)
37.5KHz
75.0Hz
800X600 (50Hz)
35.2KHz
56.3Hz
800X600 (60Hz)
37.9KHz
60.3Hz
800X600 (72Hz)
48.1KHz
72.2Hz
800X600 (75Hz)
46.9KHz
75.0Hz
832X624 (75Hz)
49.7KHz
75.0Hz
1024X768 (60Hz)
48.3KHz
60.0Hz
1024X768 (70Hz)
56.5KHz
70.1Hz
1024X768 (72Hz)
57.7KHz
72.1Hz
1024X768 (75Hz)
60.0KHz
75.0Hz
1152X864 (75Hz)
67.5KHz
75.0Hz
1280X960 (60Hz)
60.0KHz
60.0Hz
1280X1024 (60Hz)
64.0KHz
60.0Hz
1280X1024 (75Hz)
80.0KHz
75.0Hz
1. We offer you 21 Windows compatible modes.
2. If any interference occurs on your screen while you modulating your PC or
OSD. It is normal.
3. To obtain best display quality, remember to upgrade your video card driver.
We strongly recommended you choose a mode listed in the
above-mentioned table.
4. The modes not listed on the table above may be supported.
5. You may use the power management on your computer. It’s good for
extending the service life of the product.


