13
7.10
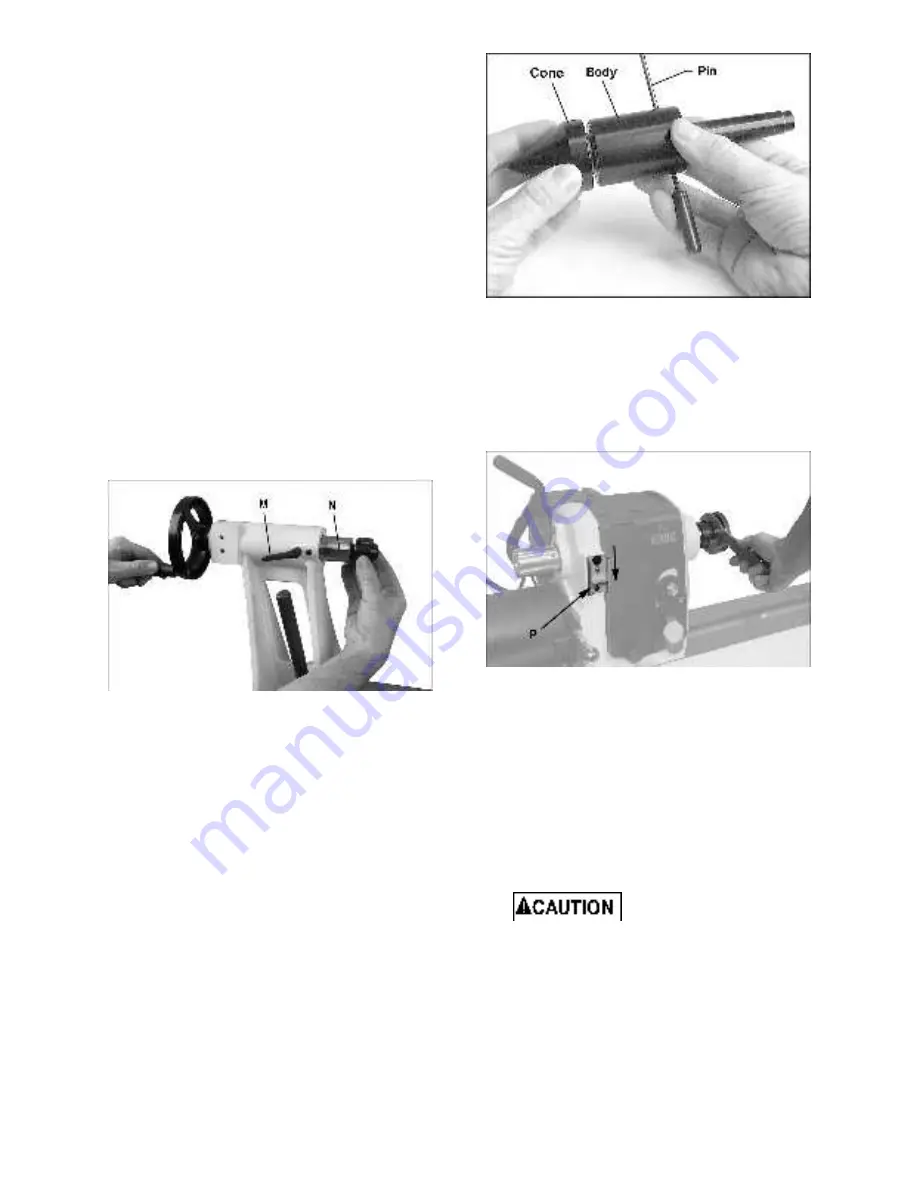
Live center: Installing/removing
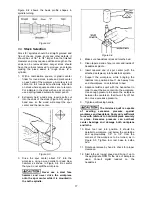
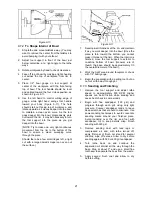
Live centers are installed into the tailstock quill.
See Figure 7-9.
1. Disconnect lathe from power source.
2. Clean tapered end of center and inside of
tailstock quill, then push center into quill. Test
the insertion by attempting to pull the center
out of the quill by hand. It should remain
secure within the quill.
3. Always tighten quill locking handle (M), once
the live center has been properly positioned in
workpiece. Make sure keyway (N) in quill is
aligned with locking handle.
To remove a live center:
4. Back off tailstock and remove workpiece from
lathe.
5. Loosen quill lock handle (M).
6. Rotate handwheel counterclockwise to retract
quill all the way, until live center comes out.
Hold the center while doing this to prevent it
from falling.
Figure 7-9: installing live center
7.11
Live center and cone
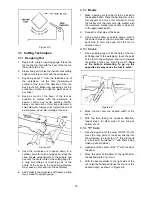
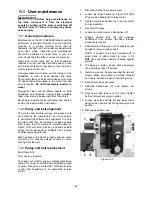
The live cone center, shown in Figure 7-10, can be
used without the cone. To remove cone from live
center, first insert pin through hole in live center
body as shown. If pin will not insert at first, rotate
cone until pin can be inserted. The cone can now
be removed by holding the body stationary while
unscrewing cone.
Figure 7-10: removing cone from live center
7.12
Spindle lock
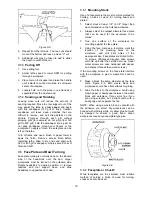
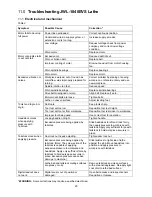
Push spindle lock pin (P, Figure 7-11) and rotate
spindle slightly until pin engages. Slide plate
downward to hold pin in locking position.
Release spindle lock by pushing plate upward.
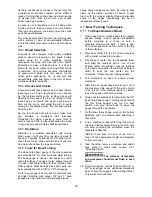
Figure 7-11: spindle lock and face plate
7.13
Face plate: Installing/removing
1. Disconnect lathe from power source.
2. Mount face plate to your workpiece.
3. Engage spindle lock.
4. Install face plate onto threads of headstock
spindle and rotate clockwise as far as it will go.
5. Tighten both set screws in face plate. Face
plate is now ready for turning.
Make certain set screws in
face plate are tight before reversing lathe
spindle rotation.
6. To
remove
face plate, engage spindle lock.
Loosen both set screws
in face plate, and
turn face plate counterclockwise with face
plate wrench to loosen.


