9
5.2
Uncrating and cleanup
Machine is heavy. Use an
appropriate lifting device and use extreme
caution when moving the machine to its final
location. Failure to comply may cause serious
injury.
1. Finish removing wooden crate from around
lathe.
2. Unbolt lathe from shipping crate bottom.
3. Choose a location for the lathe that is dry, has
good lighting, and has enough room to be able
to service the lathe on all four sides.
4. Move carriage and tailstock to the tailstock end
of the bed.
5. Place two steel rods or pipes of sufficient
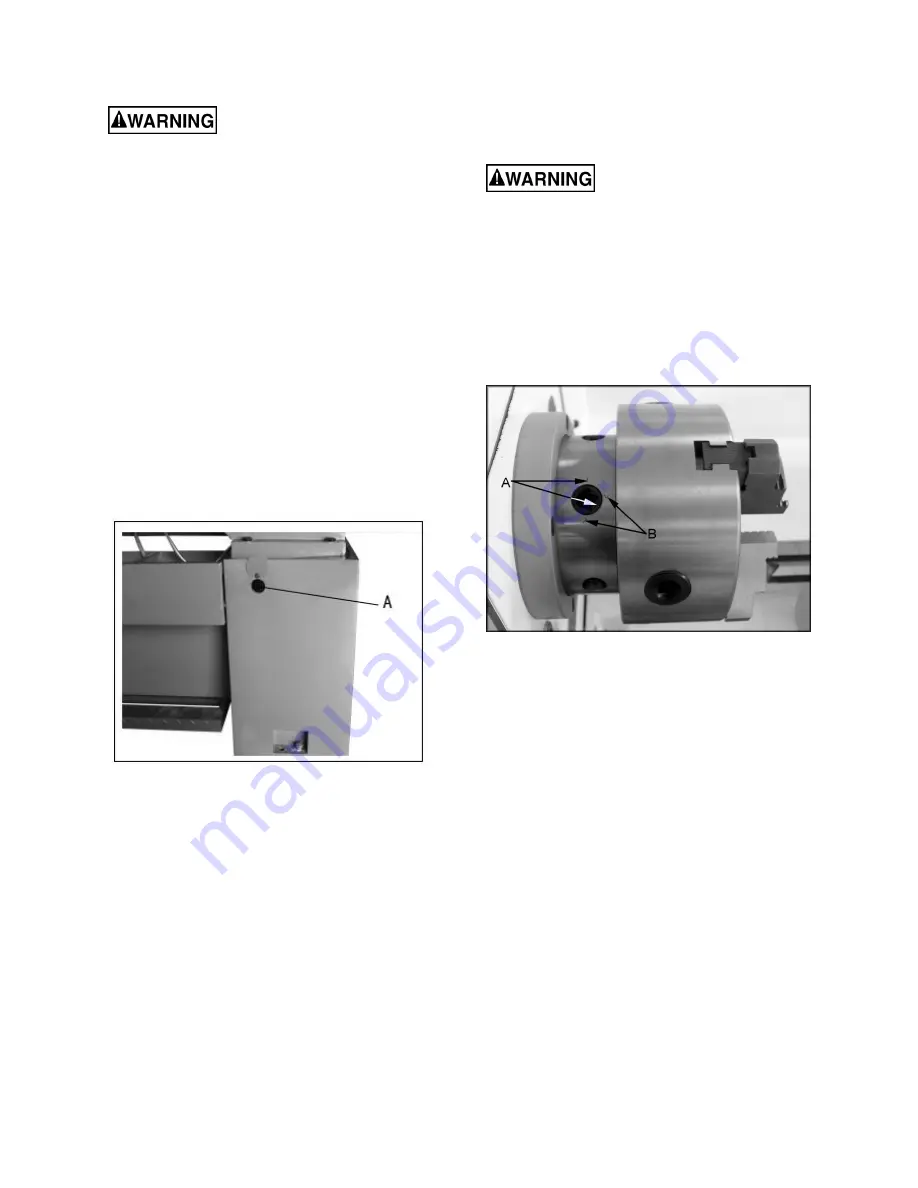
strength into four holes (A, Figure 5-2) of lathe
stand. Sling the lathe with properly rated
straps.
Do not lift by spindle.
With adequate
lifting equipment, slowly raise lathe off
shipping crate bottom. Make sure lathe is
balanced before moving to sturdy bench or
optional stand.
Figure 5-2
6. To avoid twisting the bed, the lathe's location
must be absolutely flat and level. Bolt lathe to
stand (if used). If using a bench, through-bolt
for best performance.
7. Clean all rust protected surfaces using a mild
commercial solvent, kerosene or diesel fuel.
Do not use paint thinner, gasoline, or lacquer
thinner, as these will damage painted
surfaces. Cover all cleaned surfaces with a
light film of Mobil DTE
Oil Heavy Medium or
equivalent.
8. Remove
end
gear
cover.
Clean
all
components of end gear assembly and coat all
gears with a heavy, non-slinging grease.
9. Using a machinist’s precision level on the
bedways, check to make sure lathe is level
side to side and front to back. If necessary,
loosen mounting bolts, shim, and retighten
mounting bolts. The lathe must be level to be
accurate.
5.3
Chuck preparation (three jaw)
Read and understand all
directions for chuck preparation. Failure to
comply may cause serious injury and/or
damage to the lathe.
Note:
Before removing chuck from spindle, place
a way board across bedways under the chuck.
1. Support the chuck while turning three
camlocks 1/4 turn counter-clockwise with the
chuck key enclosed in the toolbox. Figure 5-3
shows the cam in the secure position. Line up
the two marks (A, Figure 5-3) for removal.
Figure 5-3
2. Carefully remove chuck from spindle and place
on an adequate work surface.
3. Inspect the camlock studs. Make sure they
have not become cracked or broken during
transit. Clean all parts thoroughly with solvent.
Also clean spindle and camlocks.
4. Cover all chuck jaws and scroll inside the
chuck with Mobilith
AW2. Cover spindle, cam
locks, and chuck body with a light film of Mobil
DTE
Oil Heavy Medium.
5. Lift chuck up to spindle nose and press onto
spindle. Tighten in place by turning cam locks
1/4 turn clockwise. The index mark (A, Figure
5-3) on the camlock should be between the
two indicator arrows (B, Figure 5-3). If the
index mark is not between the two arrows,
remove chuck and adjust the camlock studs by
either turning out one full turn (if cams will not
engage) or turning in one full turn (if cams turn
beyond indicator marks).
6. Install chuck and tighten in place.
ATTENTION:
Only when the incised line on chuck
lines up with that on the spindle, can the chuck be
mounted.
Summary of Contents for GHB-1236
Page 18: ...18 12 0 Thread and feed chart Table 3 ...
Page 20: ...20 13 2 1 Headstock Assembly Exploded View ...
Page 21: ...21 ...
Page 24: ...24 13 3 1 Gearbox Assembly Exploded View ...
Page 25: ...25 ...
Page 28: ...28 13 4 1 Apron Assembly Exploded View ...
Page 31: ...31 13 5 1 Cross Slide Assembly Exploded View ...
Page 33: ...33 13 6 1 Compound Rest Assembly Exploded View ...
Page 36: ...36 13 7 1 Tailstock Assembly Exploded View ...
Page 39: ...39 13 9 1 Feed Rod Assembly Exploded View ...
Page 41: ...41 13 10 2 Motor and Change Gear Enclosure Exploded View ...
Page 43: ...43 13 11 1 Stand Brake Coolant Pump Exploded View ...
Page 44: ...44 ...
Page 46: ...46 13 12 1 Electrical Box Assembly Exploded View ...
Page 48: ...48 13 13 1 Steady Rest and Follow Rest Parts List ...
Page 51: ...51 13 15 1 Accessories Exploded View ...
Page 53: ...53 14 0 Wiring Diagram for GHB 1236 ...
Page 55: ...55 This page intentionally left blank ...
Page 56: ...56 427 New Sanford Road LaVergne Tennessee 37086 Phone 800 274 6848 www jettools com ...


