Jeremias HT 103 Installation Instructions Manual Download Page 10


10 

Jeremias INSTALL_HT


Rev: 3/26/19


Roof Support (RS) 

The Roof Support (RS) provides vertical support for the chimney both above and suspended 
below the Roof Support.  It may also be used to provide supplemental support when the total 
chimney height exceeds the capacity of the primary support.   
To Install (See Fig. 19) 

1.


Refer to Table 2

 Maximum Support Capacity / Spacing. Do not exceed the 

maximum chimney height the RS can support.    

2.


Determine where the RS is to be located.  The brackets of the RS are to be 

positioned on top of framed roof opening, rafters or other solid surface.   

3.


Ensure minimum 2” clearance to combustible materials is maintained.


4.


Position the RS around the chimney leaving the band loose so the Roof support can 

be adjusted. 

5.


Locate the Brackets on top of framing.  Align pilot holes with wood rafters.  Use a 

minimum of three  #10 x 2-

1/2” wood screws to secure each bracket to wood rafter.


6.


Tighten worm gears to clamp RS to chimney pipe  

7.


Secure RS to 

Chimney Pipe by driving one #10 x 1/2” long self

-drilling screw 

through the pilot hole in the RS band and into the outer casing of the Chimney Pipe. 
Note: Do not puncture the inner flue pipe with screw. 

8.


Install adjoining chimney lengths as described in Joint Assembly section. 


Anchor Plate (AP) 

The Anchor Plate (AP) connects a masonry fireplace or a factory-built fireplace to Jeremias 
HT chimney.      

To Install For Masonry fireplace(see Fig 20) : 

1.


Follow the requirements of the local building code for connecting factory-built chimney to masonry fireplace.  

2.


Refer to Table 2

 Maximum Support Capacity / Spacing. Do not exceed the maximum chimney 

height the AP can support.    

3.


Ensure the top of the masonry is structurally sound and has level surface.  Correct any masonry 

issues accordingly. 

4.


Apply 1,000

°

F High temperature sealant around flue opening 

5.


Position the Anchor Plate over the fireplace opening. 

6.


Mount AP to fireplace with (4) masonry anchors 

7.


Install adjoining chimney lengths as described in Joint Assembly section. 

To Install for factory-built fireplaces: 

1.


Read and comply with the fireplace manufacturers installation instructions.  Verify model HT chimney 
is approved for use with the appliance. 

2.


Refer to Table 2

 Maximum Support Capacity / Spacing. Do not exceed the maximum 

chimney height the AP can support.    

3.


Refer to fireplace manufacturers instructions regarding application of 1,000

°

F High 

temperature sealant around flue opening 

4.


Position the Anchor Plate over the fireplace opening. 

5.


Mount AP to fireplace with (4) 5/8” stainless steel sheet metal screws


6.


Install adjoining chimney lengths as described in Joint Assembly section. 


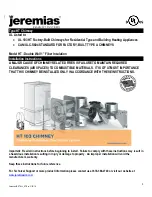
Fig 18. Tee Support (above Tee) 


Fig 19. Roof Support 


Fig 20. Anchor Plate 

Summary of Contents for HT 103

Page 1: ...IR SPACES TO COMBUSTIBLE MATERIALS IT IS OF UTMOST IMPORTANCE THAT THIS CHIMNEY BE INSTALLED ONLY IN ACCORDANCE WITH THESE INSTRUCTIONS Important Read all instructions before beginning to install Fail...

Page 2: ...unique design which leaves no destructive heat bridge between inners and outers and a strong simple locking band design which makes for easy assembly Certification by Underwriters Laboratory and a be...

Page 3: ...creosote The creosote vapors condense in the relatively cool chimney flue of a slow burning fire As a result creosote residue accumulates on the flue lining When ignited this creosote makes an extrem...

Page 4: ...rements Component 5 Diameter 6 Diameter 7 Diameter 8 Diameter Ceiling Support Round or Square 11 x 11 12 x 12 13 x 13 14 x 14 Wall Thimble 11 x 11 12 x 12 13 x 13 14 x 14 Firestop Radiation Shield 11...

Page 5: ...Locking Band so that the number etching is right side up When viewing the worm gear straight on the nut is to the left With the worm gear rotated to away from sight the nut can be accessed with a scre...

Page 6: ...ceiling in the room above where the appliance is located To install See Fig 8 7 9 29 1 Determine the location where the chimney will pass through the ceiling Plan the system to avoid obstructions such...

Page 7: ...the 1st length of chimney pipe Refer to Joint Assembly section 8 Lower Chimney Adapter and Chimney Pipe assembly down into the Ceiling Support Align and engage the single wall tube of the Chimney ada...

Page 8: ...14 15 1 Determine the location where the chimney will pass through the wall Plan the system to avoid obstructions such as electrical plumbing and studs 2 Cut a hole in the wall and build a framed in...

Page 9: ...nded Brackets and support 2 Use supplied fasteners to bolt Wall Brackets to TS in the desired position above or below the TS 3 Position the Tee Support against the wall it will be mounted to The plate...

Page 10: ...on Anchor Plate AP The Anchor Plate AP connects a masonry fireplace or a factory built fireplace to Jeremias HT chimney To Install For Masonry fireplace see Fig 20 1 Follow the requirements of the loc...

Page 11: ...ng To Install See Fig 22 23 1 Establish the correct framing dimension See Table 2 2 From the underside of the ceiling position the cylinder of the FRS inside the framed opening and with the plate flat...

Page 12: ...llar is used to seal off the opening between the vent and flashing To Install See Fig 25 1 Position Storm Collar around vent and against the opening of the flashing 2 Tighten worm gear to secure Storm...

Page 13: ...d has captured the bead Confirm all clearances and support spacing is correct Remove any protective film or packaging materials from chimney components Important Notice The UL listing for this product...

Page 14: ...14 Jeremias INSTALL_HT Rev 3 26 19 Fig 30 TEE SUPPORT INSTALLATION Fig 29 CEILING SUPPORT INSTALLATION...

Page 15: ...sture level does not exceed 20 or burning of chipboard or domestic waste IV Remedies If a valid Limited Warranty claim arises Jeremias shall it its sole discretion either repair the Product or deliver...

Page 16: ...16 Jeremias INSTALL_HT Rev 3 26 19...

Reviews: