


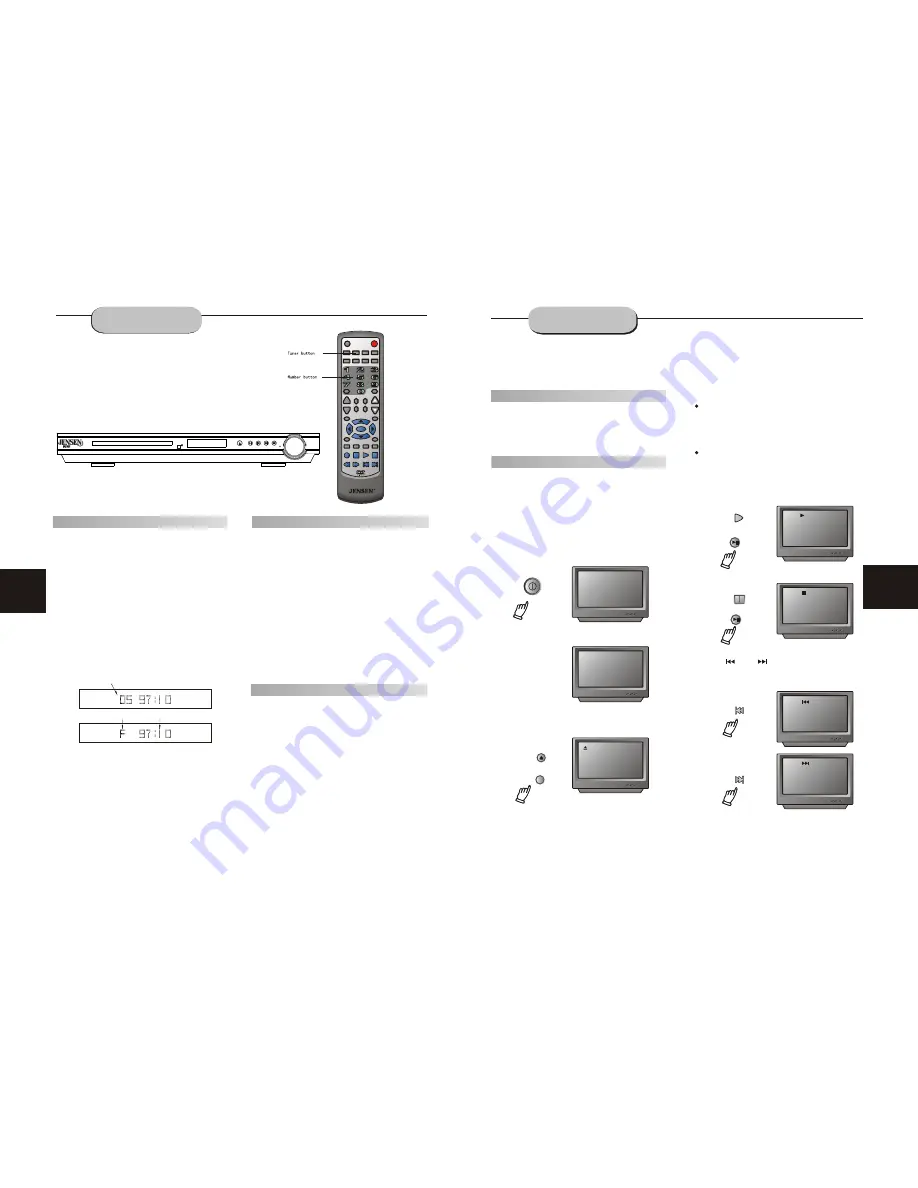
PRE/TUN
SETUP
REPEAT
VOLUME
+10
OPEN/CLOSE
UP
DOWN
MEMO
AUTO
DVD
TUNER
FM MODE
STOP
PAUSE
PLAY
A-B
PROLOGIC
STEP
ZOOM RESUME
ENTER
PROG CH LEVEL
SLOW
DISPLAY
TIME
N/P
SUBTITLE LANGUAGE ANGLE
MENU
TITLE
MUTE
AUX1
AUX2
14
Positioning
1.Press TUNER button to select desired wave
band (AM or FM).
2.Press UP or DOWN button to find a station.
The frequency will change with each press.
When a station's signal is received, it will
appear in the display.
3.To lock on to a station quickly, hold the UP
or DOWN button for two seconds. The unit
will start automatic tuning. When a station
is found, automatic tuning stops.
4.To add a station to memory, press the MEMO
button. The memory storage number will
blink for four seconds in the display. Press
MEMO again to store the station.
5. To reduce noise when an FM-stereo program
has been received, press the FM button. The
word STEREO will disappear from the display.
The program is now heard in monographic
form, reducing the noise. To resume stereo
play, press the FM button again.
1.Press the AUTO button. The word AUTO
will appear in the display and the automatic
tuning mode is activated.
2.Stations will be stored in ascending order
until 50 stations of that particular wave band
have been saved. When a station is stored, the
memory storage number, as well as the station's
frequency, will flash for four seconds in the
display.
3.When the total number of stations reaches
50, in a particular wave's (AM or FM) memory,
no further station in that wave band will be saved.
To Play Preset Stations
1.Press the TUNER button to select the
desired wave band.
2.Press the PRE/TUN button.
3.Press any of the numbere buttons to
select the desired station's memory number.
For example, to play the station at memory
#5, simply press the 5 button; for memory
#17, press the 1 button followed by the 7
button.
4.Stations in the memory function may also
be accessed by pressing the UP or DOWN
button.
15
PLAYING THE RADIO
Automatic Tuning
This unit will store up to 50 individual AM or
50 individual FM radio stations in its memory.
Memory number
Wave band
Station frequency
Z300 DVD AMPLIFIER SYSTEM
DVD/CD/CD-R/CD-RW/MP3/HDCD
VOLUME
DOWN
UP
BASIC DVD
OPERATION
If there is no disc, NO DISC shown on screen:
OPEN/CLOSE
Once the unit is connected to a television
set
and any other accessory equipment, you
are
ready to enjoy the excitement of DVD videos
or
your favorite CDs and MP3 files.
To play a DVD video disc:
Turn on the TV
,
and select the A/V mode. If
the set features an SCART connection, be sure
the SCART mode is selected from the TV menu.
Turn on amplifier, if connected. Select AC-3 or
DVD mode.
To play an audio disc:
Turn on the audio system
,
and choose the
input source connected to the DVD player.
Set
the SPDIF OUTPUT to SPDIF OFF from the
SETUP MENU display if you
d
on't have the
proper equipment for Dolby Digital surround
sound.
1. Press the POWER key on
the
front panel.
DISC LOADING appears on screen.
2. Press the OPEN/CLOSE key. The disc
tray will open.
3. Place the disc on the disc tray. Be sure
the
play side is face down on the tray.
4. Press OPEN/CLOSE
to close
the
tray.
The disc tray will close. The disc type
will
appear in the upper
eft-hand corner
of the
screen.
Once it has read the disc, the unit automati
cally
will begin playback. When playing a DVD,
the
DVD title or menu will appear. CD tracks are
played in sequence.
Note:
It is possible to damage a disc if it is not
placed correctly on the guides in the disc tray.
This may also cause the DVD player to
malfunction. Do not force or place anything
other than a 5 DVD or CD onto the disc tray.
Never move the DVD player during playback,
as this may cause damage to the disc as well as
the player. To open and close the disc tray, only
use the OPEN/CLOSE key found on bot the
remote control and on the unit's front panel.
"
6.Fast Forward/Reverse Playback
The unit features both fast forward and fast
reverse playback. Either mode will speed up
2x,4x,8x,16x,32x.
Press PAUSE key:
Press PREV key:
Press NEXT key:
FRONT PANEL
DOWN
PAUSE
UP
FRONT PANEL
REMOTE CONTROL
REMOTE CONTROL
FRONT PANEL
REMOTE CONTROL
REMOTE CONTROL
5. PREV/NEXT playback
Press
or
to
play
the
previous or next
track. To resume normal playback, press PLAY.
REMOTE CONTROL
PLAY
No Disc
LOADING
OPEN
PLAY
PAUSE
PREV
NEXT


