E6
2) AC Adaptor Operation
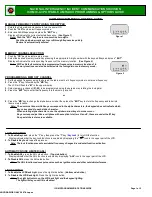
1. Plug the included AC adaptor (output: 5 V AC, 400 mA ) into the AC IN jack located on
the side of the unit.
2. Plug the AC adaptor into an 120V AC, 60Hz household outlet.
3. Press the Power On/Standby
button to turn on the unit for operation.
Note: If batteries are installed, they will automatically be disconnected when the plug is
inserted into the unit.
LOW BATTERY INDICATOR
When using battery power to operate this unit and the battery power becomes weak, the
low battery icon
will appear on LCD display. You are recommended to replace the
exhausted dry cell batteries immediately.
STANDBY MODE
Standby Mode is when the unit is first plugged into an AC power source or when batteries
are first installed (display shows “12:00”), or after all the settings have been made and the
time is showing on the display. The radio is off, no buttons are pressed and no weather
alarms are sounding.
CLOCK SETTING
IMPORTANT NOTE:
Please read over the instructions prior to setting the time. The unit will
automatically save the settings and exit the time set mode if you do not press any buttons
within 10 seconds during the time set process.
When the unit is in standby mode:
1. Press and hold the TIME SET button for 2 seconds to enter clock setting mode, hour
digits flashing.
2. Tap the TIME+ (UP)
/ TIME- (DOWN)
button repeatedly to set the hour value. Press and
hold the buttons to speed up the forward or reverse scanning of the digits.
Note
: Make sure the hour is set so that the
AM
or
PM
indicators are displayed correctly.
3. Press the TIME SET button after the hour is set, Minute digits flashing to prompt for
input.
4. Tap the TIME+ (UP)
/ TIME- (DOWN)
button repeatedly to set the minute value. Press
and hold the buttons to speed up the forward or reverse scanning of the digits.
5. Press the TIME SET button again to finish clock setting.
Note:
You will need to reset the clock if the unit is reset, or if you are using battery power
and the batteries become weak or exhausted.
LISTENING TO THE RADIO
1. Press the Power On/Standby
button to turn on the unit, LCD backlight turns on.
2. Tap the AM or FM button to select the AM or FM band, the radio mode indicator
displays.
3. To manually tune to a desired station, repeatedly tap the TUNE+ / -
button.
Summary of Contents for JEP-250
Page 1: ......
Page 5: ...1 2 3 4 5 6 8 9 10 11 7 1213 15 16 17 18 14 ...
Page 6: ...20 21 19 22 ...