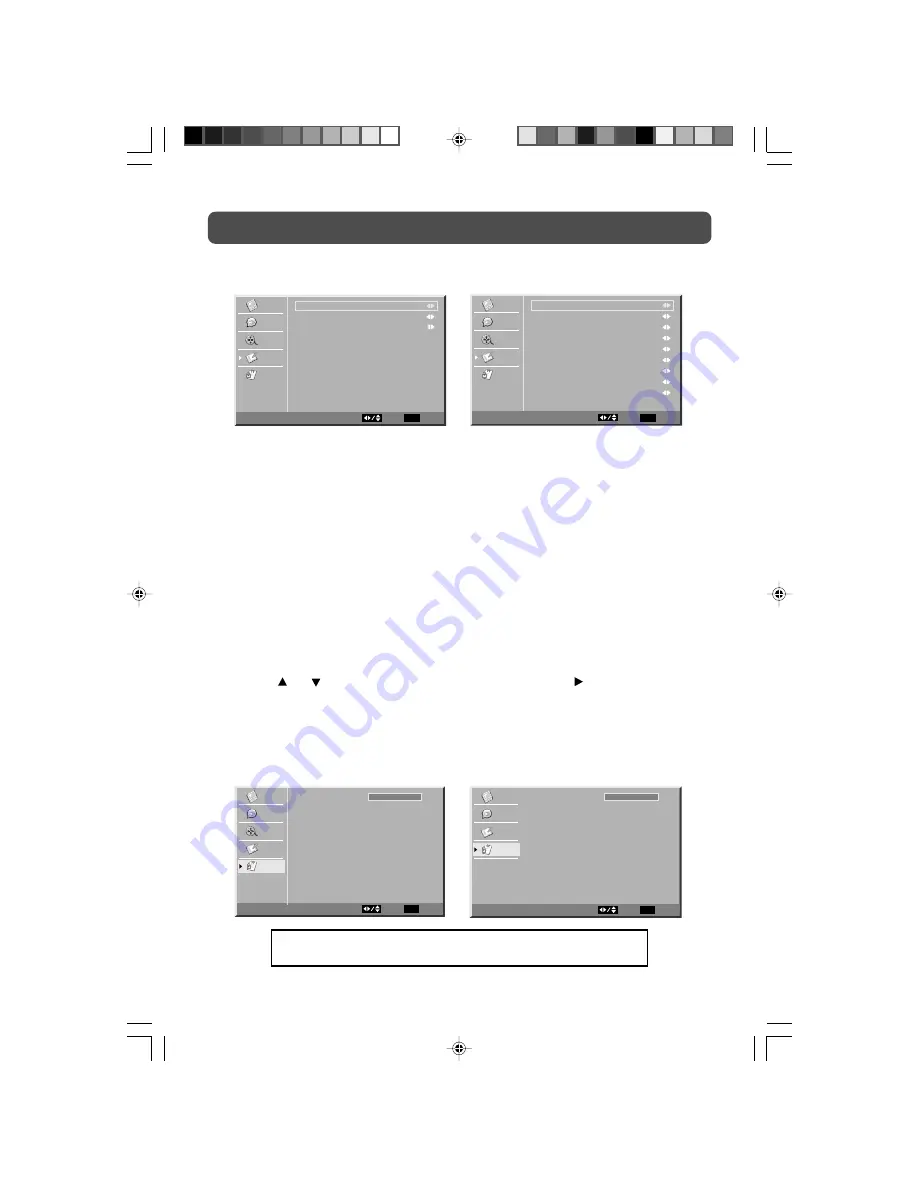
Jensen JE1908 Owner'S Manual Download Page 20

20

TV SETUP

PARENTAL MENU

Password

1. Press the 

MENU

 button.

2. Use the 

 or 

 button to select 

Parental

. Press the 

ENTER

 or   button to confirm. The

menu locked screen will be displayed.

3. Enter a 4-digit password. Once entered, the screen will enter the Parental menu. The preset

password is 0000.
You can edit the parental control level or change the password. See 

Parental Control

Settings 

on the next page.

AV / YUV / PC  MODE

TV MODE

Restore Setting:

If you reset the TV to the factory settings, all your present settings on Video & Audio will be
erased and replaced by the factory’s default settings. However, picture settings in PC mode and
Parental settings will not be erased.

Caption Setting:

Analog Closed Caption

: Select the analog closed caption or turn it off.

Digital Closed Caption

: Select the digital closed caption or turn it off.

Digital Caption Style

: Select As Broadcaster to use the default digital caption style of

the broadcaster. Select Custom to activate the caption style items
and set you prefered detailed settings.

Note:

 This function only works on ATSC programs broadcast with captions.

If you forget the password,

enter " 8888 " to unlock parental control.

Password

EXIT

Exit

Select

Parental

Video

Audio

TV

Setup

Parental

Video

Audio

Setup

Parental

Password

Parental

EXIT

Exit

Select

Video

Audio

TV

Setup

Parental

Analog Closed Caption

Digital Closed Caption

Digital Caption Style

Caption

EXIT

Return

Select

Off

Off

Video

Audio

TV

Setup

Parental

Caption Style

Font Size

Font Style

Font Color

Font Opacity

Background Color

Background Opacity

Window Color

Window Opacity

Digital Caption Style

EXIT

Return

Select

As Broadcaster

Small

Style 1

Green

Solid

Black

Translucent

White

Transparent

PLV36190CS1_IB_ENG_JEN.pmd

09/07/2007, 18:16

20

Summary of Contents for JE1908

Page 1: ...OWNER S MANUAL 19 HD FLAT PANEL LCD TV JE1908...

Page 2: ...use harmful interference to radio or television reception which can be determined by turning the equipment does cause harmful interference to radio or television reception which can be determined by t...

Page 3: ...t an electrician for replacement of the obsolete outlet 10 Protect the power cord from being walked on or pinched particularly at plug convenience receptacles and the point where they exit from the ap...

Page 4: ...HD Source 12 Connecting a PC 12 POWER SUPPLY 13 Using the Car Power Adapter 13 Using the AC Power Adapter 13 INSTALLATION 14 Mounting on the Wall 14 USING HEADPHONES 15 UNIT OPERATION 15 Turning the...

Page 5: ...emove the batteries to avoid damage caused by battery leakage corrosion Do not mix old and new batteries Do not mix ALKALINE standard CARBON ZINC or rechargeable NICKEL CADMIUM batteries WARNING Do no...

Page 6: ...ss to change disc status information displayed on the screen 7 MTS Button Press to select MONO sound STEREO sound and Secondary Audio Program SAP 8 CC Button Press to activate the Closed Captioning fe...

Page 7: ...s Adjusts the volume level and highlight selections Left Right on the menu screen 8 Buttons Selects a TV channel and highlight selections Up Down on the menu screen 9 DC IN 12V 10 AV OUT Video Output...

Page 8: ...cable box Satellite Cable or TV antenna cable to TV ANTENNA CABLETerminal cable not included CONNECTING AN AUDIO AMPLIFIER This connection allows you to use an audio amplifier and external speakers Co...

Page 9: ...t included Make sure you connect both audio and video from the same camcorder to the same input AV IN Note Please refer to the user manual for the camcorder for more information Connect to a VCR Conne...

Page 10: ...ct both audio and video from the same camcorder to the same input AV IN Note Please refer to the user manual for the camcorder for more information CONNECTIONS Connect to a VCR Connect the right red a...

Page 11: ...Note After connection please operate inTV AV mode For the reason of copyright protection the result copy may has bad picture and or sound CONNECTIONS Connect to a VCR PVR Connect the right red and le...

Page 12: ...Connect the right red and left white audio output from the source to the right red and left white input on this unit Audio cable not included Make sure you connect both audio and video from the same s...

Page 13: ...r power adapter allows the unit to be used with vehicles that have a 12V negative ground electrical system Cautions Use the provided car power adapter only Use with other car power adapters could dama...

Page 14: ...e and must be protected at all times when removing the base stand Be sure that no hard or sharp or anything that could scratch or damage the LCD display come in contact with it Do NOT place pressure o...

Page 15: ...he Initial Setup 2 Use the button to select your OSD language and press the button to the next step 3 Use the button to select your TV tuner source Antenna or Cable and press the button to the next st...

Page 16: ...ss of the picture Brighten or darken the whole picture Contrast Adjust to sharpen the picture quality The black portions of the picture become richer in darkness and the white become brighter Saturati...

Page 17: ...r of screen letters color misalignment or blurring Clock Adjusts the display clock to change width of the image AV YUV PC MODE TV MODE AUDIO MENU 1 Press the MENU button 2 Use the or button to select...

Page 18: ...or Cable cable satellite broadcasts CH 1 135 mode are available Auto Scan Search for usable stations and stores them in memory Auto Scan Add CH Search for more usable stations and add them in memory T...

Page 19: ...me Press the or button to locate the position and press the number buttons to input power on time Power Off Time Press the or button to locate the position and press the number buttons to input power...

Page 20: ...ption Select the digital closed caption or turn it off Digital Caption Style Select As Broadcaster to use the default digital caption style of the broadcaster Select Custom to activate the caption sty...

Page 21: ...all ages PG PARENTAL GUIDANCE SUGGESTED Some material may not be suitable for children PG 13 PARENTS STRONGLY CAUTIONED Some material may be inappropriate for children under 13 R RESTRICTED Under 17 r...

Page 22: ...roperly Increase the volume Make sure the antenna or audio video source device is working properly Make sure all cables are connected firmly Check for local interference Make sure there are no unshiel...

Page 23: ...23 Unit INCH 4 1 2 7 3 8 8 1 2 12 1 2 12 3 4 8 3 4 21 15 1 2 PLV36190CS1_IB_ENG_JEN pmd 09 07 2007 18 16 23...

Page 24: ...811 361991Wxxx PLV36190CS1_IB_ENG_JEN pmd 09 07 2007 18 16 24...

Reviews: