background image

22

RANGE CARE

Self-Cleaning Cycle

(on some models)

IMPORTANT: The health of some birds is extremely sensitive to 
the fumes given off during the Self-Cleaning cycle. Exposure to 
the fumes may result in death to certain birds. Always move birds 
to another closed and well-ventilated room.

Self-clean the oven before it becomes heavily soiled. Heavy soil 
results in longer cleaning and more smoke.

Keep the kitchen well-ventilated during the Self-Cleaning cycle to 
help get rid of heat, odors, and smoke.

Do not block the oven vent(s) during the Self-Cleaning cycle. Air 
must be able to move freely. Depending on your model, see 
“Oven Vent” or “Oven Vents” section.

Do not clean, rub, damage or move the oven door gasket. The 
door gasket is essential for a good seal.

Prepare Oven:

Remove the broiler pan, grid, cookware and bakeware and, 
on some models, the temperature probe from the oven.

Remove oven racks to keep them shiny and easy to slide. 
See “General Cleaning” section for more information.

Remove any foil from the oven because it may burn or melt, 
damaging the oven.

Hand clean inside door edge and the 1½" (3.8 cm) area 
around the inside oven cavity frame, being certain not to 
move or bend the gasket. This area does not get hot enough 
during self-cleaning to remove soil. Do not let water, cleaner, 
etc., enter slots on door frame. Use a damp cloth to clean this 
area.

Wipe out any loose soil to reduce smoke and avoid damage. 
At high temperatures, foods react with porcelain. Staining, 
etching, pitting or faint white spots can result. This will not 
affect cooking performance.

Prepare Cooktop:

Remove plastic items from the cooktop because they may 
melt.

How the Cycle Works

IMPORTANT: The heating and cooling of porcelain on steel in the 
oven may result in discoloring, loss of gloss, hairline cracks and 
popping sounds.

The Self-Cleaning cycle uses very high temperatures, burning soil 
to a powdery ash. 

Once the oven has completely cooled, remove ash with a damp 
cloth. To avoid breaking the glass, do not apply a cool damp 
cloth to the inner door glass before it has completely cooled.

To Self-Clean:

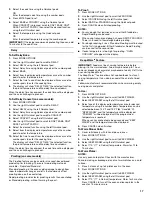
Before self-cleaning, make sure the door is closed completely. If 
the oven door is left open, “CLOSE DOOR” will appear in the 
display until the door is closed. 

1. Press CLEAN.

2. “REMOVE RACKS” will be displayed. Remove the racks.

3. Select CONTINUE using the Quickset pad. The Quickset 

pads are located on either side of the control panel display.

4. Set LIGHT soil level by entering “200” using the number pads

for 2 hours of cleaning time.

OR
Select MEDIUM for a moderately soiled oven and 3 hours of 
cleaning time.

OR
Select HEAVY for a heavily soiled oven and 4 hours of 
cleaning time.

“CLEAN,” “TIME,” “LOCKED” and the cleaning time 
countdown will be displayed while the oven is cleaning.

“OVEN COOLING” will appear in the display when the 
cleaning time has been completed and the oven is still 
locked.

The door lock will disengage approximately 1 hour after the 
cleaning time is completed. OVEN COOLING will go off in the 
display when the oven door has unlocked.

To Delay Start Self-Clean:

1. Press CLEAN.

2. “REMOVE RACKS” will be displayed. Remove the racks.

3. Select CONTINUE using the Quickset pad.

4. Set LIGHT soil level by entering “200” using the number pads

for 2 hours of cleaning time.

OR
Select MEDIUM for a moderately soiled oven and 3 hours of 
cleaning time.

OR
Select HEAVY for a heavily soiled oven and 4 hours of 
cleaning time.

The door will lock. “CLEAN,” “TIME,” “LOCKED” and the 
cleaning time countdown will be displayed.

5. After door locks, press MORE OPTIONS.

6. Select DELAY using the Quickset pad.

7. Select the number of hours you want to delay the start of the 

self-cleaning cycle.

The delay time and cleaning time will be displayed.

General Cleaning

IMPORTANT: Before cleaning, make sure all controls are off and 
the oven and cooktop are cool. Always follow label instructions 
on cleaning products. 

Soap, water and a soft cloth or sponge are suggested first unless 
otherwise noted.

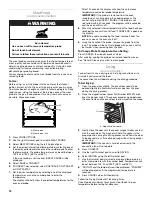
WARNING

Burn Hazard

Do not touch the oven during the Self-Cleaning cycle.

Keep children away from oven during 
Self-Cleaning cycle.

Failure to follow these instructions can result in burns.

Summary of Contents for JES9860

Page 1: ...parts accessories or service in the U S A call 1 800 JENNAIR 1 800 536 6247 or visit our website at www jennair com In Canada call 1 800 807 6777 or visit our website at www jennair ca Guided utilisa...

Page 2: ...son 33 Vitroc ramique 33 Module amovible d l ments chauffants br leurs pour table de cuisson 34 Installation du gril 34 Syst me de ventilation aspiration par le bas 35 Pr paration de conserves la mais...

Page 3: ...alert symbol and either the word DANGER or WARNING These words mean follow instructions instructions DANGER WARNING Tip Over Hazard A child or adult can tip the range and be killed Verify the anti tip...

Page 4: ...these pans or bowls during cooking may subject wiring or components underneath to damage Protective Liners Do not use aluminum foil to line surface unit drip bowls or oven bottoms except as suggested...

Page 5: ...l knob E Left rear control knob F Left front control knob A B C F E D A Exhaust fan only B Exhaust fan and grill element C Right rear element D Right front element WARNING Fire Hazard Turn off all con...

Page 6: ...he cooktop do not allow objects that could melt such as plastic or aluminum foil to touch any part of the entire cooktop To avoid damage to the cooktop do not use the cooktop as a cutting board Use co...

Page 7: ...ve grill element pull away from receptacle until it is unplugged IMPORTANT Lifting the cartridge too high while still engaged in the receptacle could damage the terminal plug To Use Before first use w...

Page 8: ...chart as a guide for cookware material characteristics ELECTRONIC OVEN CONTROLS JES9860 COOKWARE CHARACTERISTICS Aluminum Heats quickly and evenly Suitable for all types of cooking Medium or heavy th...

Page 9: ...he CANCEL button stops any function except the Clock Timer and Control Lock When you press the CANCEL button the display will show the time of day or the time remaining if the TIMER is being used Cloc...

Page 10: ...s the oven door to avoid unintended use of the oven The lock feature is preset unlocked but can be locked If the oven is currently in use the controls and oven door cannot be locked To Lock the Oven C...

Page 11: ...Bake cycle however the control will stay in the Sabbath Mode The day of the week and AM PM must be set for Sabbath Auto Mode to operate correctly To activate Sabbath mode 1 Press SETUP 2 Use right Qu...

Page 12: ...Press SETUP to exit To change the volume of the beeps 1 Press SETUP 2 Use right Quickset pad to scroll to TONES 3 Select TONES using the left Quickset pad 4 Use right Quickset pad to scroll to VOLUME...

Page 13: ...ion Cooking on some models Multiple Rack Convection Cooking Three rack on some models Use rack positions 1 3 and 5 NOTE When convect baking on 2 or 3 racks check foods at the minimum suggested time to...

Page 14: ...direct radiant heat to cook food Changing the temperature when broiling allows more precise control when cooking The lower the temperature the slower the cooking Thicker cuts and unevenly shaped piec...

Page 15: ...of heat If the oven is full extra cooking time may be needed When cooking an oven meal with several different types of foods be sure to select recipes that require similar temperatures Cookware should...

Page 16: ...onsomemodels Convect Pastry is designed to bake pastry items such as frozen pies turnovers cream puffs and puff pastry Use 1 2 or 3 racks while using this feature 1 Press CONVECT 2 Use the right Quick...

Page 17: ...n the countertop Rapid proofing provides faster proofing results than countertop or Standard proofing without harming the yeast To Proof 1 Press MORE OPTIONS 2 Use the right Quickset pad to scroll to...

Page 18: ...rs on the display NOTE To avoid overcooking the food remove it from the oven as soon as the oven shuts off 9 Using the handle of the probe remove the probe from the jack The probe will be hot Hold pro...

Page 19: ...me Beauty Newton Wash peel if desired core and slice into 3 0 mm slices 4 to 8 Pliable to crisp Dried apples store best when slightly crisp Apricots Blenheim Royal most common Tilton also good Wash ha...

Page 20: ...G Food Poisoning Hazard Do not let food sit in oven more than one hour before or after cooking Doing so can result in food poisoning or sickness FROZEN ITEMS THAW SERVE TIME HINTS Whole Pies and Cakes...

Page 21: ...ad once for A press the STU pad once for S Continue until you ve finished the word Up to 14 letters including spaces can be used 5 Press ENTER to save name SELECT MODE appears 6 Use the right Quickset...

Page 22: ...he glass do not apply a cool damp cloth to the inner door glass before it has completely cooled To Self Clean Before self cleaning make sure the door is closed completely If the oven door is left open...

Page 23: ...e rubbing until white film disappears Heavy soil dark streaks specks and discoloration Cooktop Polishing Creme or nonabrasive cleanser Rub product into soil with a damp paper towel or soft cloth Conti...

Page 24: ...Cleaning Method Warm soapy water Wipe down terminal block Do not use abrasive cleaners Dry thoroughly before inserting back into cooktop GRILL GRATES Cleaning Method Warm soapy water Wash in the sink...

Page 25: ...mum halogen bulb See the Assistance or Service section to order Ask for Part Number 74004458 To Replace Oven Light Before replacing make sure the oven is off and cool 1 Unplug range or disconnect powe...

Page 26: ...oktop Use section Is the range level Level the range See the Installation Instructions Oven door will not open Has a self cleaning cycle been started The oven door is locked during a self cleaning cyc...

Page 27: ...sult in longer cooking times Are baked items too brown on the bottom Move rack to higher position in the oven Are pie crust edges browning early Use aluminum foil to cover the edge of the crust and or...

Page 28: ...ooktop Scraper ceramic glass models Order Part Number WA906B Stainless Steel Cleaner and Polish stainless steel models Order Part Number 31462 All Purpose Appliance Cleaner Order Part Number 31682 Wok...

Page 29: ...9 Expenses for travel and transportation for product service if your major appliance is located in a remote area where service by an authorized Jenn Air servicer is not available 10 The removal and re...

Page 30: ...et le mot DANGER ou AVERTISSEMENT Ces mots signifient Risque de basculement Un enfant ou une personne adulte peut faire basculer la cuisini re ce qui peut causer un d c s V rifier que la bride antibas...

Page 31: ...onc e Les endroits pr s des l ments de surface peuvent devenir assez chauds pour causer des br lures Pendant et apr s l utilisation ne pas toucher les l ments chauffants et ne pas laisser les v tement...

Page 32: ...aines de four toucher l l ment chaud du four NE PAS TOUCHER LES L MENTS CHAUFFANTS OU LES SURFACES INT RIEURES DU FOUR Les l ments chauffants peuvent tre chauds m me s ils ont une teinte fonc e Les su...

Page 33: ...aches peuvent tre plus visibles et n cessiter davantage de nettoyage et de soin L utilisation d un nettoyant et d un grattoir pour table de cuisson est recommand e Pour plus de renseignements voir la...

Page 34: ...roles est propre et sec avant de les utiliser Les r sidus et l eau peuvent laisser des d p ts lors de la cuisson Ne pas faire cuire d aliments directement sur la table de cuisson pour viter de l endom...

Page 35: ...our carter l l ment de la prise de courant jusqu ce que la fiche de branchement soit compl tement d gag e IMPORTANT Un soul vement excessif du module amovible alors qu il est encore engag dans la pris...

Page 36: ...opri t s de l aluminium Les ustensiles de cuisson avec surface antiadh sive ne doivent pas tre utilis s sous l l ment de cuisson au gril Utiliser le tableau suivant comme guide pour les caract ristiqu...

Page 37: ...quement entr e Si plus de 30 secondes s coulent entre les tapes de la programmation la fonction est annul e et l afficheur retourne l affichage pr c dent Annulation Le bouton CANCEL annulation arr te...

Page 38: ...re les tapes suivantes 1 Appuyer une fois sur la touche TIMER d sir e La minuterie s lectionn e appara t au premier plan 2 Appuyer une deuxi me fois sur TIMER pour acc der au mode de modification afin...

Page 39: ...age rapide de gauche 4 S lectionner OFF l aide de la touche de r glage rapide 5 Appuyer sur SETUP r glage pour sortir du menu de r glage Pour r activer la conversion automatique pour la convection 1 A...

Page 40: ...a touche de r glage rapide de droite pour faire d filer les options jusqu REGLER TEMP 3 S lectionner REGLER TEMP l aide de la touche de r glage rapide de gauche 4 Entrer la modification de temp rature...

Page 41: ...onner HIGH pour le volume le plus lev OU MEDIUM pour le volume moyen OU LOW pour le volume le plus faible 7 S lectionner le volume souhait l aide de la touche de r glage rapide de gauche 8 Appuyer sur...

Page 42: ...er les grilles de four Placer la grille sur le support de grille dans le four Soulever l g rement le rebord avant et repousser la grille vers l arri re jusqu sa position de blocage Abaisser l avant et...

Page 43: ...n au four placer les grilles tel qu indiqu la section Positionnement des grilles et des ustensiles de cuisson au four Pour la cuisson au four laisser la cuisini re pr chauffer avant de placer des alim...

Page 44: ...aire de tourner les coupes tr s minces de poisson de volaille ou de viande Apr s la cuisson au gril sortir la l chefrite du four en m me temps que l aliment Ce qui reste au fond de la l chefrite cuira...

Page 45: ...sini re pr chauffer avant de placer des aliments dans le four Lors du pr chauffage pour la cuisson au four par convection les l ments du gril ainsi que l l ment de cuisson au four chauffent la cavit d...

Page 46: ...uisson de p tisseries par convection est con ue pour faire cuire des articles de p tisserie tels que des tartes surgel es des chaussons des choux la cr me et la p te feuillet e Utiliser 1 2 ou 3 grill...

Page 47: ...6 S lectionner CONVECT l aide de la touche de r glage rapide de gauche 7 Appuyer sur la touche de r glage rapide de droite pour faire d filer les options jusqu CUISS CONVECT ROTISS CONVECT ou PATISS C...

Page 48: ...tes REMARQUES Utiliser uniquement des assiettes allant au four V rifier aupr s du fabricant Pour viter les craquelures ou bris ne pas placer de plats chauds sur une surface froide 1 Placer 2 piles de...

Page 49: ...ent du four Voir la section Nettoyage g n ral pour le nettoyage de la sonde S chage surcertainsmod les Pour des r sultats optimaux utiliser une grille de s chage La grille de s chage permet l air de c...

Page 50: ...se d colorer si des r sidus alimentaires acides ou sucr s ne sont pas essuy s avant un programme chaleur lev e ou d autonettoyage On peut s cher plus d une grille d aliments la fois Cependant il faut...

Page 51: ...rottes Danvers demi longues Imperator Chantenay c ur rouge Ne pas utiliser des carottes fibre ligneuse ou c ur nerveux Laver couper les extr mit s et peler si d sir Couper en travers ou en diagonale e...

Page 52: ...D CONGELER ET SERVIR CONSEILS Tartes et g teaux entiers Tartes Meringue au citron cr me pacanes chocolat patates douces tarte soyeuse G teaux Vanille chocolat noix de coco trois tages quatre quarts g...

Page 53: ...lage rapide de gauche 4 Entrer le nom l aide des touches Apr s chaque lettre d sir e attendre 3 secondes jusqu ce qu un trait de soulignement apparaisse dans l espace suivant avant de passer la lettre...

Page 54: ...on au four et sur certains mod les la sonde thermom trique Sortir les grilles du four pour les garder brillantes et pour qu elles glissent facilement Voir la section Nettoyage g n ral pour plus de ren...

Page 55: ...porte verrouill e appuyer sur MORE OPTIONS plus d options 6 S lectionner DEMARR DIFFERE l aide de la touche de r glage rapide 7 S lectionner le nombre d heures dont on souhaite diff rer la mise en mar...

Page 56: ...isson Nettoyer d s que la table de cuisson a refroidi Frotter la cr me sur la surface avec un essuie tout ou un linge doux humide Continuer de frotter jusqu ce que la pellicule blanche disparaisse Les...

Page 57: ...S cher parfaitement avant d ins rer la partie arri re dans la table de cuisson GRILLES DU GRIL M thode de nettoyage Eau ti de savonneuse Laver dans l vier ou au lave vaisselle Ne pas tremper dans l e...

Page 58: ...e graisseuse M thode de nettoyage D tergent ou nettoyant doux pour usage domestique et essuie tout chiffon ou ponge humide Appliquer le d tergent ou nettoyant sur l essuie tout le chiffon ou l ponge h...

Page 59: ...ne fonctionne pas Le bouton de commande est il r gl correctement Enfoncer le bouton avant de le tourner un r glage Chaleur excessive autour des ustensiles de cuisson sur la table de cuisson La dimensi...

Page 60: ...rifier la recette dans un livre de recettes fiable Le calibrage de la temp rature du four est il r gl correctement Voir Adjustement de la temp rature dans la section R glage Le four a t il t pr chauf...

Page 61: ...vendu l appareil ou t l phonez Jenn Air au 1 800 JENNAIR 1 800 536 6247 pour localiser une compagnie de service autoris e Lors d un appel veuillez conna tre la date d achat et les num ros de mod le e...

Page 62: ...l ments radiants JEA8120ADB Noir JEA8120ADW Blanc L chefrite et grille de r tissage de qualit sup rieure Commander la pi ce W10123240 www jennair com broilerpan AuCanada Si le probl me n est pas attr...

Page 63: ...es 30 jours suivant la date d achat 6 Toute perte d aliments due une d faillance du r frig rateur ou du cong lateur 7 Les co ts associ s au transport du gros appareil m nager du domicile pour r parati...

Page 64: ...roduit Nom du marchand ______________________________________________ Adresse ________________________________________________________ Num ro de t l phone ___________________________________________ N...

Reviews: