background image

19

Cook Time

To Set a Timed Cook:

1. Press BAKE or BROIL, or press AUTO CONVECT MODES or 

MANUAL CONVECT MODES until the desired convection 
mode appears on the display. 

2. Press the number keypads to enter a temperature other than 

the one displayed.

3. Press COOK TIME. The Cook Time oven indicator light will 

light up.

4. Press the number keypads to enter the length of time to cook.

5. Press START. The display will count down the time. When the 

time ends, the oven will shut off automatically. 

6. Press CANCEL for the desired oven to clear the display.

To Set a Delayed Timed Cook:

1. Press BAKE or BROIL, or press AUTO CONVECT MODES or 

MANUAL CONVECT MODES until the desired convection 
mode appears on the display. 

2. Press the number keypads to enter a temperature other than 

the one displayed.

3. Press COOK TIME. The Cook Time oven indicator light will 

light up.

4. Press number keypads to enter the length of time to cook.

5. Press DELAY START. 

6. Press number keypads to enter the number of hours and/or 

minutes you want to delay the start time.

7. Press START.

When the start time is reached, the oven will automatically turn on. 
The temperature and/or time settings can be changed anytime 
after pressing Start by repeating steps 2 through 7. When the set 
cook time ends, the oven will shut off automatically.

8. Press CANCEL for the desired oven to clear the display.

Oven Light

The oven light is a standard 40-watt appliance bulb. Before 
replacing, make sure the oven and cooktop are cool and the 
control knobs are in the Off position.

To Replace:

1. Unplug range or disconnect power.

2. Turn the glass bulb cover in the back of the oven 

counterclockwise to remove.

3. Turn bulb counterclockwise to remove from socket.

4. Replace bulb by turning clockwise.

5. Replace bulb cover by turning clockwise.

6. Plug in range or reconnect power.

WARNING

Food Poisoning Hazard

Do not let food sit in oven more than one hour before 
or after cooking.

Doing so can result in food poisoning or sickness.

Summary of Contents for JDS1750ES

Page 1: ...ubicados en el marco del horno detrás del lado derecho superior de la puerta del horno User Guide Dual Fuel Downdraft Range Table of Contents RANGE SAFETY 2 The Anti Tip Bracket 3 KEY USAGE TIPS 5 AquaLift Self Cleaning Technology 5 Surface Temperatures 5 Preheating 5 Surface Burners 5 FEATURE GUIDE 6 Electronic Oven Controls 9 COOKTOP 11 Surface Burners 11 Surface Grates 12 Burner Size 12 Griddle...

Page 2: ...y damage personal injury or death Do not store or use gasoline or other flammable vapors and liquids in the vicinity of this or any other appliance WHAT TO DO IF YOU SMELL GAS Do not try to light any appliance Do not touch any electrical switch Do not use any phone in your building Immediately call your gas supplier from a neighbor s phone Follow the gas supplier s instructions If you cannot reach...

Page 3: ...gaged per installation instructions Re engage anti tip bracket if range is moved Do not operate range without anti tip bracket installed and engaged Failure to follow these instructions can result in death or serious burns to children and adults To verify the anti tip bracket is installed and engaged Slide range forward Look for the anti tip bracket securely attached to floor or wall Slide range b...

Page 4: ...l Handles Should Be Turned Inward and Not Extend Over Adjacent Surface Units To reduce the risk of burns ignition of flammable materials and spillage due to unintentional contact with the utensil the handle of a utensil should be positioned so that it is turned inward and does not extend over adjacent surface units Clean Cooktop With Caution If a wet sponge or cloth is used to wipe spills on a hot...

Page 5: ...urn near the oven vent Preheating When beginning a Bake Convect Bake or Convect Roast cycle the oven will begin preheating after Start is pressed The oven will take approximately 12 to 15 minutes to reach 350 F 177 C with all of the oven racks provided with your oven inside the oven cavity Higher temperatures will take longer to preheat The preheat cycle rapidly increases the oven temperature The ...

Page 6: ...p to 9 hours and 59 minutes 1 Press TIMER SET OFF 2 Press the number keypads to set the length of time in hr min min Leading zeros do not have to be entered For example for 2 minutes enter 2 3 Press TIMER SET OFF to begin the countdown If enabled end of cycle tones will sound at end of countdown 4 Press TIMER SET OFF again to cancel the Timer and return to the time of day Do not press the Cancel k...

Page 7: ...5 Insert food when prompted 6 To change the temperature repeat steps 3 and 4 7 Press CANCEL when finished AUTO CONVECT MODES Convection cooking 1 Press AUTO CONVECT MODES until the desired convection mode appears in the display 2 Press START 3 Press the number keypads to set the desired temperature 4 Press START 5 Press the number keypads to set the desired cook time 6 Press START 7 Insert food wh...

Page 8: ...Off will not change the Downdraft Fan speed START hold 3 sec to lock Oven control lockout 1 Check that the oven is off 2 Press and hold START hold 3 sec to lock for 3 seconds 3 A tone will sound and Control Locked will scroll and then Locked will be displayed 4 Repeat to unlock No keypads will function with the controls locked The cooktop functions are not affected by the oven control lockout OPTI...

Page 9: ...ess START or CANCEL to exit and display the time of day Fahrenheit and Celsius The temperature is preset to Fahrenheit but can be changed to Celsius 1 Press OPTIONS CLOCK until TEMP UNIT is displayed 2 The current setting will be displayed 3 Press the 1 keypad to adjust the setting 4 Press START or CANCEL to exit and display the time of day Audible Tones Disable Turns off all tones including the e...

Page 10: ...ess the 1 keypad to adjust the setting 4 Press START or CANCEL to exit and display the time of day Languages Scrolling Display Text Language options are English Spanish and French 1 Press OPTIONS CLOCK until LANGUAGE is displayed 2 The current setting will be displayed 3 Press the 1 or 2 keypad to select the desired language 4 Press START or CANCEL to exit and display the time of day Oven Temperat...

Page 11: ...w freely throughout the gas tube opening for the burner to light properly Keep this area free of soil and do not allow spills food cleaning agents or any other material to enter the gas tube opening Keep spillovers out of the gas tube opening by always using a burner cap Burner Ports Check burner flames occasionally for proper size and shape as shown in the previous illustration A good flame is bl...

Page 12: ...proper positioning align bumpers on grate bottom with the indentations in the cooktop The surface grates interlock using the hooks on the middle grate and the indents on the end grates To remove the grates remove the end grates first and then remove the middle grate To replace the grates replace the middle grate first and then place the end grates on either side Although the burner grates are dura...

Page 13: ...r optimal performance operate the downdraft ventilation system with the filter properly installed To avoid the buildup of grease the filter should be cleaned often For more information on proper filter placement and cleaning see Downdraft Ventilation System in the General Cleaning section Cookware IMPORTANT Do not leave empty cookware on a hot surface cooking area element or surface burner Ideal c...

Page 14: ...types of cooking Medium or heavy thickness is best for most cooking tasks May leave aluminum residues which may be diminished if cleaned immediately after cooking Cast iron Heats slowly and evenly Good for browning and frying Maintains heat for slow cooking Rough edges or burrs may scratch the cooktop Ceramic or Ceramic glass Follow manufacturer s instructions Heats slowly but unevenly Ideal resul...

Page 15: ... a rare interior use a flat rack in rack position 7 Side 1 should cook for approximately 2 to 3 minutes Side 2 should cook for approximately 4 to 5 minutes Expect a moderate degree of smoke when broiling If your model has a Max Capacity Oven Rack the recessed ends must be placed in the rack position above the desired position of the food See the following illustration IMPORTANT These rack position...

Page 16: ...rack assembly so the ladder hook engages with the ladder on both sides of the oven To Remove Roll Out Rack 1 Push the sliding rack in completely so that it is in the closed and engaged position 2 Reach through the rack to hold the sliding rack and the front crossbar Lift the front of the rack assembly to disengage the ladder hook from the ladders at the rear of the oven and then pull the rack asse...

Page 17: ...re The actual oven temperature will go above your set temperature to offset the heat lost when your oven door is opened to insert food This ensures that when you place your food in the oven the oven will begin at the proper temperature Insert your food when the preheat tone sounds Do not open the door during preheat before the tone sounds Oven Temperature While in use the oven elements will cycle ...

Page 18: ...ough and for the first and second rise To Proof Before first proofing place the dough in a lightly greased bowl and cover loosely with wax paper coated with shortening Place on rack guide 2 and close the oven door NOTE If the temperature of the oven is greater than 120 F 49 C Oven Cooling will be displayed until the temperature is less than 120 F 49 C 1 Press PROOF 2 Press START Let the dough rise...

Page 19: ...ter the length of time to cook 5 Press DELAY START 6 Press number keypads to enter the number of hours and or minutes you want to delay the start time 7 Press START When the start time is reached the oven will automatically turn on The temperature and or time settings can be changed anytime after pressing Start by repeating steps 2 through 7 When the set cook time ends the oven will shut off autom...

Page 20: ...n cycles may be run to help remove the stubborn soils IMPORTANT Do not use oven cleaners The use of chemicals including commercial oven cleaners or metal scouring pads may cause permanent damage to the porcelain surface of the oven interior NOTES The range should be level to ensure that the entire surface of the bottom of the oven cavity is covered by water at the beginning of the Clean cycle For ...

Page 21: ...rates and caps are cool Dishwasher grates only not caps Use the most aggressive cycle Cooked on soils should be soaked or scrubbed before going into a dishwasher Although the burner grates are durable they may lose their shine and or discolor when washed in a dishwasher Gas Grate and Drip Pan Cleaner Part Number 31617 not included See the Accessories section for more information SURFACE BURNERS Fo...

Page 22: ...ing the filter Remove vent grate and then lift the filter out of the vent chamber Clean the filter in the sink with warm water and detergent or in the dishwasher Replace the filter The filter should always be placed at an angle As you face the front of the range the top of the filter should rest against the right side of the vent opening The bottom of the filter should rest against the left side o...

Page 23: ...cian or see Warranty for contact information Excessive heat around cookware on cooktop Cookware and flame are not matched The cookware should be centered above the burner with the bottom sitting level on the grate The flame should be adjusted so that it does not extend up the sides of the pan Cooktop cooking results not what expected Improper cookware Ideal cookware should have a flat bottom strai...

Page 24: ...Positioning Racks and Bakeware section Batter distributed unevenly in pan Check that batter is level in the pan Darker browning of food caused by dull or dark bakeware Lower oven temperature 25 F 15 C or move rack to a higher position in the oven Lighter browning of food caused by shiny or light colored bakeware Move rack to a lower position in the oven Incorrect length of cooking time was used Ad...

Page 25: ...der Part Number W10423113RP Cooktop Scraper ceramic glass models Order Part Number WA906B Granite Cleaner and Polish Order Part Number W10275756 Gas Grate and Drip Pan Cleaner Order Part Number 31617A Gourmet Griddle Order Part Number W10432539 Heavy Duty Flat Oven Rack Order Part Number W10554005 Split Oven Rack Order Part Number 4396927 HD Max Capacity Oven Rack Order Part Number W10554006 Slidi...

Page 26: ...tc 5 Defects or damage caused by the use of non genuine Jenn Air parts or accessories 6 Conversion of products from natural gas or L P gas 7 Damage from accident misuse abuse fire floods acts of God or use with products not approved by Jenn Air 8 Repairs to parts or systems to correct product damage or defects caused by unauthorized service alteration or modification of the appliance 9 Cosmetic da...

Page 27: ...27 Notes ...
Page 28: ...AIRES D UTILISATION 33 Technologie d autonettoyage AquaLift 33 Températures en surface 33 Préchauffage 33 Brûleurs de surface 33 GUIDE DES CARACTÉRISTIQUES 34 Commandes électroniques du four 37 TABLE DE CUISSON 39 Brûleurs de surface 39 Grilles de surface 40 Taille du brûleur 41 Plaque à frire 41 Système de ventilation à aspiration par le bas 42 Ustensiles de cuisson 42 Mise en conserve à la maiso...

Page 29: ...VERTISSEMENT Si les renseignements dans ce manuel ne sont pas exactement observés un incendie ou une explosion peut survenir causant des dommages au produit des blessures ou un décès Ne pas entreposer ni utiliser de l essence ou d autres vapeurs ou liquides inflammables à proximité de cet appareil ou de tout autre appareil électroménager QUE FAIRE DANS LE CAS D UNE ODEUR DE GAZ Ne pas tenter d all...

Page 30: ...faire basculer la cuisinière ce qui peut causer un décès Vérifier que la bride antibasculement est bien installée et engagée conformément aux instructions d installation Réengager la bride antibasculement si la cuisinière a été déplacée Ne pas faire fonctionner la cuisinière si la bride antibasculement n est pas installée et engagée Le non respect de ces instructions peut causer un décès ou des br...

Page 31: ...ce Ne pas utiliser d eau pour éteindre un feu de graisse Étouffer le feu ou les flammes ou utiliser un extincteur à produits chimiques secs ou un extincteur à mousse N utiliser que des mitaines de four sèches Des mitaines de four mouillées ou humides sur des surfaces chaudes peuvent provoquer des brûlures provenant de la vapeur Ne pas laisser les mitaines de four toucher les éléments chauffants Ne...

Page 32: ...lations électriques Veiller à ce que l installation et la mise à la terre de la cuisinière soient correctement réalisées par un électricien qualifié Déconnecter la source de courant électrique avant d intervenir sur l appareil Des blessures peuvent résulter d un mauvais usage des portes ou tiroirs de l appareil par exemple marcher s appuyer ou s asseoir sur les portes ou tiroirs Entretien Mainteni...

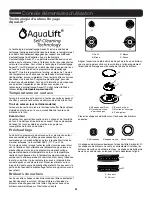
Page 33: ...cuisson au four de cuisson au four avec convection ou de rôtissage avec convection le four commence par un préchauffage une fois la touche Start mise en marche enfoncée Le four atteint 350 F 177 C en 12 à 15 minutes environ lorsque toutes les grilles fournies avec le four sont à l intérieur Pour atteindre une température plus élevée le préchauffage est plus long Le programme de préchauffage augmen...

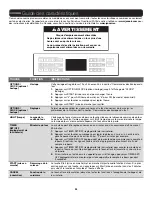
Page 34: ...terie Minuterie du four La minuterie peut être réglée en heures ou en minutes jusqu à concurrence de 9 heures et 59 minutes 1 Appuyer sur TIMER SET OFF réglage arrêt de la minuterie 2 Appuyer sur les touches numériques pour régler la durée en hr min min Les zéros de gauche peuvent ne pas être entrés Entrer 2 pour 2 minutes par exemple 3 Appuyer sur TIMER SET OFF réglage arrêt de la minuterie pour ...

Page 35: ...de de convection souhaité 2 Appuyer sur START mise en marche 3 Utiliser les touches numériques pour régler la température souhaitée 4 Appuyer sur START mise en marche 5 Insérer les aliments lorsque demandé 6 Pour modifier la température répéter les étapes 3 et 4 7 Appuyer sur CANCEL annulation après avoir terminé AUTO CONVECT MODES modes automatiques de cuisson au four par convection Cuisson par c...

Page 36: ...on par le bas est déjà allumé appuyer sur Downdraft Fan Auto Off ne changera pas la vitesse du ventilateur à aspiration par le bas START hold 3 sec to lock mise en marche appuyerpendant 3 secondes pour verrouiller Verrouillage des commandes du four 1 Vérifier que le four est éteint 2 Appuyer pendant 3 secondes sur la touche START hold 3 sec to lock mise en marche appuyer pendant 3 sec pour verroui...

Page 37: ...ter le mode Settings réglages Horloge Cette horloge est réglable sur 12 ou 24 heures 1 Appuyer sur OPTIONS CLOCK options horloge jusqu à afficher CLOCK horloge 2 Appuyer sur START mise en marche pour changer l heure 3 Appuyer sur 3 pour AM heure du matin ou 6 pour PM heure de l après midi 4 Appuyer sur les touches numériques pour régler l heure 5 Appuyer sur START mise en marche ou CANCEL annulati...

Page 38: ...atiquement 12 heures après avoir activé une fonction de cuisson ou de nettoyage Cette fonction ne perturbe aucune fonction de cuisson minutée ou différée 1 Appuyer sur OPTIONS CLOCK options horloge jusqu à afficher 12Hr AUTO_OFF arrêt automatique après 12 heures 2 Le réglage en cours s affiche 3 Appuyer sur la touche 1 pour changer le réglage 4 Appuyer sur START mise en marche ou CANCEL annulation...

Page 39: ...l électrode d allumage avec l encoche de la base du brûleur Ouverture du tube d arrivée de gaz Pour que la flamme s allume convenablement il faut que le gaz puisse passer librement à travers l orifice Garder cette zone propre et ne pas laisser les produits renversés les aliments les agents de nettoyage ou tout autre produit pénétrer dans l ouverture du tube d arrivée de gaz Toujours utiliser un ch...

Page 40: ...les doivent être correctement positionnées avant la cuisson Les grilles doivent être en affleurement et de niveau pour être en bonne position Une mauvaise installation des grilles peut entraîner l écaillement ou l éraflement de la table de cuisson Afin de les positionner correctement aligner les butoirs souples au dessous de la grille avec les indentations sur la table de cuisson Les grilles de su...

Page 41: ...e et une cuisson parfaits placer le brûleur avant au réglage de chaleur le plus faible et le brûleur arrière au niveau de chaleur moyen élevé REMARQUE La plaque à frire peut également être utilisée sur la grille de gauche Pour une performance optimale placer le brûleur arrière au niveau de chaleur moyen élevé ou moyen et le brûleur avant au réglage de chaleur le plus faible Nettoyage de la plaque ...

Page 42: ...tiquement et le matériau doit être d épaisseur moyenne à forte Les finis rugueux peuvent égratigner la table de cuisson L aluminium et le cuivre peuvent être utilisés comme fond ou base d un ustensile de cuisson Toutefois lorsqu ils sont utilisés comme base ils peuvent laisser des marques permanentes sur les surfaces Le matériau d un ustensile a une influence sur la rapidité et l uniformité de la ...

Page 43: ...aisseur moyenne ou forte convient le mieux pour la plupart des tâches de cuisson Peut laisser des résidus d aluminium Pour en réduire la quantité les nettoyer immédiatement après la cuisson Fonte Chauffe lentement et uniformément Convient pour le brunissage et la friture Maintient la chaleur pour une cuisson lente Des rebords anguleux ou mal poncés peuvent érafler la table de cuisson Céramique ou ...

Page 44: ...ille plate en position 7 Cuire le 1er côté pendant 2 à 3 minutes Cuire le 2e côté pendant 4 à 5 minutes Une légère fumée peut se dégager durant la cuisson au gril Si votre modèle possède une grille de four à capacité maximale les bords surélevés doivent être placés dans la position immédiatement supérieure à la position souhaitée pour les aliments Voir l illustration ci dessous IMPORTANT Ces posit...

Page 45: ...échelle s engage dans l échelle de chaque côté du four Dépose de la grille déployante 1 Enfoncer complètement la grille coulissante jusqu à ce qu elle soit rétractée et emboîtée 2 Passer la main sur la grille pour agripper la grille coulissante et la barre transversale avant Soulever l avant de la grille pour dégager le crochet de l échelle au fond du four et tirer la grille vers l avant 3 Avec le...

Page 46: ...traditionnelle ou sur CANCEL annulation pour éteindre la cuisinière Cuisson au four et rôtissage Préchauffage Au début d un programme de cuisson au four de cuisson au four avec convection ou de rôtissage avec convection le four commence par un préchauffage une fois la touche Start mise en marche enfoncée Le four atteint 350 F 177 C en 12 à 15 minutes environ lorsque toutes les grilles fournies ave...

Page 47: ... règle le four Utiliser le tableau suivant comme guide Lorsque l on utilise les modes automatiques de cuisson au four par convection le four ajuste automatiquement la durée et la température pour le mode sélectionné Modes de cuisson par convection Modes manuels de cuisson au four par convection Cuisson au four par convection cuisson au four sur plusieurs grilles de biscuits pains plats en sauce ta...

Page 48: ...nte le compte à rebours de la durée Lorsque la durée est écoulée le four s éteint automatiquement 6 Appuyer sur CANCEL annulation pour le four désiré pour effacer l afficheur Réglage d une cuisson minutée différée 1 Appuyer sur BAKE cuisson au four ou BROIL cuisson au gril ou appuyer sur AUTO CONVECT MODES modes automatiques de cuisson au four par convection ou sur MANUAL CONVECT MODES modes de co...

Page 49: ...me de nettoyage La plupart de l eau initiale contenue dans 2 tasses 16 oz 500 mL restera dans le four après la fin du programme de nettoyage S il reste encore des saletés laisser une petite quantité d eau au fond du four pour aider le nettoyage 7 S il reste des saletés les enlever avec une éponge à gratter non abrasive ou une spatule en plastique Des programmes de nettoyage supplémentaires peuvent...

Page 50: ...brasifs de nettoyants avec agent de blanchiment de produits antirouille d ammoniaque ou d hydroxyde de sodium soude car la surface peinte pourrait se tacher GRILLES ET CHAPEAUX ÉMAILLÉS Les renversements d aliments contenant des produits acides tels que vinaigre et tomates doivent être nettoyés dès que la table de cuisson les grilles et les chapeaux ont refroidi Ces salissures peuvent endommager l...

Page 51: ...e nettoyage Programme de nettoyage Voir la section Programme de nettoyage SYSTÈME DE VENTILATION AVEC ASPIRATION PAR LE BAS Grille de ventilation Méthode de nettoyage Soulever les grilles de brûleurs Soulever la grille de ventilation de la table de cuisson pour la retirer Essuyer ou laver dans un évier Ustensile de récurage en plastique non abrasif et nettoyant légèrement abrasif Lave vaisselle Ut...

Page 52: ...urs obstrués Voir la section Brûleurs de surface scellés Les flammes des brûleurs de surface ne sont pas uniformes sont de teinte jaune et ou sont bruyantes Orifices de brûleurs obstrués Voir la section Brûleurs de surface scellés Chapeaux de brûleurs mal positionnés Voir la section Brûleurs de surface scellés Conversion inappropriée de la cuisinière Si l on utilise du gaz propane contacter un tec...

Page 53: ... La cuisson au four ne produit pas les résultats prévus La cuisinière n est pas d aplomb Régler l aplomb de la cuisinière Voir les Instructions d installation Le réglage de la température était incorrect Revérifier la recette dans un livre de cuisine fiable La température du four doit être ajustée Voir Commande de température du four dans la section Commandes électroniques du four Le four n a pas ...

Page 54: ...amique Commander la pièce numéro WA906B Nettoyant et poli pour granite Commander la pièce numéro W10275756 Nettoyant pour plateau d égouttement et grille de cuisinière à gaz Commander la pièce numéro 31617A Plaque à frire Gourmet Commander la pièce numéro W10432539 Grille de four plate service intense Commander la pièce numéro W10554005 Grille de four en deux pièces Commander la pièce numéro 43969...

Page 55: ...n de pièces ou accessoires Jenn Air non authentiques 6 Conversion de votre produit du gaz naturel ou du gaz de pétrole liquéfié 7 Dommages causés par accident mésusage abus incendie inondations catastrophe naturelle ou l utilisation de produits non approuvés par Jenn Air 8 Réparations aux pièces ou systèmes dans le but de rectifier un dommage ou des défauts résultant d une réparation altération ou...

Page 56: ...W10750373A SP PN W10750396 2014 Used under license in Canada All rights reserved Utilisé sous licence au Canada Tous droits réservés 11 14 Printed in U S A Imprimé aux É U ...

Reviews: