5
S
WITCH SETTING (스위치 설정 방법)
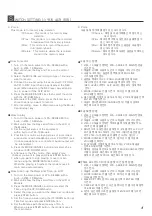
4. Voice
녹음 및 재생/삭제를 할수 있는 모드 입니다.
①Choose : 재생 및 녹음 삭제를 선택 할수 있는
모드 입니다.
②Play : 메로리 뱅크에 녹음된 방송을 출력 할수
있는 모드 입니다.
③Rec : 메모리 뱅크에 원하는 음원을 녹음 할수
있는 모드 입니다.
④Delete : 메모리 뱅크에 녹음된 음원을 삭제하는
모드 입니다.
녹음 하는 방법
1. JTM-10 모듈이 장착된 JPA-SERIES 의 MAIN 전원을
인가 한다.
2. 모듈의 LCD에 요일과 시간이 나타날때 까지 기다린다.
3. 녹음 하고자 하는 음원의 종류에 맞게 MIC/LINE
스위치를 선택한다.
4. 음원을 액세서리(2.5' PONH JACK)를 이용해 REC
INPUT에 인가후 REC LEVEL을 적당히 조정 한다.
(REC LEVEL 조정시 CLIP LED가 점등 되지 않게 주의
한다.)
5. MODE/CANCEL 키를 누른 후 업/다운 키를 이용해
VOICE를 선택한다.
6. REC모드를 선택후 녹음 하고자 하는 VOICE 채널을 선택
ENTER 키를 누른다.
7. 녹음이 끝나면 MODE/CANCEL(정지) 키를 이용하여
메인 메뉴로 이동한다.
◆
녹음 재생 방법
1. JTM-10 모듈이 장착된 JPA-SERIES 의 MAIN 전원을
인가 한다.
2. 모듈의 LCD에 요일과 시간이 나타날때 까지 기다린다.
3. JTM-10 모듈이 장착된 장비의 출력 상태를 셋팅 한다.
(지역 선택 및 볼륨 등)
4. 헤드폰으로 녹음된 방송을 재생 하고자 할경우 H.P OUT
PUT 을 통해 모니터링이 가능 하다.(헤드폰을 연결 할
경우 JTM-10의 최동 음원 출력은 나가지 않는다.)
5. MODE/CANCEL 키를 누른 후 업/다운 키를 이용해
VOICE를 선택한다.
6. PLAY모드를 선택후 재생 하고자 하는 VOICE 채널을
선택 ENTER 키를 누른다.
7. 재생중 방송을 중단하고자 할경우 MODE/CANCEL(정지)
키를 이용하여 메인 메뉴로 이동한다.
재생이 끝 나면 자동으로 메인 메뉴로 이동 한다.
◆
상태표 표시창(LCD)의 요일 및 시간 설정 방법
1. JTM-10 모듈이 장착된 JPA-SERIES 의 MAIN 전원을
인가 한다.
2. 모듈의 LCD에 요일과 시간이 나타날때 까지 기다린다.
3. MODE/CANCEL 키를 누른 후 업/다운 키를 이용해
TIME을 선택 한다.
4. WEEK SET 에서 원하는 요일을 선택후 ENTER 키를
누른다.
5. TIME SET 에서 원하는 시간을 업/다운 키를 이용해 설정
후 ENTER 키를 누른다.
6. 5번과 같은 방법으로 분을 설정후 ENTER 키를 누르면
메인 메뉴로 이동한다.
◆
How to play
1. Turn On the main power of JPA-SERIES With a
built-in JTM-10 Module.
2. Wait until show the Days and Time on the LCD of
the Module.
3. Set the output status of the equipment
with a built-in JTM-10 Module.
4. Possible to monitor a playing status of a recorded
announcment with Headphone via H.P OUTPUT jack.
(In case Headphone is connected, Audio output will
be interrupted.)
5. Press the MODE/CANCEL button and select Voice
mode with UP/DOWN button.
6. After select the Play mode, then select Voice
channel you want to play and press ENTER button.
7. when you want to stop playing, move to main
menu using the MODE/CANCEL button.
When the playing is finished, the mode moves to
main menu automatically.
◆
How to set-up the Days and Time on LCD
1. Turn on the main power of JPA-SERIES with a
built-in JTM-10 Module.
2. Wait until show the Days and Time on the LCD of
Module.
3. Press the MODE/CANCEL button and select the
Time using the UP/DOWN button.
4. Select the days you want at the Week Set mode and
press ENTER button.
5. Set the Time you want using the UP/DOWN button at
Time Set mode and press ENTER button.
6. Set the Minutes with the same way of No.5.
When you press ENTER button, the mode moves to
the main menu.
◆
4. Voice
This mode is for record, play, deletion.
①Choose : This mode is for record, play,
deletion.
②Play : This mode is to output the recorded
broadcase from the memory bank.
③Rec : This mode is to record the sound
into memory bank.
④Delete : This mode is delete the recorded
sound in the memory bank.
How to record
1. Turn On the main power of JPA-SERIES with a
built-in JTM-10 Module.
2. Wait until show the Day and Time on the LCD of
Module.
3. Select the MIC/LINE according to type of sound you
want to record.
4. Connect the sound using the accessory(2.5' PONH
JACK) to REC input then properly adjust the REC
Level.(When abjusting the REC level, pay attention
not to power off the CLIP LED.)
5. Press the MODE/CANCEL key then select the voice
with the UP/DOWN key.
6. After select the REC mode, press the Enter key of
Voice channel you want to record.
7. After recording, move to Main menu using the Mode/
Cancel(stop) key.
◆
Summary of Contents for JTM-10
Page 9: ...7 MEMO ...
Page 10: ...8 MEMO ...
Page 11: ...4M OP DIGITAL MESSAGE JTM 10 WEEKLY PROGRAM TIMER ...


