EN
9
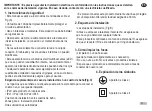
1. Safety Instructions
2. Installation
3. How to clean the product
• Clean the lamp with a soft dust cloth
(it could be lightly moistened if necessary).
• Never use alcohol, solvent or products of a similar nature.
• Wait until the product is completely dry before reconnecting it
to the main supply.
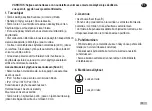
4. Symbols explanation
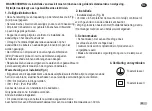
Class II appliance
Class I appliance
• This manual applies to references listed in Fig (A).
• The electrical circuit must be protected with a 10A fuse.
• The product is for indoor use only, in dry place only.
• Always disconnect from main supply before installation,
connection and servicing.
• You are only authorized to connect the main supply cable to
the connection block: inner cables and connections cannot be
modifie
• The light source of the product is non-changeable light
diodes(LED). Never try to disassemble the product, as the light
diodes can cause damage to the eyes.
• Repairs should only be carried out by qualified person and
using genuine spare parts. Inappropriate repairing could cause
significant danger.
Additional requirement for Bathroom Installation(Fig.C)
• Please refer to the rating plate on the product to know in
which volume you caninstall the item.
• IPx0: This product can be installed in dry premise only.
• IPx1 / IPx2 / IPx3/ IPx4 / IPx5
Recommended area for bathroom installation
Zones in grey: Forbidden installation
Other area: Allowed installation
• This product must be connected to a circuit protected by a
residual current protective device with rated residual operating
current not exceeding 30mA.
• Installation steps (Fig B).
• Before drilling or cutting in the ceiling / wall, ensure that there
is no risk on the over side.
• For products controlled with IR remote controller, make sure that
the IR receiver is not covered by any obstacle
WARNING: The installation of this kit must comply with the standard and regulation in force.
Should you have any doubt, please seek advice from a professional electrician.
Summary of Contents for ZIS01619
Page 1: ...ZIS01619...
Page 9: ...EL 7 1 2 3 4 A 10A LED B IR IR II I C IPx0 IPx1 IPx2 IPx3 IPx4 IPx5 30 mA...
Page 10: ...Cd Hg Pb 8...
Page 36: ...34 Cd Hg Pb...
Page 45: ...BU 43 4 II I 1 2 3 10A LED C IPx0 IPx1 IPx2 IPx3 IPx4 IPx5 30mA IR IR...
Page 46: ...44 Cd Hg Pb...
Page 51: ...B 6mm A ZIS01179 SLD33I1C SLD33I2E SLD33I3E SLD33I4E 1 2 3 4 5 6 4 3 1 2...


