© 2016 JCM American Corporation
© 2016 JCM American Corporation
4
5
September, 2016
September, 2016
SPECIFICATIONS
The UAC
™
Specifications are as follows:
• USB 1.1 or USB 2.0 compliant
• Power consumption less than 100 mA
• Power Supply: Input = 110V to 240VAC, Output = + 12 VDC @ 3.5A & +24 VDC @ 3.0A
• Dimensions = 3.54 x 1.97 x 0.945 in. (90 x 50 x 24 mm).
UNIVERSAL POWER SUPPLY
P
OWER
S
UPPLY
I/O
• Input: 110V to 240VAC
• Output: +12VDC 3.5A or +24VDC 3.0A
One of the above two DC Voltage Levels is acceptable to most JCM Acceptors.
O
PERATIONAL
V
OLTAGE
S
ELECTION
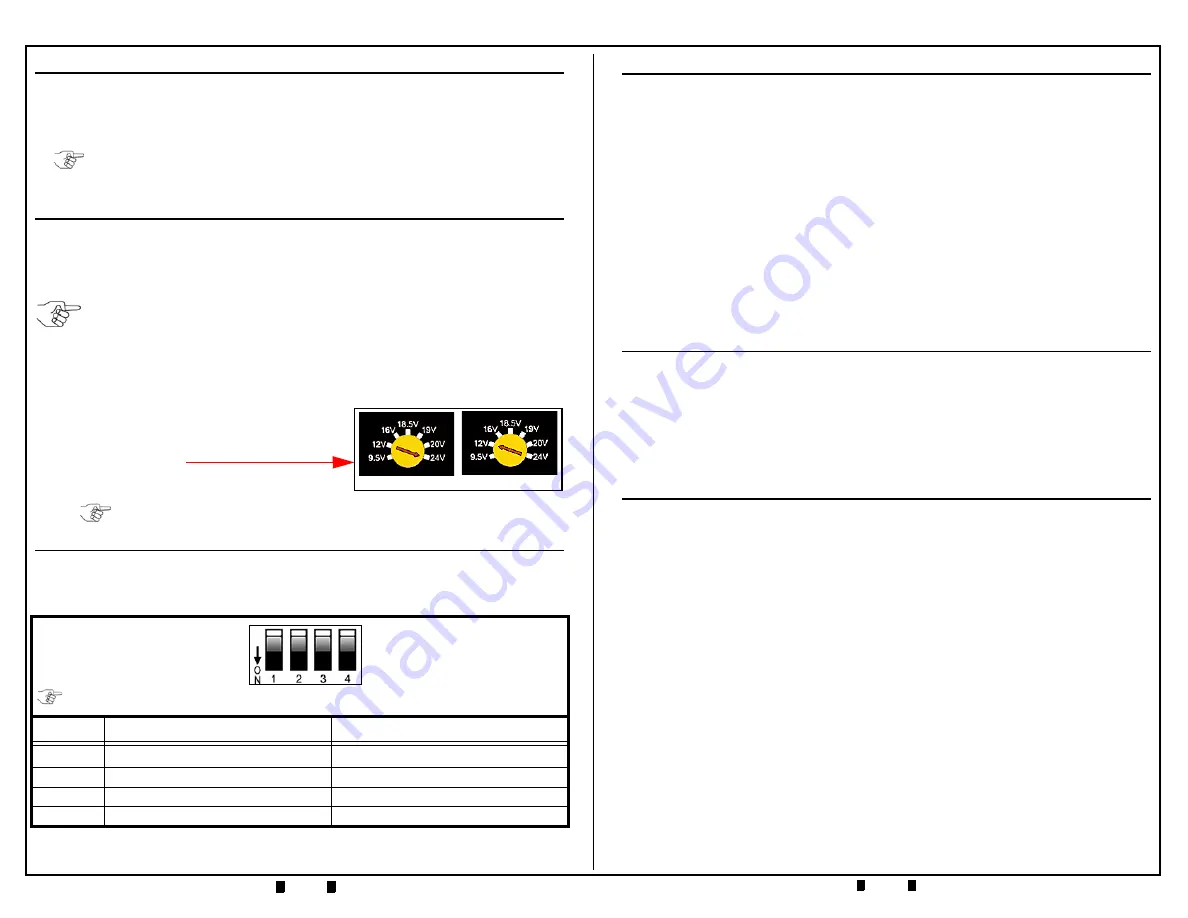
To switch Voltage levels, proceed as follows:
1. Disconnect AC power from Adaptor.
2. Use a Flat Blade Screwdriver to rotate the
Yellow
Selector Switch to the desired
Voltage Output.
3. Reapply DC Adaptor’s AC power.
DIP SWITCH SETTINGS
The four position, Snap Style DIP Switch shown in Table 3 is used to set the
UAC
™
output signal levels.
Table 3
UAC Connector Configurations
SW No.
Switch OFF
Switch ON
1
TTL Output to Banknote Acceptor
RS232C Output to Banknote Acceptor
2
RS232C for the SEB-40x Series BV
Standard/Normal Setting
3
Reserved
Reserved
4
Reserved
Reserved
NOTE: The +12 VDC Power Adapter provides an operating Voltage designed to power
the Banknote Acceptor while running Diagnostic or Acceptance Tests.
NOTE: Ensure the proper Voltage level is set for the JCM Acceptor.
An incorrect Output Voltage can damage a JCM Acceptor.
Ensure the AC power source is disconnected from the Power Supply
before switching it’s DC Output Voltage levels!
Set 24 VDC Output Set 12 VDC Output
NOTE: Ensure that the proper Voltage level is set for the JCM Acceptor being
tested. An incorrect Voltage setting can damage a JCM Acceptor.
ON
OFF
Four Position Piano Key
Snap Style DIP Switch Block
NOTE: All Switches shown
in the OFF Position.
DRIVER INSTALLATION
A USB Driver needs to be installed so a PC will be able to communicate with
the UAC
™
. Perform the following steps to install the necessary Drivers for the
UAC
™
Device:
1. Download the required drivers from the following location, or contact JCM for
the required Device Drivers:
http://www.ftdichip.com/Drivers/VCP.htm
2. Select the Virtual Comm Port (VCP) Drivers for the PC Operating System being
used on the PC. The CDM 2.04.16 (or newer) Application will be downloaded.
3. Run the CDM 2.04.16 Application to load the required Drivers onto the PC.
When the UAC
™
is connected, the PC will indicate that Drivers are needed.
4. Follow the prompts, selecting the Folder directory where the Drivers were stored
from the previous step.
Documentation for the UAC
™
Drivers is available at the following location:
http://www.ftdichip.com/support/ftdocuments.htm
LOCATING THE REQUIRED UAC COMMUNICATIONS PORT
Proceed as follows to locate the PC Comm Port being used by the UAC
™
:
1. Open the Control Panel on the PC.
2. Click the System ICON and select the Device Manager.
3. Open the required Ports (Comm and LPT).
4. Identify the Comm Port to which the UAC
™
is attached. This is the Comm Port
that will be selected by the application to enable the desired Banknote Acceptor
communications.
OPERATION
Proceed as follows to operate the UAC
™
Device:
1. Connect the UAC to the PC using the USB A/B Cable.
2. Connect the proper RS232C/TTL Cable from the UAC to the Banknote Acceptor
(see list of Cables for JCM Acceptors in Table 4 on page 6).
UAC LED I
NDICATORS
The LED Indications present on the top of a UAC
™
Device Housing are as
follows:
• The
Green
LED will light when the USB Communications Port is active,
indicating a good USB connection, and that power is applied to the UAC
™
.
• If either the USB connection is not established, or power is not applied to the UAC
™
,
the
Green
LED will be OFF (Out).
• The
Red
LED is the Status Indication for the Banknote Acceptor.
The
Red
LED indicates errors while in the Test or Diagnostic mode.
Refer to the appropriate Banknote Acceptor Service Manual for the proper Error
Code definition.


