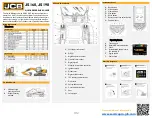
Service Points and Access Covers
Charging Levels & Charging
Hydraulic Hitch Unlock Sequence
Mechanical Hitch Unlock Sequence
Joystick & Dozer Lever
Auxiliary Venting (Within 1 Minute of Motor Shutdown)
Swing Controls
A. Swing Left
B. Swing Right
C. Swing Thumb Wheel
Control
D. Change over button
Auxiliary Controls
A. Tilt/grab changeover for tilt-rotator
B. Boom swing/Aux change over button
C. Thumb
–
wheel control
–
Aux 2 (Low flow)
D. Continuous flow button
–
Hammer circuit
E.
Thumb and wheel control
–
Aux 1 (High flow)
Note: A & D located underside of the joystick
Dozer Lever
A. Lower the dozer
B. Raise the dozer
C. Control lever
D. 2-speed selection
Retracting Undercarriage Lever
A. Track Extension Lever
B. Upward
–
Retract
C. Downward - Extend
A. Lock
B. Service compartment cover
C. Handle
A. Grease gun
B. Service disconnect
C. Fuse/relay box
D. 12V Battery
A. Hydraulic compartment cover
B. Lock
A. Hydraulic tank filler cap
B. High voltage batteries charging
point
C. Hydraulic oil level indicator
A. Full Charge
B. Low Battery
A. Charge indicator
B. Operating status
C. Charging socket
D. Charge cable
1.
Connect charge lead to mains supply outlet and the
machine inlet.
2.
Depress the reset button with the RCD*
3.
Green status LED light will illuminate at charge inlet (A)
1.
LED light will pulse when charging
2.
LED light will hold green when plugged in and
not charging
4.
Machine instrument panel will illuminate and display state
of charge
*for 230V AC mains supply, when using 110V AC, an RCD is not
provided
Excavator Levers (SAE)
A. Slew cab left
B. Slew cab right
C. Raise boom
D. Lower boom
E.
Dipper in
F.
Dipper out
G. Crowd bucket
H. Dump bucket
Hydraulic Compartment
Battery Compartment
Battery Cover
Hydraulic Compartment Cover


