background image

1

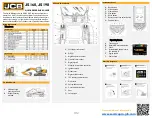
Compact Excavators

65R-1, 67C-1, 85Z-1, 86C-1, 

90Z-1, 100C-1

Quick Start Guide

QUICKSTART.JCB.COM

Summary of Contents for 1 86C-1 TAB

Page 1: ...1 Compact Excavators 65R 1 67C 1 85Z 1 86C 1 90Z 1 100C 1 Quick Start Guide QUICKSTART JCB COM...

Page 2: ...ck Reference Guide DOES NOT replace the Operators Manual You MUST read ALL the disclaimers and safety and other instructions in the Operators Manual before initially operating this product Accordingly...

Page 3: ...Points 7 Cab Layout Controls 8 11 Start Up Sequence 12 Setting Auxiliary Flows 13 Hydraulic Quick Hitch 14 Shutdown Sequence 14 Maintenance Position 15 Service Maintenance Schedule 16 18 Service Maint...

Page 4: ...ndscaping etc Can be used for object handling Not intended for use in mining and quarrying applications demolition forestry any use underground and any explosive atmospheres Must not be used for fores...

Page 5: ...600 1145 1601 F Overall width of superstructure mm 1798 2168 2187 G Height over cab mm 2582 2582 2706 H Ground clearance mm 240 350 I Track gauge mm 1600 1850 J Width over tracks 450 shoes mm 2000 230...

Page 6: ...1 Angle 46 2 1 5 Angle 47 1 5 dozer 8 10T Angle 40 1 5 B Front track tie down points D 65R 1 67C 1 Length 2 000 100mm 8 10T Length 2 415 100mm The correct tie down positions are identified on the mac...

Page 7: ...t B Dozer Lift point C degrees 35 30 30 25 30 D mm 2500 2320 2755 2295 2263 2725 2075 E mm 4800 4620 5325 5285 5352 5800 5250 F mm 1052 966 1096 1083 1090 1091 1091 G mm 850 1048 990 1187 1203 982 120...

Page 8: ...ozer blade control lever F Two speed tracking switch G Hand throttle control H Ignition key switch J Switch console K Auxiliary power socket L Entertainment system M HVAC controls N Operator seat P Gl...

Page 9: ...atus warning M Auto idle status N Engine power mode status P Hydraulic active status Fig 7 Normal Operating Screen A High flow aux warning B High flow aux warning single acting C Low flow aux mode war...

Page 10: ...On Overload Warning System 1 Off 2 Silence un silence buzzer Excavator Arm Quickhitch 1 Off 2 Start unlock sequence Controls Isolation 2GO 1 Off 2 Activate de activate hydraulic controls Window Wiper...

Page 11: ...t H Dump bucket Auxiliary Controls A Tilt grab changeover for tilt rotator B Aux activation button C Thumb wheel control Aux 2 Low flow D Continuous flow button Hammer circuit E Thumb wheel control Au...

Page 12: ...back next dig Similarly do not use the side of the bucket to push soil into the excavation B will damage the machine It is possible when excavating to use either full machine slew when discharging a l...

Page 13: ...2 3 Enter Menu Mode Set Aux Flow Operate Machine Adjust maximum high flow auxiliary using the momentary rocker switch in position 2 Adjust maximum high flow auxiliary using the momentary rocker switc...

Page 14: ...econds then remove attachment To engage the lock on the quick hitch press one of the following two buttons and visually check hitch is locked Instrument panel will indicate need to confirm process A T...

Page 15: ...dental operation of the engine Maintenance Position A Attachment flat on the ground B Dozer blade lowered to ground as a cab tilt feature This feature must only be used out by trained personnel Refer...

Page 16: ...olant for leaks contamination and level Page 164 Visual check Check condition of cooling pack and system Page 164 165 Visual check Check hydraulic oil level Page 167 168 Visual check Check window wash...

Page 17: ...engine coolant for leaks contamination and level Page 164 Visual check Check condition of cooling pack and system Page 164 165 Visual check Check hydraulic oil level Page 170 171 Visual check Check w...

Page 18: ...1 Clean Check engine coolant for leaks contamination and level Page 154 Visual check Check condition of cooling pack and system Page 163 164 Visual check Check hydraulic oil level Page 169 170 Visual...

Page 19: ...r B Hydraulic oil level indicator C Fuel filler cap D Refuelling pump E Hydraulic oil filler cap Fig 14 A Air filter B Coolant expansion bottle C Battery D Battery isolator E Radiator F Washer bottle...

Page 20: ...tery C Battery isolator D Washer Bottle E Fuel filler cap F Main fuel filter G Hydraulic oil level indicator H Engine fuel filter J Hydraulic oil filler cap Fig 17 L Radiator M Radiator expansion bott...

Page 21: ...earbox each 0 8L JCB Engine Oil HP SAE 30 Not Multigrade 4001 0305 20L Track Idler Wheels 0 8L JCB HD90 Gear Oil 4000 0305 20L Track Rollers top 0 3L JCB HD90 Gear Oil 4000 0305 20L Track Rollers bott...

Page 22: ...o 45 C 113 F JCB extreme performance 5W40 4001 2705 20L Below 25 C 13 F to 45 C 113 F JCB Ultra performance 5W40 4001 3405 20L Engine Coolant 12 1L JCB Antifreeze HP Coolant Water 4006 1120 20L Track...

Page 23: ...ter 4006 1120 20L Track Gearbox each 0 8L JCB Engine Oil HP SAE 30 Not Multigrade 4001 0305 20L Track Idler Wheels 0 8L JCB HD90 Gear Oil 4000 0305 20L Track Rollers top 0 3L JCB HD90 Gear Oil 4000 03...

Page 24: ...5R 1 100C 1 None Tapered Ditching Bucket 300mm 1000mm 111 65R 1 100C 1 None Grading Bucket 1520 1800mm 150 172 65R 1 100C 1 None Bucket DP Bolt on Teeth 300mm 1100mm 214 65R 1 100C 1 None Jaw Bucket 6...

Page 25: ...y Aux flow high Flow When the ignition is on and the Aux controls are activated the maximum flow can be changed by pressing the rocker switch up to position 1 shown in the handbook How do I change pow...

Page 26: ...00hrs does the bush then need greasing daily No the bush wont need greasing until the next 500hrs 500hrs Greasing Without daily greasing what cleans all the dirt out of the bush Machine is fitted with...

Page 27: ...65R 1 67C 1 85Z 1 86C 1 90Z 1 100C 1 27 Your Notes...

Page 28: ...and may vary dependant upon the exact specification of the machine They should not therefore be relied upon in relation to suitability for a particular application Guidance and advice should always b...

Reviews: