background image

Important Safety Note:

The

customer is solely responsi-
ble for proper selection of
mounting hardware not
included with the speakers,
and for proper assembly 
and installation of the wall
brackets, including but not
limited to the selection of
appropriate weight-bearing
supports and proper use of
the bracket. JBL disclaims
any liability for the selection
of mounting hardware
and/or bracket installation.
Be sure to follow these
bracket assembly and
installation instructions
carefully. If you have any
questions or doubts about
your ability to correctly wall-
mount the speakers, consult
with your authorized JBL
dealer or custom installer.

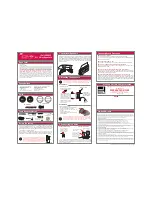
Step 1: Unscrew and remove
the large 

Molded Nut

. If

necessary, use the supplied

Metal Bar

as a lever by

inserting it into one of the
holes in the outer edge of
the 

Molded Nut

.

Step 2: Firmly grasp the 

Ball

and Shaft

£

and pull it

straight out of the 

Attach-

ment Plate

¢

. Avoid leaning

it to the side for leverage, as
this may break off a tab.

Step 3: Slide the 

Molded Nut

onto the 

Ball and Shaft

£

with the threaded opening
facing the ball. Thread the

Metal Nut

¡

all the way

onto the 

Ball and Shaft

£

,

with the star washer side
away from the ball. Refer 
to the exploded drawing for
the proper orientation of
these parts.

Step 4: Screw the 

Ball and

Shaft

£

into the 

Threaded

Insert

§

on the back of 

the 

Satellite Speaker

until it is fully seated in the

Threaded Insert

§

, but 

do

not

tighten, as you might 

dislodge the 

Threaded 

Insert

§

. Such damage

would not be covered under
the warranty.

Step 5: Tighten the 

Metal

Nut

¡

with the star washer

side between the 

Nut

¡

and the back of the 

Satellite

Speaker

, using large

needle-nose pliers, until it 
is firmly seated against the
back of the 

Speaker

and

has locked the 

Ball and

Shaft

£

and the 

Speaker

together. Note that once

the 

Metal Nut

¡

is fully

tightened, it may embed
some marks on the back of
the 

Satellite Speaker

.

However, these marks will
be covered by the 

Metal 

Nut

¡

.

Step 6: Mount the 

Attachment

Plate

¢

into a wood stud on

the wall, using four #10 pan-
head wood screws at least

one-inch long (not supplied)

. Make sure that all four

screws are driven into the
stud and not into drywall. 

If the bracket needs to be
mounted in drywall, the 
customer is responsible for
selecting and using appropri-
ate wall anchors and screws.

Important Note:

The 

Metal

Nut

¡

must be fully tight-

ened against the 

Satellite

WALL-MOUNTING

2

3

4

8

5

1

1

2

3

4

5

6

7

8

6

SCS200.5 OM  5/18/06  10:24 AM  Page 6

Summary of Contents for Simply Cinema SCS200.5

Page 1: ...SCS200 5 SURROUND CINEMA SPEAKERS OWNER S GUIDE...

Page 2: ...the mast and supporting structure grounding of the lead in wire to an antenna discharge unit size of grounding conductors location of antenna discharge unit connection to grounding electrodes and requ...

Page 3: ...nderstand our customers and build products that meet their needs and expectations JBL Incorporated Four satellites for left right and surrounds Wall mount brackets Shelf stands Floor stand adapters On...

Page 4: ...han the listeners ears If that is not possible they may be placed on a wall behind the listening position facing forward Additional satellites may be purchased separately for use in 6 1 or 7 1 channel...

Page 5: ...han dling the weight and propor tions of these loudspeakers in a safe and stable manner JBL disclaims any liability for the selection of suitable floor stands and or correct compat ibility between the...

Page 6: ...way onto the Ball and Shaft with the star washer side away from the ball Refer to the exploded drawing for the proper orientation of these parts Step 4 Screw the Ball and Shaft into the Threaded Inse...

Page 7: ...ion is tight The hole in the center of each collar is intended for use with banana type connectors To comply with European CE certification these holes are blocked with plastic inserts at the point of...

Page 8: ...e subwoofer is On Note for advanced users If your receiver processor has a built in low pass crossover filter for the subwoofer out put you may use the LFE input to bypass the sub woofer s internal cr...

Page 9: ...nals on the subwoofer that are marked Speaker Level In Connect the left and right terminals on the subwoofer that are marked Speaker Level Out to the corresponding termi nals on the back of your front...

Page 10: ...On position to use the SUB200 subwoofer If you will be away from home for an extended period of time or if the subwoofer will not be used switch the Master Power switch to the Off position VOLUME Volu...

Page 11: ...r is set in Dolby Pro Logic mode make sure the center speaker is not in phantom mode If your receiver processor is set in one of the Dolby Digital or DTS modes make sure the receiver processor is conf...

Page 12: ...osure Bass reflex Dimensions H x W x D including feet 16 1 4 x 11 x 13 3 4 413mm x 279mm x 349mm Weight 28 lb 12 7kg SPECIFICATIONS All features and specifications are subject to change without notice...

Reviews: