background image

www.janome.com

 Join us!

Memory Craft 15000

Horizon Memory Craft 15000

PA

GE 9

  b.  Attach Embroidery foot P.

  c.  The Straight Stitch needle plate will ensure precise embroidery designs.  Touch the lock button. 


The presser foot 

    will automatically lower and a lock will appear on the screen.

  d.  Touch the presser foot lifter button to raise the foot to the highest position.

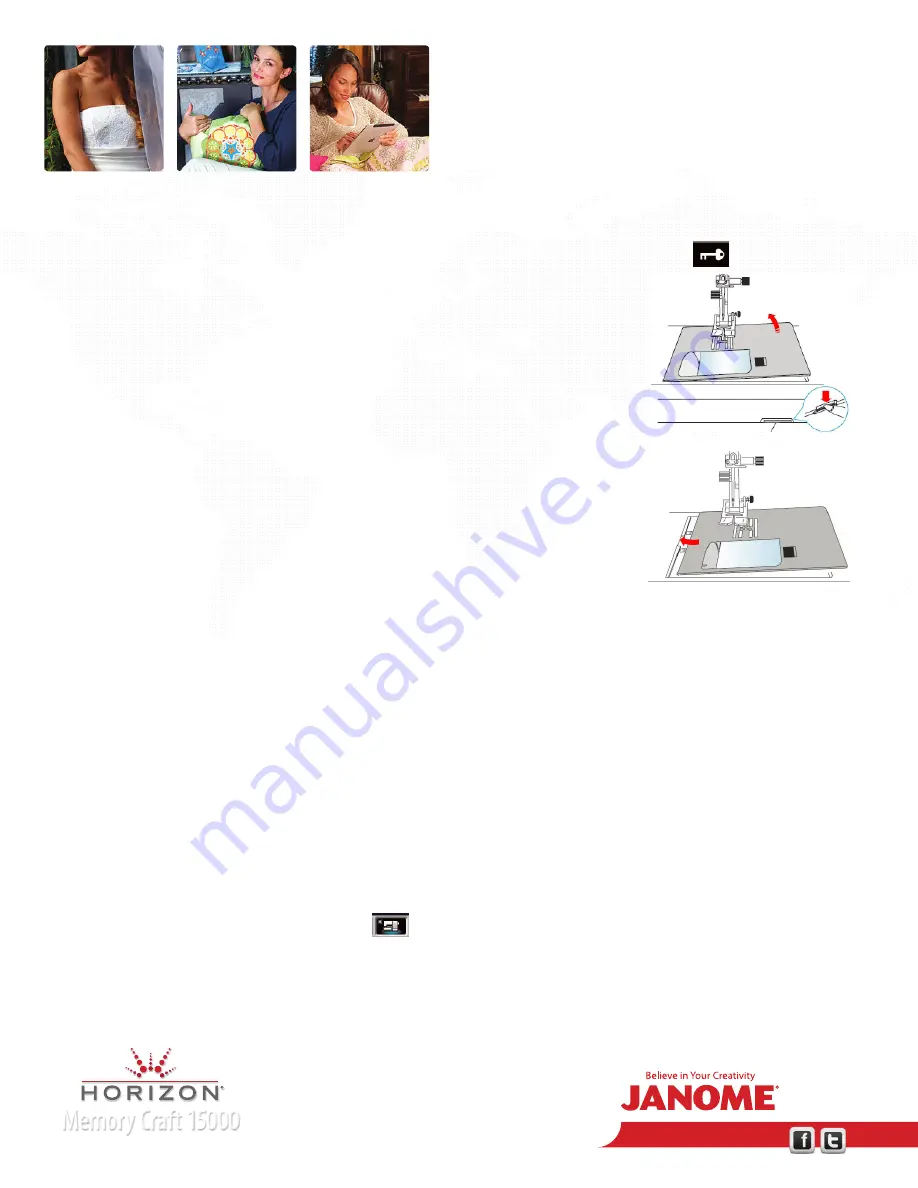
  e.  Remove the accessory table and press down on the lever as shown in the picture. 


A warning window will appear on the screen and the needle plate will pop up.  Lift the 

    plate off of the bed.

  f.  Place the left edge of the straight stitch needle plate against the left edge of the opening  


Press firmly on the “bullseye” marking on the needle plate to lock it in place. A warning 

    message will appear and the straight stitch will automatically be selected.  Press the 
    Lock button to turn off the lock. 

    •  When using non-Janome brand bobbin thread switch to the “embroidery” 
      (yellow dot) bobbin case…the tension is 2 times tighter on this bobbin case.  Use    
      this bobbin case any time the bobbin thread persistently comes to the top of the embroidery design. Be sure to use the   
      Lock function when changing the bobbin case.

  g.  Thread the machine with embroidery thread and the Janome Prewound bobbin.

    •  Janome Blue tip, Red tip and Purple tip needles are the recommend needles for embroidery. These needles have been   
      designed with a larger eye and scarf to allow the embroidery threads to flow and lay smoothly on the fabric.  The Blue 
      Tip is a size 11/75 ball point needle and should be used with most embroidery threads.  The Red Tip is a size 14/90 
      standard needle and should be used with metallic threads.   The Purple tip is a size 14/90 ball point needle especially 
      designed to use with 9mm width stitches to avoid skipped stitches.

    •  Needles should be changed after approximately 8 hours of use. 
 
1.  Customize Machine Settings. 

  a.  Touch Set Mode , touch Embroidery Mode. 

  b.  Page 2/5 Maximum embroidery speed; set the speed at the user’s choice.

  c.   Page 4/5 Auto Thread Cutting; touch ON to cut jump threads.

Summary of Contents for Horizon Memory Craft 15000

Page 1: ...lift to raise and lower the presser foot Use the Presser Foot Lifter to raise and lower the presser foot Use the Presser Foot Lifter Button to raise and lower the presser foot Horizon Memory Craft 15...

Page 2: ...y settings made 3 Ordinary Sewing a Utility Stitches 1 2 3 Straight Stitches Select Stitch 1 Straight Stitch fold a 6 square of cotton in half and sew a short seam stop the needle will end in the down...

Page 3: ...uch the cloth guide icon Touch OK at the pop up window Attach the cloth guide touch OK and the guide will automatically move to the 5 8 position move the guide to the left so screen shows The cloth gu...

Page 4: ...corner The foot will automatically lift if the pivot function is still on from step 3b Turn the fabric Touch the Start Over at a Corner button Finish appliqu ing the square using the Start Over at a C...

Page 5: ...changed to adjust for the depth of the quilt sandwich 5 Ordinary Sewing Modes a Touch Home button b Touch the Buttonhole tab Attach Buttonhole foot R Place a button in the back of the foot pull down...

Page 6: ...c 6 Laptop connected to machine open Horizon Link Suite a Help Movies can be viewed fig22a b Screen Saver images can be changed fig22b Locate the Help button on upper right hand side of the tool bar t...

Page 7: ...a stabilized piece of cotton Insert a USB flash drive in the computer Click the Write a Design Open the Removable Disc Open the Ordf folder and click on the arrow to write the design This design can...

Page 8: ...e bow Sew the stitch pattern on a piece of stabilized cotton Embroidery Mode 1 Getting Ready to Embroider a Attach Embroidery Unit and turn on machine Embroidery Session MC15000 Embroidery Unit Power...

Page 9: ...oidery yellow dot bobbin case the tension is 2 times tighter on this bobbin case Use this bobbin case any time the bobbin thread persistently comes to the top of the embroidery design Be sure to use t...

Page 10: ...sorted by category or hoop Select Hoop d Select SQ14 on page 2 14 select design 29 e Touch Home touch Edit f Touch Home touch Monogram g Touch Font turn to page 2 3 select Brush h Use upper and lower...

Page 11: ...e design to see the design information f Use the white and black buttons in the upper left of the screen to change the background color g Touch Done in upper right corner to move to edit screen h Touc...

Page 12: ...ol b Click the View Embroidery button to access the folders and drives of the laptop From this window you will be able to access designs from anyplace they are stored My Documents CD s USB flash drive...

Page 13: ...move the entire design into the center of the hoop r Click the Menu button in the upper left hand corner s Select Connection Settings Select Wireless Search Select the machine OK Or Select USB for dir...

Page 14: ...PAG E 1 4 g Rotate the design to 20 h Move to the lower left hand corner i Click Corner j Next k Write a Design l Write the design to the machine or USB memory stick Note More lessons for AcuFil can...

Reviews: