


95
GridVis
®
Collector
www.janitza.de
www.janitza.de
GridVis
®
Collector
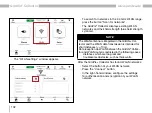
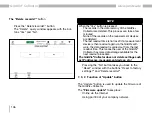
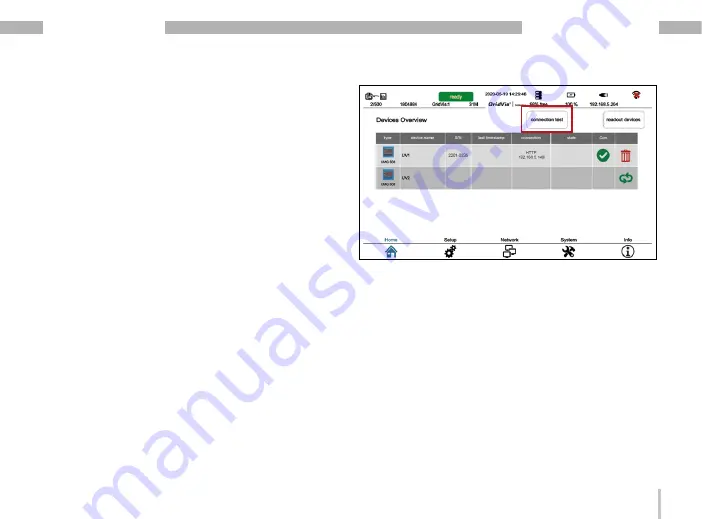
· Measurement devices already connected to the
GridVis
®
Collector (see "binding" in section "Rea-
ding out measured values" on page 89) are marked
by the system with a “Trash can icon" in the last
table column (e.g. UV1).
· Measurement devices that have been newly created
in the GridVis software (e.g. UV2) appear in the last
table column with a "black assignment symbol".
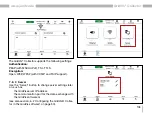
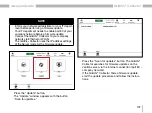
Step 4
· First connect the on-site measurement device
"UV1" with the GridVis
®
Collector.
· When the “Connection test" button is clicked, the
GridVis
®
Collector detects measurement device
"UV1" and in the measurement device list marks
measurement device "UV1" with a "green check
mark" in the "Connection" column. No further "bin-
ding" is possible.
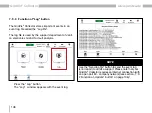
· Additional measurement devices not yet connected
by “binding" (e.g. UV2) appear in the last column of
the table with a "green assignment symbol".
Summary of Contents for GridVis Collector
Page 25: ...25 www janitza de GridVis Collector...
Page 29: ...29 www janitza de GridVis Collector 270 mm 247 mm 91 mm Fig Housing of the GridVis Collector...
Page 37: ...37 www janitza de GridVis Collector...
Page 41: ...41 www janitza de GridVis Collector...
Page 45: ...45 www janitza de GridVis Collector...


