


1.5 Install Drive Trays
Drives are mounted in drive trays, which are then installed in drive bays in the ES24 or M-Series chassis.
Each drive bay in the chassis has two indicator lights to the right of the tray. The upper light is blue when the drive
is active. The lower light is solid red if a fault has occurred. Both lights blink to identify drives that are hot spares.
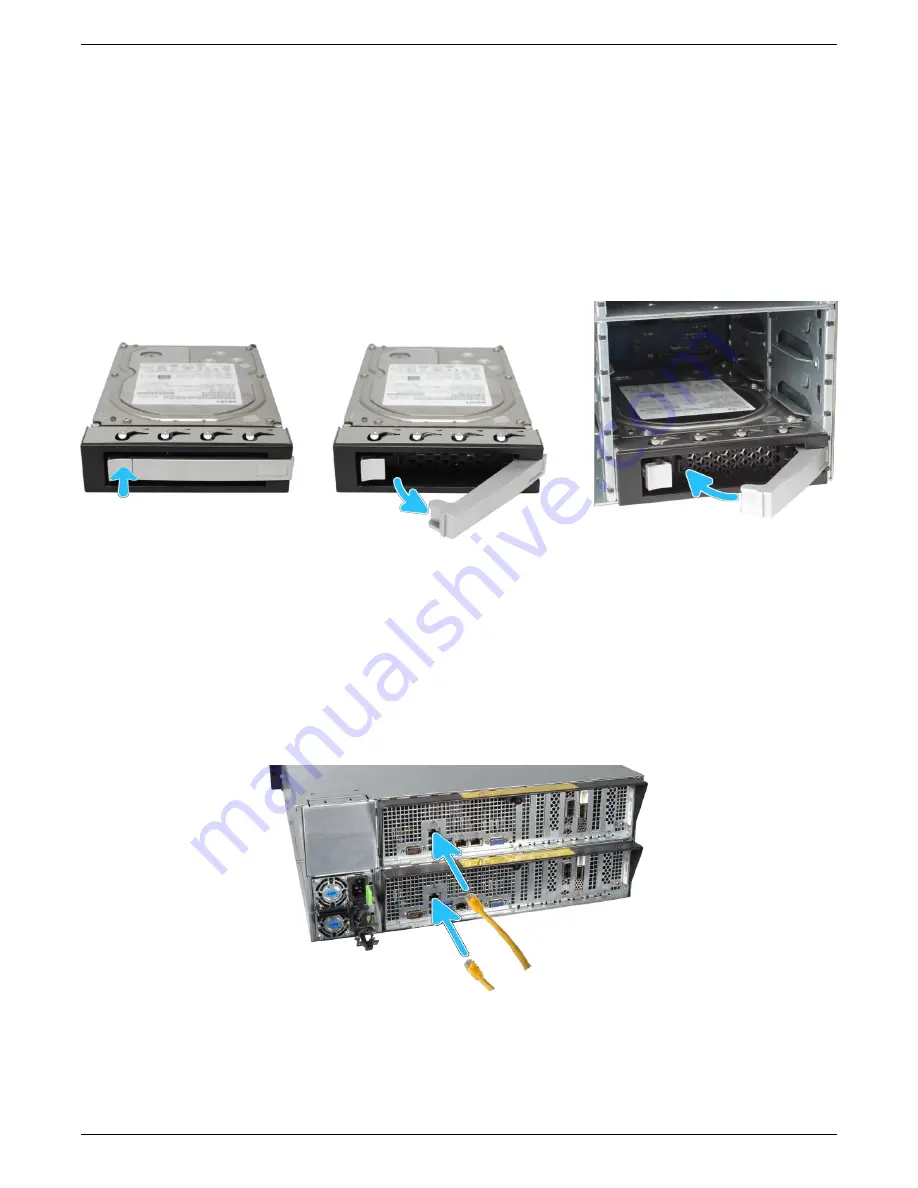
Press the silver button on the drive tray to open the latch. Carefully slide the tray into a drive bay until the right
side of the latch touches the metal front edge of the chassis, then gently swing the latch closed until it clicks into
place.
All drive bays must be filled to maintain proper airflow for cooling. If fewer than 24 drives are connected, filler
blanks must be placed in the empty bays.
1.6 Connect Expansion Shelves
Refer to the installation instructions included with expansion shelves for details on connections.
1.7 Connect Network Cables
Connect network cables before powering on the M-Series. Cable specifications and requirements vary by configu-
ration, so they are not included with the system.
Connect network cables from the local switch or management network to the Out-of-Band (OOB) IPMI manage-
ment port on each TrueNAS controller.
Network ports are preconfigured to customer specifications before shipment. Contact
(page 13) for de-
tails on connecting them to the local network.
Support: 855-473-7449 or 408-943-4100
Page 7


