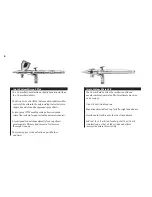
Lubricating the Needle (#9)
To ensure smooth main lever (#13) action lubricate the needle
when the trigger won’t respond properly.
1. Unscrew the handle (#11).
2. Loosen the needle chucking nut (#10).
3. Remove the needle.
4. Coat the needle slightly with Medea Super Lube starting
1 inch behind the tip.
5. Wipe the needle with a soft, clean cloth, leaving a light coat
of lube behind.
6. Re-insert the needle gently into the airbrush until you feel
a positive stop.
7. Tighten the needle chucking nut.
8. Screw the handle onto the airbrush body.
DO NOT over-lube the needle; transferring excess lube into
the nozzle may cause severe paint flow problems.
DO NOT use light machine oil or WD-40 for lubrication. These
lubes cause the needle to stick when it moves through the
needle packing o-ring and can also get into the air system.
CAUTION: If it becomes absolutely necessary to dismantle the
airbrush remember that most situations do not require tools.
DO NOT use pliers.
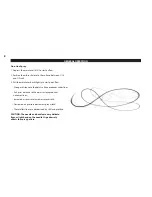
Lubricating the Air Piston (#14)
To ensure smooth main lever (#13) action, lubricate the air piston
when the trigger won’t respond properly.
1. Unscrew the handle (#11).
2. Unscrew the needle chucking nut (#10).
3. Remove the needle (#9).
4. Unscrew the needle spring adjuster (#8).
5. Remove the needle spring (#7).
6. Remove the needle chucking guide (#5).
7. Pull the main lever up and out.
8. Use tweezers to pull out the air valve piston.
9. Clean the valve piston with a cotton swab.
13
Summary of Contents for Custom Micron B
Page 1: ...CUSTOM MICRON SERIES VERSION 2 MANUAL PARTS GUIDE...
Page 2: ...w w w I W A T A A I R B R U S H c o m...
Page 15: ...9 15...
Page 16: ...16...
Page 17: ...17...
Page 23: ...6...
Page 24: ...5 4 5...
Page 25: ...4 3 3 1 3 2...
Page 26: ...3 2 2 1 2 2...
Page 27: ...2...
Page 28: ...1 Part No ICM 110 2 Rev6 4 16...


