9
User manual
Hold function
4.3
When the
HOLD
switch is in the Hold position, all buttons on the
device are inactive.
On Hold
will be shown brie
fl
y on the display, and
the display will turn off. Unlock the IVR Recorder by moving the
switch to the Off position.
Set date and time
4.4
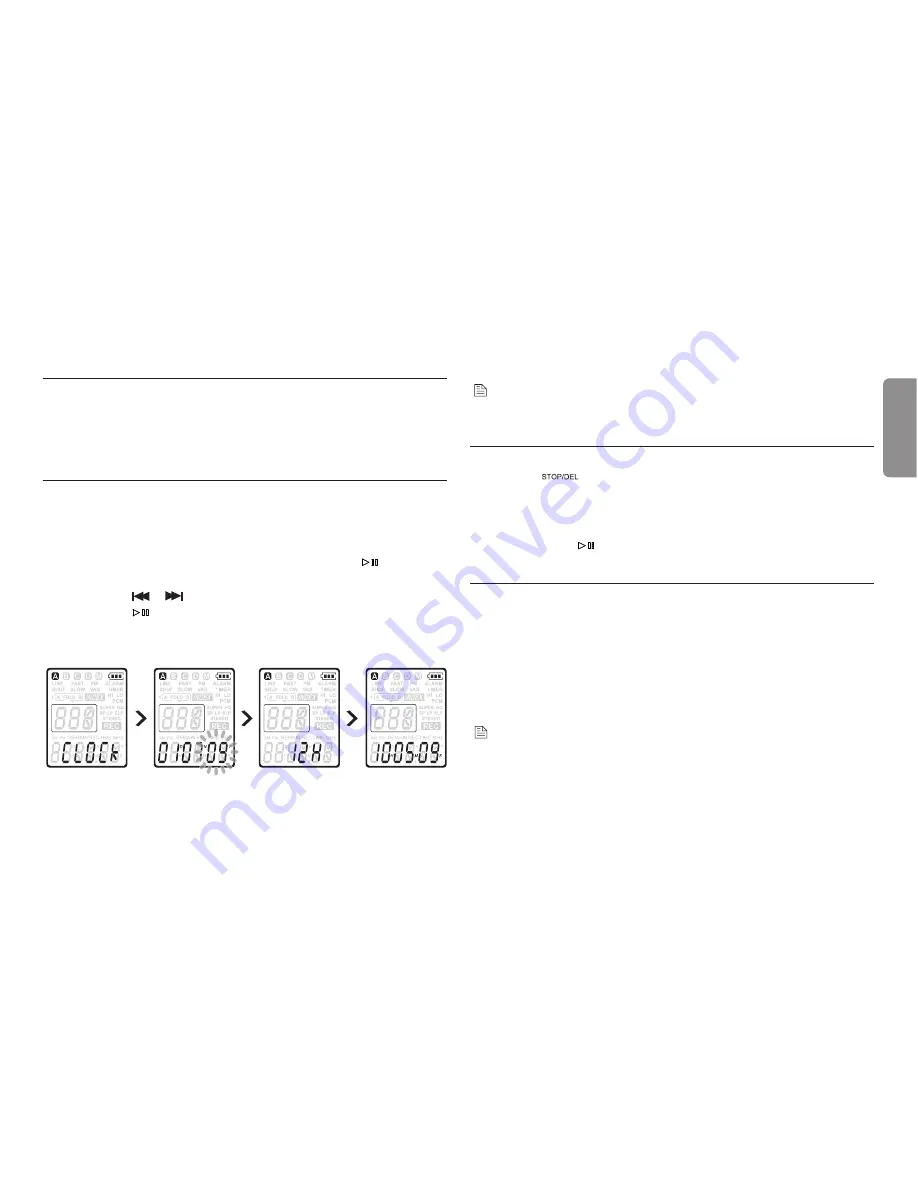
When the batteries are installed f
or the first tim
e, you will be
prompted to set the date and time.
‘CLOCK’
1
will be shown on the display. Press the
button.
The year indicator flashes.
Press the
2
or
button to set the year.
Press the
3
button to advance to the settings for the month.
Repeat steps
4
2 and 3 to continue to set the month, day, 12/24-
hour system and the time in the same way.
Note
The date and time can be changed at any time using the menu.
See Customize settings on page 22 for more information.
Display information
4.5
Press the
•
button while the recorder is stopped to rotate the
information on the display: total playback time of the curr
ent file
> time > date > remaining recording time > recording time of the
curr
ent file >
recording date of the curr
ent fil
e.
Press and hold
•
during recording to display the remaining
recording time.
Use the IVR Recorder with a computer
4.6
As a USB mass storage device, the IVR Recorder offers a convenient
way to save, back up and mov
e files. The IVR Recorder connects
to
a computer using a USB connection and does not require special
software to be installed. The IVR Recorder is automatically displayed
as a removable drive, allowing you to simply drag and
fr
drop files
to and om the unit.
Notes
Do not disconnect the IVR Recorder while files a
re transferred from
•
or to the device. Data is still being transferred while the record/play
indicator light is blinking in orange.
Do not format the drive of the IVR Recorder on a computer.
•
HOLD
ENGLISH
Summary of Contents for IVR-L1
Page 2: ......
Page 27: ...IVR L1 REV 1 1 ...


