IVIEW Smart Vacuum Important Safety Instructions Manual Download Page 7

2 Note: If you want to terminate the 

Spot Cleaning mode, press any Cleaning 

buttons on the robot control or the 

robot to stop this mode; also the robot 

will automatically stops cleaning when 

Spot Cleaning is done

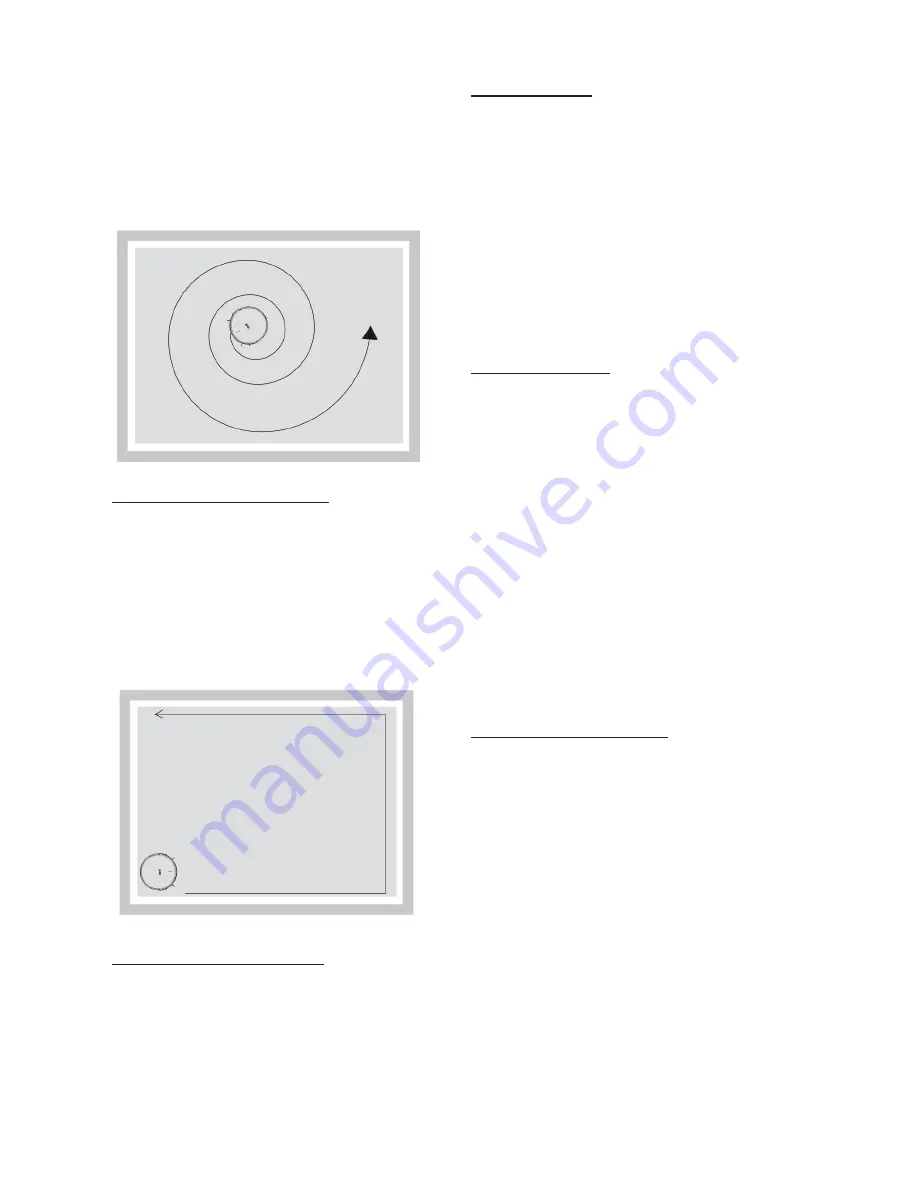
3 Edge Cleaning Mode

   1 Put the robot close to the edge of 

wall, press Edge Cleaning button on 

the remote control to start this mode.


Note: If you want to terminate the Edge 

Cleaning mode, press any Cleaning 

buttons on the r

remote 

control

 to stop 

this mode.

4 Scheduling Cleaning

1 Set up Scheduling Cleaning as 

needed

. When scheduling Is set up, 

the robot will start cleaning 

according 

to the set schedule and return to its 

charging station when completed.

5 D Cleaning

1 When the robot is on, or in cleaning, or 

in charging status (connected to charging 

station), press D button on the remote 

control to activate this mode. The robot 

will start cleaning automatically 

once 

fully charged.

3.5 Plan mode/Scheduling

1 Time Setting

   1 Make sure the robot is on and not in 

charging

   2 Point your remote control toward 

the display panel of the robot, press 

Clock Button, the left two numbers will 

flash, press Up Arrow/Down Arrow to 

set up the current HOUR, and press OK 

to confirm; then the right two numbers 

will flash, press Up Arrow/Down Arrow 

to set up the current Minute, press OK 

to confirm.

   3 Press OK button to confirm. Current 

clock setting is finished.

2 Scheduling Setting

Once the scheduling setting is activated, 

the robot will 

begin cleaning, every day, 

at the scheduled time.

   1 Make sure the robot is on and not in 

charging

   2 Point your remote control toward 

the display panel of the robot, press 

Plan 

Setting Button, the left two num

-

bers 

will flash, press Up Arrow/Down 

Arrow 

to set up the current HOUR, and 

press 

OK to confirm; then the right two 

numbers will flash, press Up Arrow/

Down Arrow to set up the current Minu-

te, press OK to confirm. The scheduling 

setting is finished.

Summary of Contents for Smart Vacuum

Page 1: ...ric shock or personal injury Make sure the charger is firmly plugged into the socket Otherwise may cause electric shock short circuit smoke or fire Do not use the product to vacuum stones metals large...

Page 2: ...Side brush 4 Driving wheel 5 Main brush 6 Dustbin and water tank 7 Anti collision sensors 8 Tape 9 Universal wheel 10 Charging socket 11 Power switch 12 Dust box and water tank assembly key 13 Display...

Page 3: ...display Battery status Time Plan display 1 On Off button 2 Auto button 3 Ok button 4 Edge cleaning button 5 Clock button 6 Strong cleaning button 7 Plan button 8 Spot cleaning button 9 D mode button 1...

Page 4: ...in unit 3 Disassemble of main brush Push the button on the main brush then take out the roller brush and fur brush 4 Dust and water tank 1 Press the button on dustbin pull out the dustbin 2 Push the d...

Page 5: ...e robot or remote control to let the robot start finding charging station 3 Charging status 1 Please make sure the battery has been charged for 12 hours for the first charging While charging the charg...

Page 6: ...ial Navigation an advanced navigation system that ucalculates the best path to efficiently clean your room When it is in Auto Clea ning Mode it will clean rooms automati cally and adjust its cleaning...

Page 7: ...ill start cleaning automatically once fully charged 3 5 Plan mode Scheduling 1 Time Setting 1 Make sure the robot is on and not in charging 2 Point your remote control toward the display panel of the...

Page 8: ...button When the robot is standbymode press this button to set the time on the robot 6 When the robot is cleaning press this button to start strong power cleaning Press again to stop 7 Plan button When...

Page 9: ...Please clean it by using a soft brush 4 2 Main brush and side brush Clean them by using a soft brush 4 3 Other parts 1 Keep the universal wheel clean of hair animal dander and string 2 Clean all sens...

Reviews: