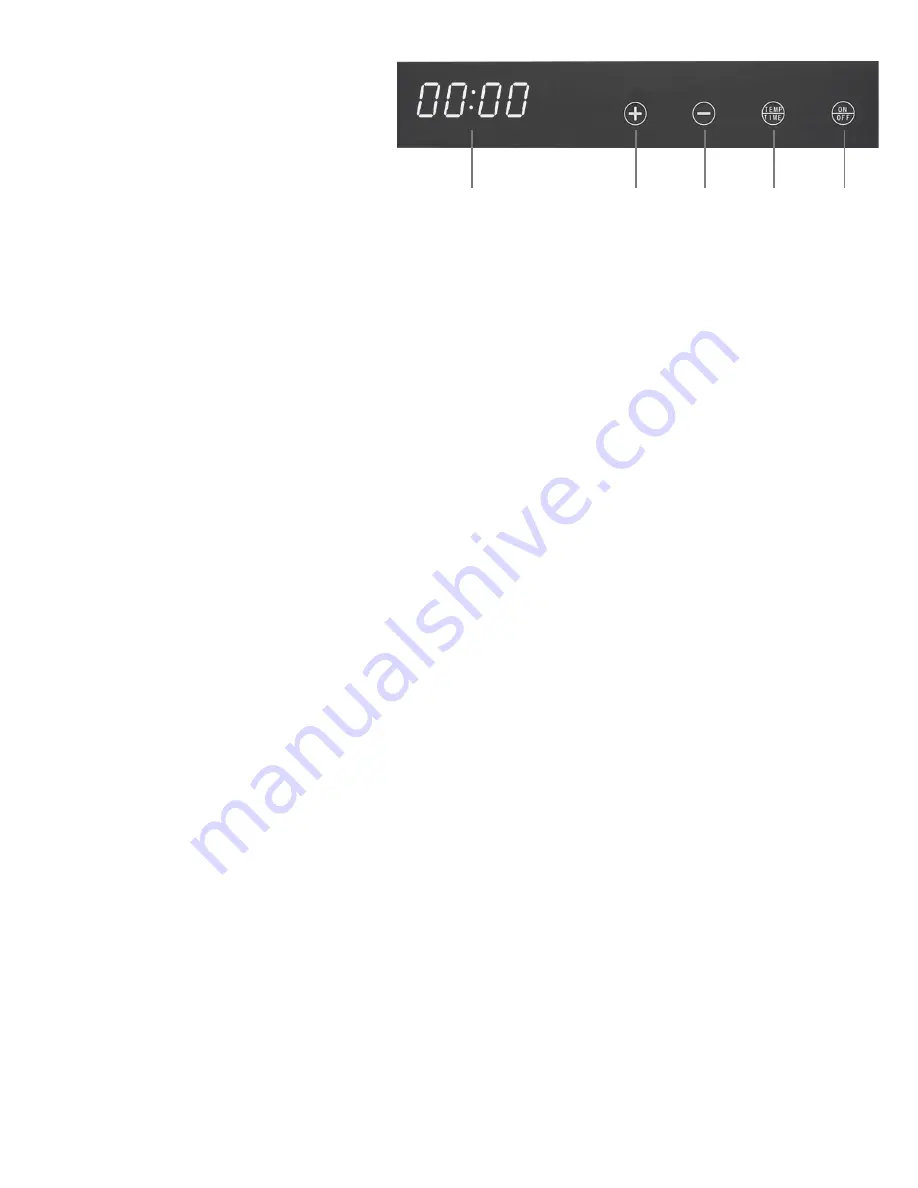
USING THE DEHYDRATOR
1. Put the food items on the trays. Do not overload
the trays and make sure food does not overlap.
Close the damper door.
2. Plug the dehydrator into a wall socket. The
screen, buttons, and ON/OFF button will
light up and the unit will beep. The screen
will show “0000”.
3. Press the ON/OFF button once. The LED screen will
show a default time of 10:00 and the default temperature
setting of 95°F (35°C). The motor and fan will start first, and after five (5) seconds, the heating element inside will start working as
well. The “:” symbol on the LED screen will be flashing as the timer begins counting down.
4. Press the TEMP/TIME button once to set the duration of the drying process. The LED screen will show you the current time setting.
Use the + or – buttons to adjust the drying time between 00:30 (30 minutes) and 24:00 (24 hours). After you finish setting the time,
the system will automatically enter operating mode for that duration at the default temperature.
NOTE: Press the + or – button once to slowly change the time in 30 minute intervals, or hold down the button to speed up the process.
5. Press the TEMP/TIME button a second time to set the temperature. Use the + or – buttons to set the drying temperature between
95°F and 167°F. Once you finish setting the drying temperature, the unit will start operating at that temperature automatically and
the screen will display the countdown until the timer you set completes. See the notes at the end of this section for recommendations
about choosing a temperature setting.
6. During the drying process, you can change or check the drying time by pressing the TEMP/TIME button. If you tap the TEMP/TIME
button once, it will show you the remaining drying time. Once the remaining time is displayed, press the + or – buttons if you want
increase or decrease the drying time.
NOTE: Remember that the dehydrator should not run for more than 24 hours at a time and will need to cool down between uses. Do
not add time if your food has been dehydrating for 24 hours already.
USEFUL INFORMATION ON FOOD DEHYDRATION
• For thin/small pieces as well as smaller loads of food, you want to keep the temperature lower.
• For larger loads as well as bigger/thicker pieces of food, you’ll want to set the temperature higher.
• Toward the end of the drying cycle, you can also turn the thermostat down and decrease the temperature slightly, allowing you
more control over the final moisture level in the food.
• The air vents on the trays allow air to be circulated and increases the efficiency of the dehydrator.
• Depending on the amount of moisture in the food itself and the humidity in the air, the amount of time needed to dehydrate your
food will vary. Always make sure to operate the dehydrator in a dust-free, well-ventilated, warm, and dry room.
• We recommend keeping a record of the humidity and weights of the produce before and after drying, as well as the drying times.
This allows you to become accustomed to your dehydrator’s operation and adjust your drying times accordingly as you become
more familiar with perfecting the process.
• Fruit and vegetables dried in your food dehydrator will look different than the ones you might have purchased previously from
health food stores and supermarkets. This is because your food dehydrator eliminates the need for preservatives and artificial
coloring, resulting in a healthier snack, but one that might look a little different than you were originally expecting.
TIPS FOR DRYING
Remember, drying time for produce will vary based upon the following factors:
1. Thickness of the pieces/slices
2. Number of trays being dried simultaneously
3. Volume of the food to be dried
4. Moisture or humidity in the environment
5. Your preferences for drying for each type of food
In order to achieve your ideal level of dehydration, we recommend that you follow these tips:
1. Check your food every hour.
2. Rotate and/or re-stack the drying trays if you notice uneven drying.
3. Label the food with contents being dried, date, and weight before drying. It can also help to note the drying time on the label for
future
reference.
4
Screen
Up
button
Down
button
TEMP/TIME
button
ON/OFF
button


