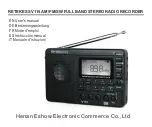
Parts/controls
• Light
on/off
button
• Power
button
• Tuner
buttons
• LCD
display
•
Display backlight button
• Volume
buttons
• Reset
button
•
Locking carabiner hanging hook
• Telescoping
antenna
•
Rubber ports cover
• 3.5mm
Headphone
Jack
• USB
in
• Micro
USB
• 8-pin
Lightning
adapter
• Hand
crank
•
Crank reset indent
• Charging
indicator
• Solar
panel
•
Battery access panel (takes 3 AAA batteries)
• Radio
speaker
•
LED bulb array
First Use: Charge the Radio
Crank method:
• Pull open the hand crank.
• Turn the crank (clockwise or counterclockwise) in a gentle, continuous motion at fewer than 120 rotations per minute; fast
cranking may over heat the components.
• Cranking for 60 seconds provides enough power for light for 30 minutes and radio for 20 minutes at medium volume.
Solar Method:
• Place the unit in direct sunlight with the solar panel pointed up.
• The red charging indicator illuminates as the sun charges the radio.
• Leave in the sun as long as possible; there are too many variable factors to solar charging to enable a useful charging time.
USB Charging:
• Open the rubber port cover and locate the charging ports
• Connect Micro USB cable to port
• Connect the other end to a computer UBS port or use an adaptor to connect to a wall outlet or car charging port.
• It takes approximately 2 hours to reach full charge.
Regular Use:
• Whenever the radio is off, the LCD window displays ‘off’.
• Press the power button to turn unit on.
• Fully extend the antenna.
• Use the volume buttons to adjust the sound level.
• Adjust the antenna as needed.
• Select the desired band: AM, FM, NOAA.
• Use the tuner to select the desired station/channel.


