iStoragePro
|
your high performance storage solutions
www.istoragepro.com
iStoragePro - Quick start guide
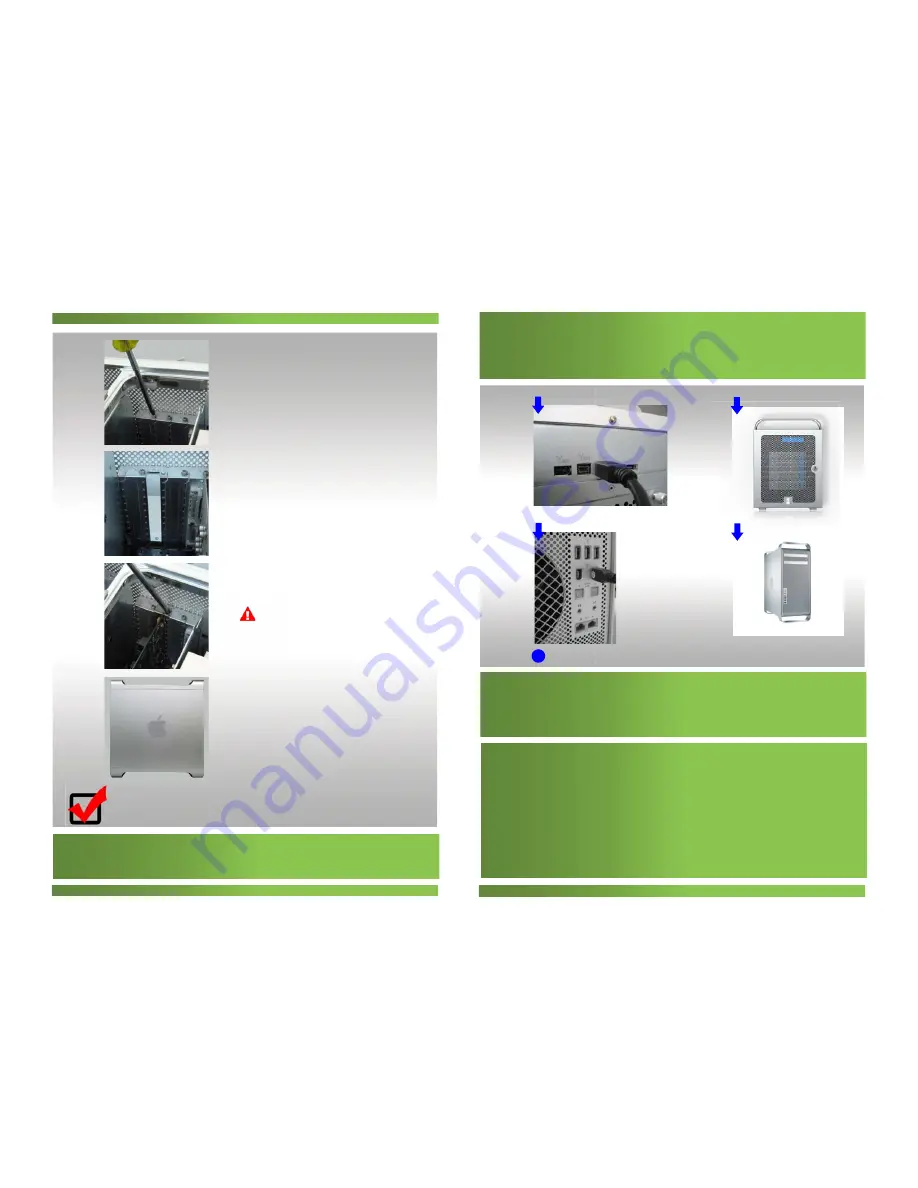
Unscrew the captive screws in the
PCI bracket and remove the bracket
Remove the slot cover from the slot
that you wish to install the card.
Consult with your iStoragePro video
experts for best slot position if you
are not sure.
Install and secure the card into the
slot with PCI bracket
Put the cover back to your computer
lock it securely.
If the PCI Express card you are
installing is full-length (12") ,make
sure it fits in the appropriate card
guide.
Your RAID controller Installation is done
E
F
Connect to Host USB/Firewire or SATA cable
Please see the cable diagram
Connect MacPro or PC computer to your iT4UFER:
Please make sure the cable connector are fully inserted and
secured between the controller and storage system. (most
common issues are loose cables causing poor connection).
Complete Basic Installation:
after connecting the cable between your Host Computer & T4 RAID
system, please power on your T4 RAID system first, and then
power on your workstation.
G
One cable between Computer & T4 System
Back View of T4 RAID System
Front View of T4
RAID System
Back View of MacPro or PC
Front View of MacPro or PC
i
H
Preparing RAID initialization and Host Operation:
Install all disk drives into disk trays and insert in the disk bays. After
turning on the RAID unit, the LCD will display “ Active”; the unit is
ready to format with your host computer. Please connect host data
cable. If you need to re-initialize the RAID set, recycle the Power,
During power up, LCD will display re-init ( Press Left arrow Set Key),
LCD will display Detecting disks, after initialize disks, LCD will
display “ init, R5 4d “” Press ( Left arrow set key to reconfirm). This
is distructive Mode. Do not use this function unless you want to
destroy old data and re-create new RAID set.
2


