Installation
12
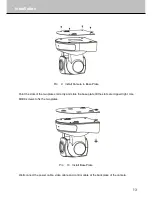
Use the camera mounting plate as a template; mark location of the three mounting holes on the
ceiling.
Pic. 7 Dimensions: Mounting Plate
Use screws at the locations you marked above to fasten the mounting plate to the ceiling.
Pic. 8 Mounting Plate
Install the camera onto the base plate, and tighten the camera with screws.
Summary of Contents for IS-SC1802E
Page 1: ...USER MANUAL Standard Definition Video Conference Camera ...
Page 2: ......
Page 8: ...About The Product 4 Remote controller Key pad Pic 3 Remote Controller ...
Page 27: ......
Page 28: ......


