Manufacturer of Quality Air Conditioning and Heating Products • www.islandaire.com • sales@islandaire.com • (800)-886-2759
23
Installation - Exterior Grille
(Cont.)
Architectural Exterior
(Rear) Grille
The architectural rear grille directs condenser airflow
and provides a protective barrier for the outdoor coil.
Either the approved Standard or Architectural grille must
be installed before installing the chassis.
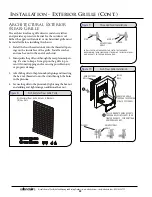
1. Install the four threaded studs into the threaded open-
ings on the inside face of the grille. Install a washer
and one hex nut to the end of each stud.
2. Manipulate the grille out through the rear plenum open-
ing. Be sure to keep a firm grip on the grille to pre-
vent it from dropping and/or causing possible injury
or property damage.
3. Attach the grille to the plenum by aligning and inserting
the hex nut threaded onto the studs through the holes
in the plenum.
4. Secure the grille to the plenum by tightening the hex nut
and adding and tightening an additional hex nut.
Architectural Rear Grille, 4 Studs, 4 Washers,
(8) Hex Nuts
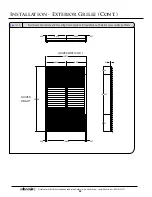
Figure 8
Architectural Rear Grille Parts
STUD
HEX NUT
WASHER
ARCHITECTURAL
GRILLE
INSTALL THE FOUR THREADED STUDS INTO THE THREADED
OPENINGS ON THE INSIDE FACE OF THE GRILLE. INSTALL WASHERS
AND HEX NUTS TO THE END OF EACH STUD.
Figure 9
Threaded Stud Installations
INSIDE
WALL
ANGLE THE GRILLE
THROUGH THE OPENING
AT BACK OF PLENUM
PLENUM
ARCHITECTURAL
GRILLE
PULL FORWARD TO GUIDE HEX NUTS
THROUGH HOLES IN PLENUM, THEN
TIGHTEN HEX NUTS. SECURE WITH AN
ADDITIONAL HEX NUT.
1
2
3
ARCHITECTURAL
GRILLE
Figure 10
Arch. Rear Grille Installation


