


10
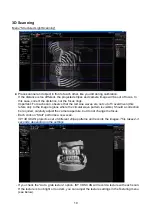
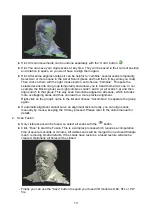
3D Scanning
Menu “Structured Light Scanning“
Place scanner and object in front of each other, like you did during calibration.
If the distance is too different, the projected stripes and camera image will be out of focus. In
this case, correct the distance, not the focus rings.
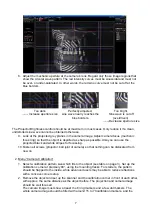
Important: For each scan, observe that the red sine waves are not cut off / overdriven (this
refers only to the image regions where the circular wave pattern is visible). Should a correction
be required, carefully adjust the camera aperture, but do not change the focus.
Each click on “Start” performs a new scan.
ISY 3D SCAN projects a set of different stripe patterns and records the images. This takes 2-4
seconds, depending on the settings.
If you check the “Auto. grab texture” option, ISY 3D SCAN will record a texture with each scan.
If the texture is too bright or too dark, you can adjust the texture settings in the Texturing menu
(see below).


