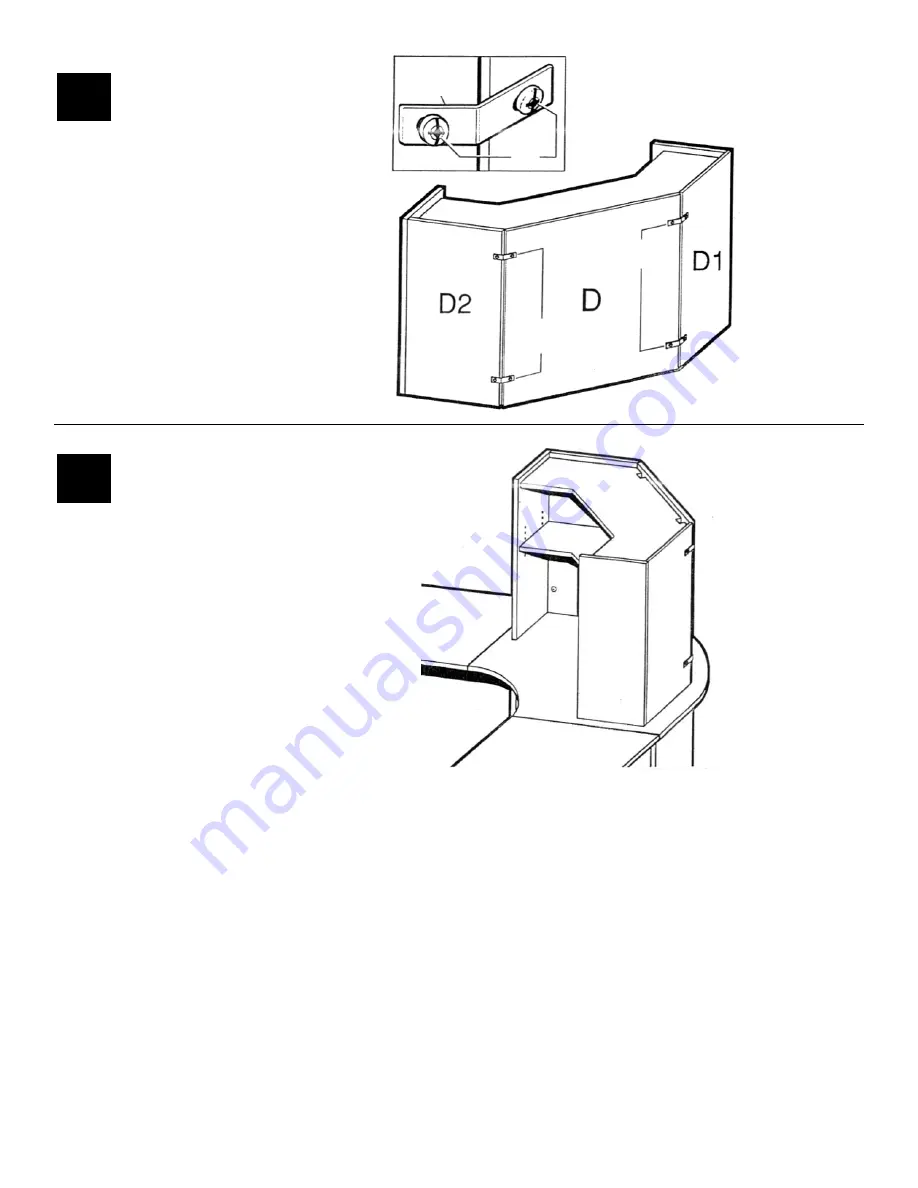
At this time, tighten all the#10x5/8” Panhead Screws(H7) that secure the AngleBrackets (H6) as shown.
#12
With the assistance of anotherperson, position thecompleted Corner Hutch ontoa Corner Units.
#13
H6
H7
Page 1: ...mallet To protect your new furniture from damage during assembly it is recommended to work on a carpeted surface CAUTION On assemblies requiring glue make sure the unit is assembled correctly before g...
Page 2: ...Back Panel MCH48 02340454 MCH42 02340354 1 ea Left Back Panel MCH48 02340453 MCH42 02340353 1 ea A Left Side Panel 02340341 1 ea Shelf MCH48 02340424 MCH42 02340324 2 ea G B Right Side Panel 02340341...
Page 3: ...te holes The flat edge of the cam should be facing the edge of the panel Slide Rafix Cams of the panel to be attached onto the corresponding posts Using a 3 Phillips screwdriver turn the rotating port...
Page 4: ...rner Hutches assemble in a similar manner For convenience only the MCH48 is depicted in the following instructions MCH42 MCH48 H1 H1 H1 H1 H1 H1 H1 H1 G G ASSEMBLED DISASSEMBLED Using the Minifix Syst...
Page 5: ...indicated 2 H2 Insert Wood Dowels H3 into the Left Side Panel A and the Right Side Panel B where indicated 4 Insert three Minifix Cams H4 into the Left Back Panel D1 and three Minifix Cams into the Ri...
Page 6: ...cated 6 H5 H5 H5 H5 H5 H5 Select the preferred height for the Self G Install Rafix Bolts H5 into the appropriate set of pre drilled holes of the Left Side Panel A Left Back Panel D1 Back Panel D Right...
Page 7: ...el D2 with the top edges up as shown Turn the arrows of the Minifix Cams H4 clockwise to secure 8 H4 H4 Position the Back Panel D between the Left Back Panel D1 and the Right Back Panel D2 as shown At...
Page 8: ...urn clockwise to secure using a 3 screwdriver 10 Do not exceed 1 4 turn when tightening cams G G H1 With the assistance of another person position the lower Shelf G onto the Rafix Bolts H5 of the unit...
Page 9: ...his time tighten all the 10x5 8 Panhead Screws H7 that secure the Angle Brackets H6 as shown 12 With the assistance of another person position the completed Corner Hutch onto a Corner Units 13 H6 H7 H...