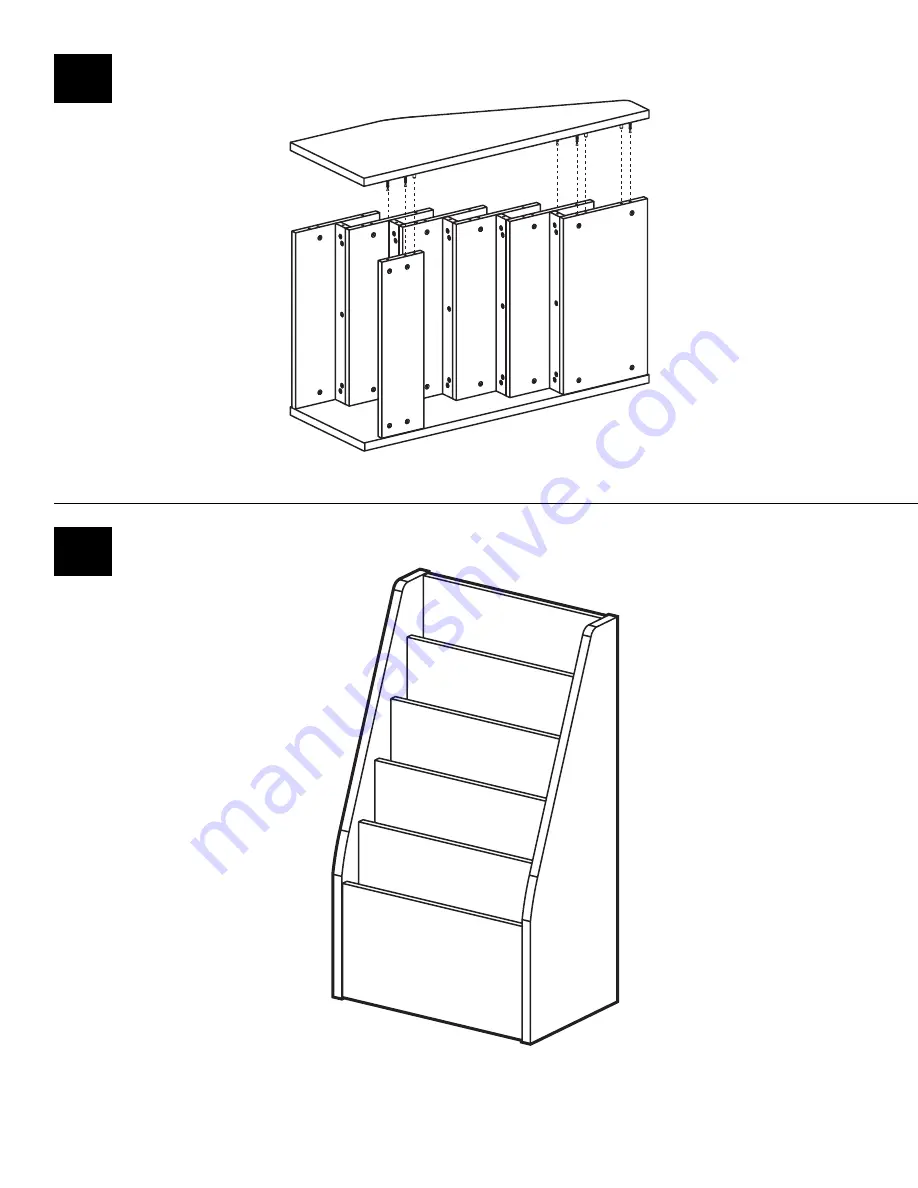
#11
Attach Right Panel (B) to unit.Secure using Minifix Cams (H2).
B
A
C
D
E
G
F
(H2)
#12
Stand upright, assemblyis complete.
Page 1: ...allet To protect your new furniture from damage during assembly it is recommended to work on a carpeted surface CAUTION On assemblies requiring glue make sure the unit is assembled correctly before gl...
Page 2: ...Front Panel 07010680 1 ea C Magazine Back 07010680 4 ea D Shelf Panel 07010636 5 ea E Back Panel 07010657 1 ea F Back Spanner 07010660 1 ea G PARTS DIAGRAM Minifix Bolt 909834 43 ea H3 Minifix Cam 90...
Page 3: ...river rotate the Cam Devices a half turn clockwise until snug To disassemble turn the Cam Devices counter clockwise and remove panels When screwing post into hole Do Not over tighten Screw post down u...
Page 4: ...3 2 Screw in Minifix Bolts H3 and push in Minifix Cam H2 to Front Panel C and Magazine Back Panel D 3 E H2 Push in Minifix Cams H2 into Shelf Panel E H3 H4 4 F H2 Push in Minifix Cams H2 into Back Pan...
Page 5: ...Panel C and Magazine Back D Secure in place by turning Minifix Cams H2 Note Observe the direction the Minifix Cams are facing Attach Front Panel C and Shelf Panel D to Left Panel A Secure in place by...
Page 6: ...nifix Cam H2 Repeat with the remaining 3 Magazine Back Shelf sub assemblies Attach Back Panel F to Left Panel A Secure using Minifix Cams H2 F D D D D D A H2 H3 H3 H1 H1 H2 E E E E E 10 Attach Spanner...
Page 7: ...11 Attach Right Panel B to unit Secure using Minifix Cams H2 B A C D D E E E E G D D F H2 H2 H2 H2 H2 H2 H2 H2 12 Stand upright assembly is complete...