background image

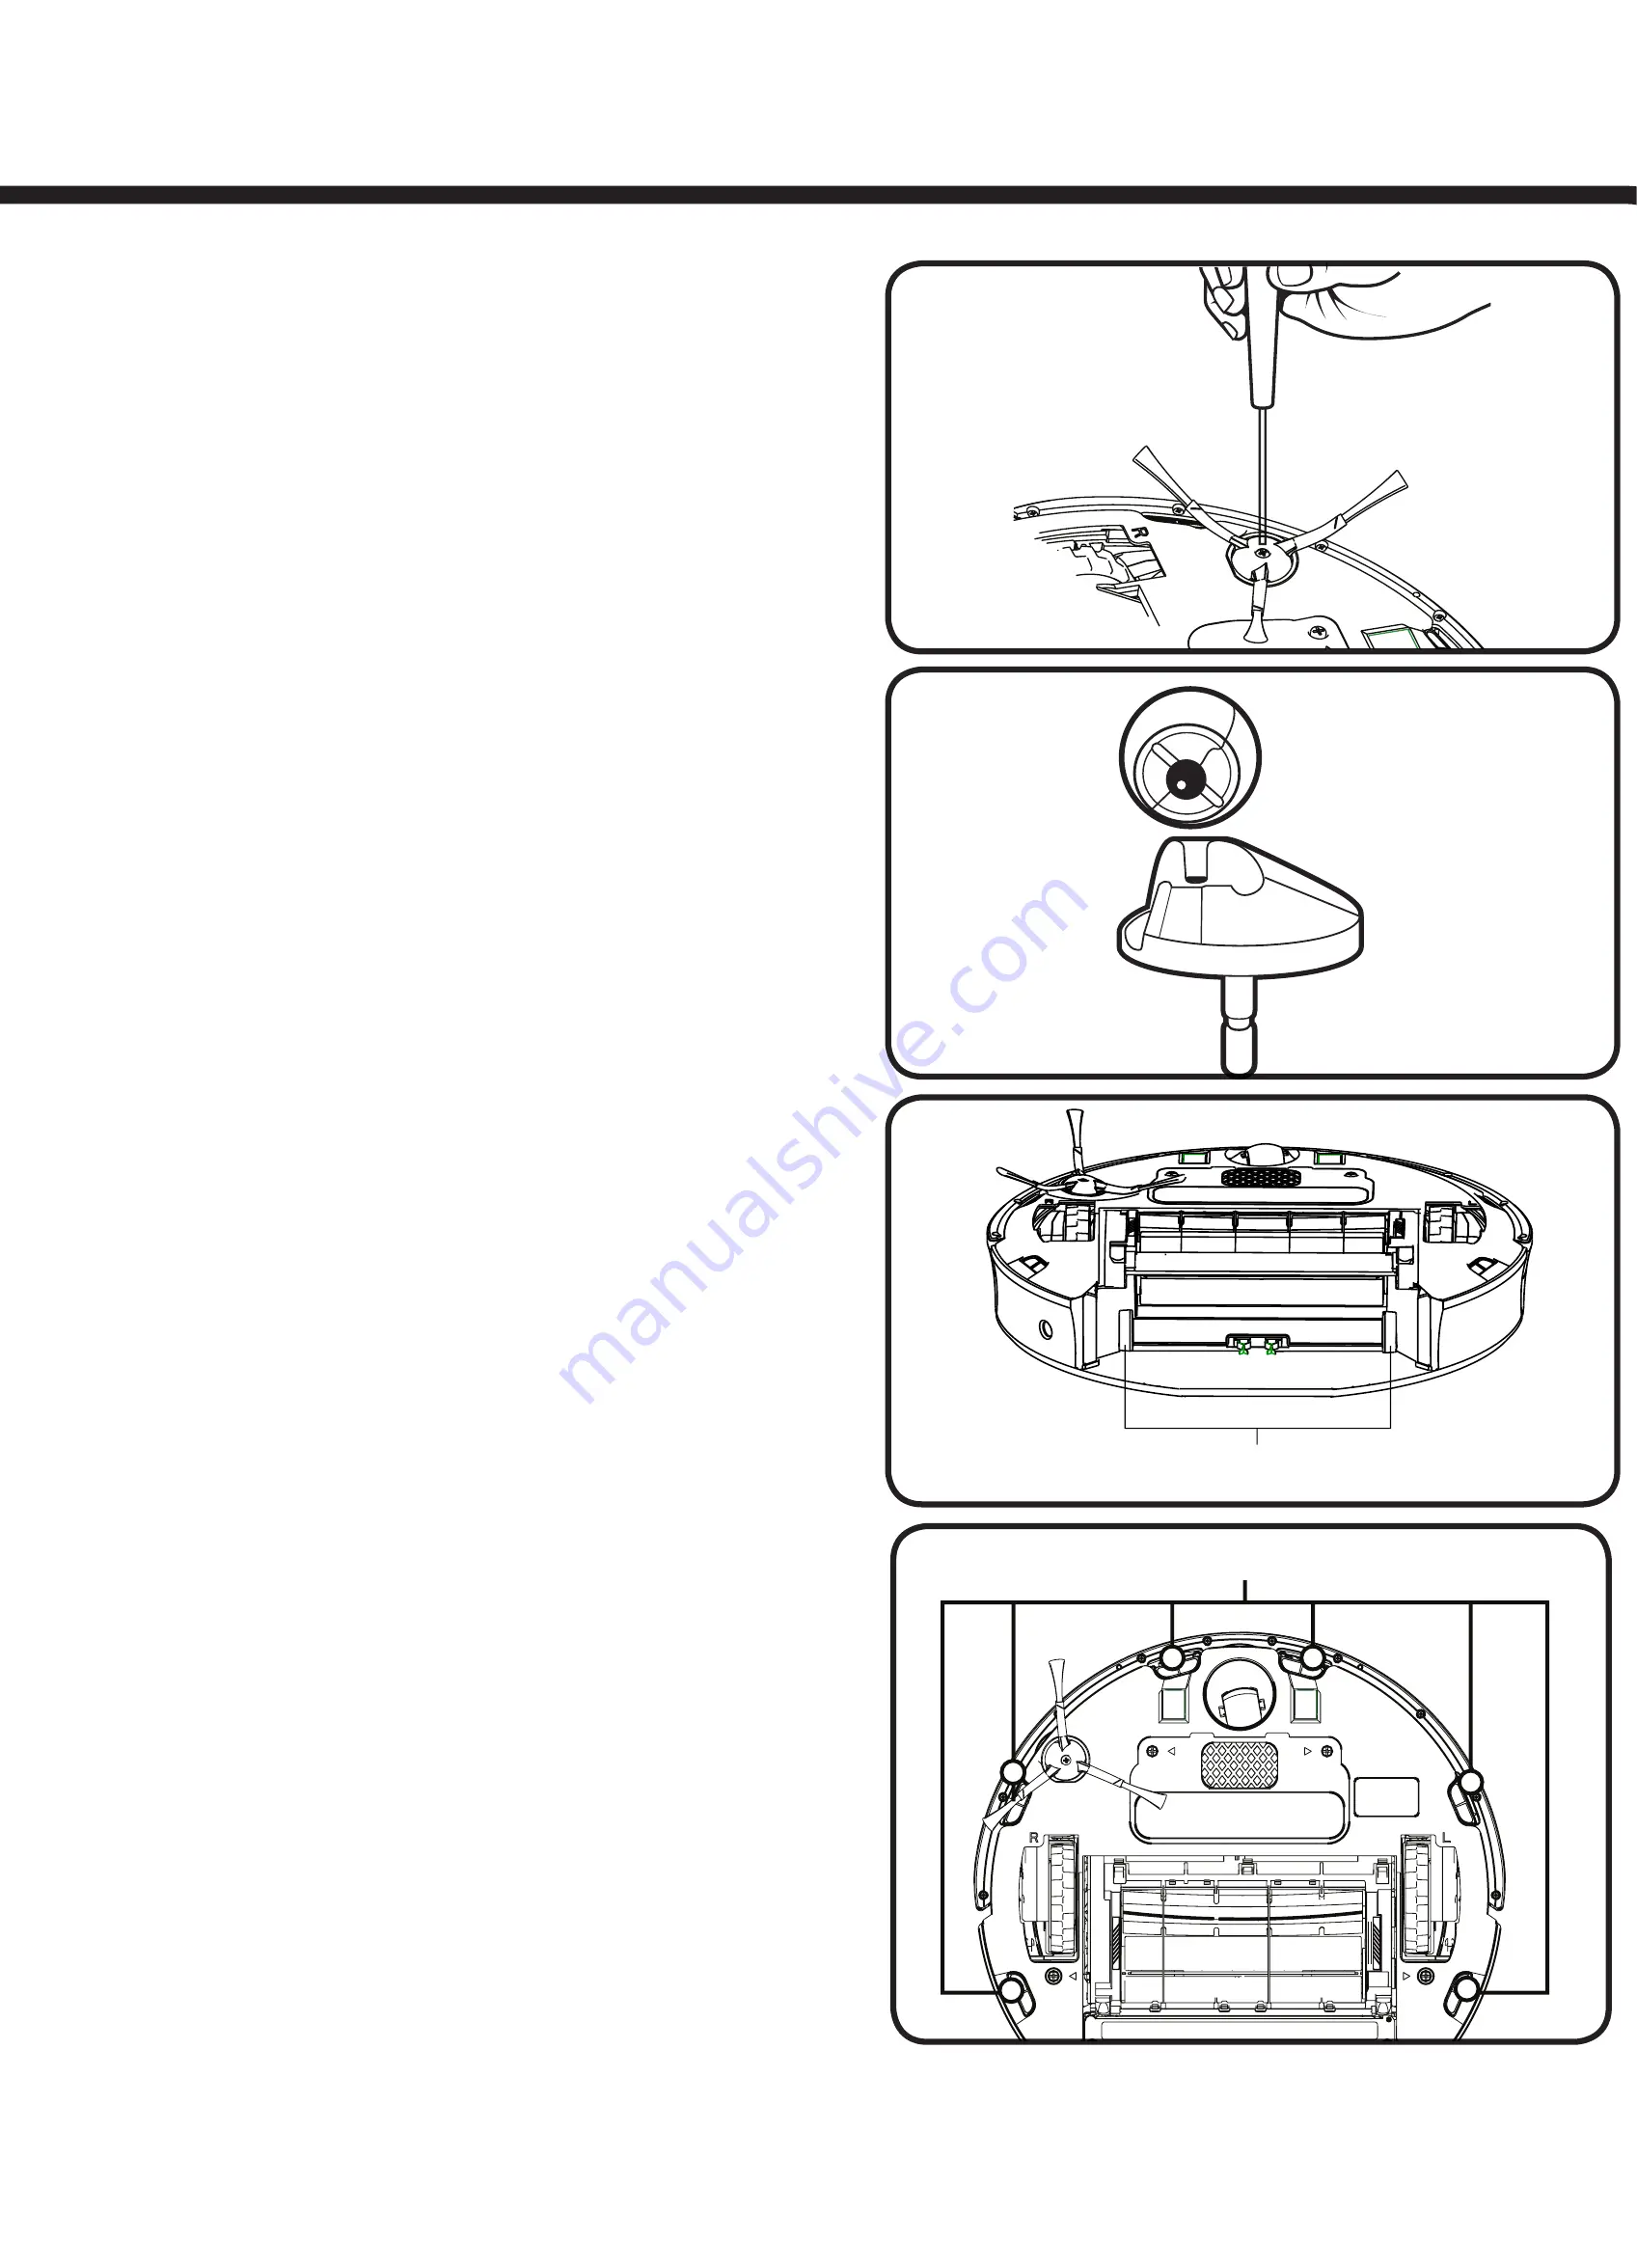
4.  To clean the side brush, use a small  

Phillips screwdriver to remove the screw 


from the center. Remove the brush,  
clean, reinstall.  


Cleaning the front wheel

1. Pull firmly on the front wheel to remove it. 

2. Remove any debris from inside the 
    wheel cavity.
3. Remove the wheel from its housing and     

    wipe clean. Pull firmly to remove the axle 

    and clear any hair wrapped around it. 
4. Reinstall all parts when finished. Make  
    sure the wheel clicks right back into place.

Cleaning the bin sensors  
(models 770 and above only)

Remove the bin and wipe the two optical  
bin sensors with a clean, dry cloth.

Cleaning the cliff sensors

Simply wipe all six cliff sensor openings 
with a clean, dry cloth.

Troubleshooting

Occasionally, something can go wrong. But  
don’t worry – there’s an early warning system. 

Your Roomba will tell you what the problem  
is. The troubleshooting light will also blink.  
To repeat an error message, just press CLEAN.

For more information you can download a detailed user manual at 

www.irobot.com

Emptying the bin

You should do this after each use. 
Ensure proper insertion of the bin each 
time as Roomba will not run without it.


Cleaning the two filters

Regular cleaning is important and  

you should replace the filters after two 

months of regular use. 


Cleaning the brushes and 
associated parts

1. Remove brush guard by lifting both 
   yellow tabs. 


2. Remove and clean the two brushes
    and brush bearings.  


3. Use the included cleaning tool to 
    remove hair easily from the bristle 
    brush by pulling it over the brush. 

Essential maintenance

Essential Maintenance   

|    Step by step

9

10

Cliff sensor openings

Bearings

Bin sensors

Summary of Contents for Roomba 700 series

Page 1: ...Roomba Vacuum Cleaning Robot 700 series Owner s Manual...

Page 2: ...omba and on behalf of all the team thank you for choosing iRobot Best Wishes Colin Angle Chairman CEO and Co Founder iRobot Corporation Looking after your iRobot Roomba Every little bit helps For best...

Page 3: ...p your Roomba on track set up Virtual Walls or Auto Virtual Walls which block off areas or Virtual Wall Lighthouses models 780 and above only to enable room to room cleaning Ready to Go If you have on...

Page 4: ...anything wood carpet tile vinyl and linoleum adjusting to different floor types It automatically senses stairs and other drops It might stall when confronting round edges and might slide over particul...

Page 5: ...een it means you ll need new batteries soon Auto Virtual Wall When an Auto Virtual Wall is set to AUTO mode the power light continuously blinks to indicate it is on When battery levels are low the Vir...

Page 6: ...to each other to the Home Base or to furniture that could block the invisible beams Otherwise your Roomba might not recognize the Lighthouses or be able to return to Home Base How to use the Virtual...

Page 7: ...a cool dry place Battery storage and charging How to remove your battery If you won t be using your Roomba for an extended period we recommend that you remove the battery To access the battery turn Ro...

Page 8: ...mba by pressing CLEAN 2 Press CLOCK 3 Use DAY HOUR and MINUTE individually to set the correct time 4 Press OK to save changes To exit or cancel press CLEAN and start again Setting 12 24 hr To switch b...

Page 9: ...your Roomba by pressing CLEAN 2 Press SCHEDULE 3 Press DAY to look through the scheduled cleaning times 4 When your Roomba is displaying the scheduled cleaning time you want to change press HOUR and...

Page 10: ...ning is important and you should replace the filters after two months of regular use Cleaning the brushes and associated parts 1 Remove brush guard by lifting both yellow tabs 2 Remove and clean the t...

Page 11: ...sure the wheel clicks right back into place Cleaning the bin sensors models 770 and above only Remove the bin and wipe the two optical bin sensors with a clean dry cloth Cleaning the cliff sensors Si...

Page 12: ...ely Start in a new location Your Roomba s cliff sensors are dirty or your Roomba is hanging over a drop Wipe your Roomba s cliff sensors with a dry cloth Start in a new location Your Roomba s side whe...

Page 13: ...charging error Your Roomba has a charging error Your Roomba has a charging error Your Roomba s battery Isn t cooling Charging error 7 Charging error 6 Charging error 5 Charging error 3 Charging error...

Page 14: ...E PARTS INSIDE REFER SERVICING TO QUALIFIED SERVICE PERSONNEL PLEASE ENSURE VOLTAGE RATING FOR ENCLOSED BATTERY CHARGER MATCHES STANDARD OUTLET VOLTAGE Always exercise caution when operating your Room...

Page 15: ...e protected with a surge protector in the event of severe electrical storms Never handle the battery charger with wet hands Always disconnect Roomba from the battery charger before cleaning Please ens...

Page 16: ...bility Requirements for household appliances electric tools and similar apparatus Part 2 Immunity Product family standard Low Voltage tests and EMC tests have been conducted by TUV Rheinland of North...

Reviews: