


Output Format
Output Format
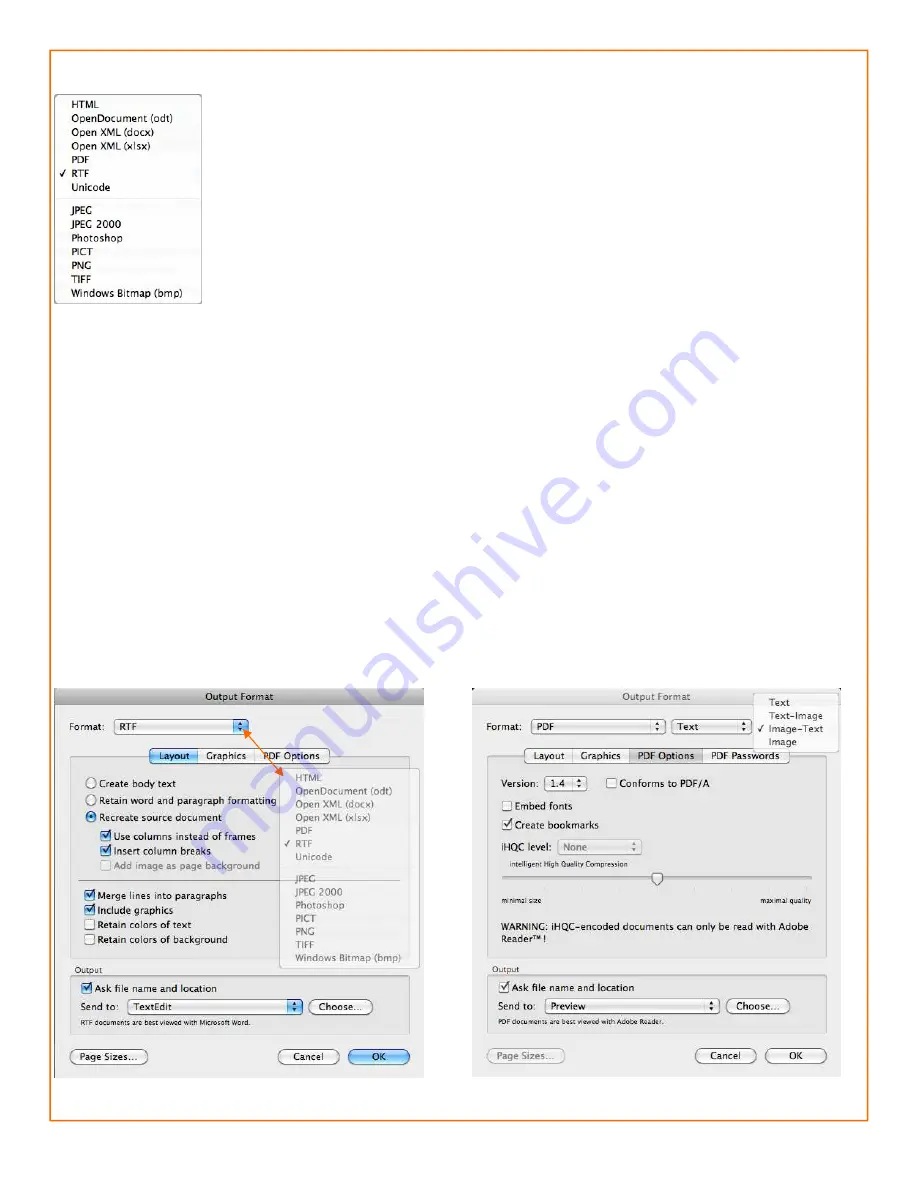
Now it is time to set where the output is going by clicking on the bottom left button or Set-
tings > Text Format. This brings up the Text Format dialogue. The choices are :
HTML
- Used for Excel or Web pages
ODT
- Open Document Format used with Open Office Word Processor
DOCX
- Used with Word 2008
XLXS
- Used with Excel 2008
- Adobe Acrobat most often you will use the Image - Text option
RTF
- Rich text format used for Word, Pages or Open Office, cross platform
Unicode
- Straight text
Different options will appear with these selections. Pictured below left is the RTF which is
the most commonly used. The next decision to make is in Layout which deals with the formatting of the output
document. For the closest replication you would select
Recreate source document
and the sub options;
Use
columns instead of frames
and
Insert column breaks
. There are occasions where such formatting is un-
needed so the
Create body text
or
Retain word and paragraph formatting
are other options.
The merge lines is checked by default but may be turned off if you are dealing with sentence fragments such
as found in poetry or song lyrics.
Page Sizes allows you to include or exclude output page dimensions.
We want Readiris to allow us to specify a file name and where to save it so the
Ask file name and location
option should be checked. The
Send to
allows you to select which application you want the results sent to. If
it’s not in the list click on Choose to navigate to it in your Applications folder on your Mac and select the pre-
ferred application. Of course that application has to be able to work with the selected format.
Click OK and these options are now set. These can be saved as the default or a reusable profile by going to
the
Settings
menu and choosing Save as default or Save.


