IRIS OC821 Setup Manual Download Page 6

2

Chapter 2

Basic Setup

This chapter provides details on how to setup and mount the camera.

System Requirement

The Iris™ camera requires the Iris™ smart hub for operation. To use the wireless 
interface on the wireless model, other wireless devices must be compliant 
with the IEEE802.11b, IEEE802.11g or IEEE 802.11n specifications. All Wireless 
stations must use compatible settings.

Front Panel

1. Lens 

No physical adjustment is required or possible for the lens, but you should 
ensure that the lens cover remains clean. The image quality is degraded if 
the lens cover is dirty or smudged.

2. Infrared Motion Sensor 

The infrared motion sensor is designed for human body detection.

3. Privacy LED 

On (Green) - The Privacy function is enabled. 

Off - The Privacy function is disabled.

Rear Panel

1. LAN port


Use a standard LAN cable to connect your Network camera to a 
10/100BaseT (or faster) Ethernet router or switch.

  The LAN cable should only be connected or disconnected when the 

camera is powered OFF. Attaching or detaching the LAN cable while the 
camera is powered on does NOT switch the interface between wired and 
wireless.

  The LAN cable is only used while pairing the camera to Iris™. After 

pairing is complete, the LAN cable is no longer required for video data 
transmission.  Please visit lowes.com/iris to learn more about pairing your 
camera with Iris™.

2. Power Input 

Connect the supplied 12V power adapter here. Do not use other power 
adapters; doing so may damage the camera.

3. External Input/Output 

GPIO terminal block including 1 input port and 1 output port. 

  The GPIO block is NOT used by Iris™.
4. Memory Card Slot


The memory card slot is not used with the Iris service and is disabled for all 
installations. 

RC8221 Iris

 Camera

6

OC821 Iris

 Outdoor Camera

RC8221 Iris

 Camera Set-Up Guide

Mounting the Outdoor Camera

NOTE: Please ensure the camera is configured and added to the network before 
permanent mounting.
NOTE:


Prior to permanently installing your camera, ensure that it is within range of your 

wireless router.  To test it is working, place the camera in its final location and use the 
Iris website or mobile app to stream live video.

Tips for Best Outdoor Camera Placement

a. Avoid facing the camera directly into the sunrise (east) and sunset (west)

b. It is generally better to aim the camera with a slight downward angle

c. Avoid aiming the camera towards bright nighttime objects, such as streetlights,  
  porch lights, and vehicle headlights

d. If you receive false motion triggers, consider shadows which may be cast over the  
  camera or in its view.

e. To prevent false motion triggers, avoid positioning close to objects which move 
  on windy days

f.  Avoid mounting the camera in direct sunlight, as the passive infrared sensor (PIR)  
  works best at cooler temperatures.  

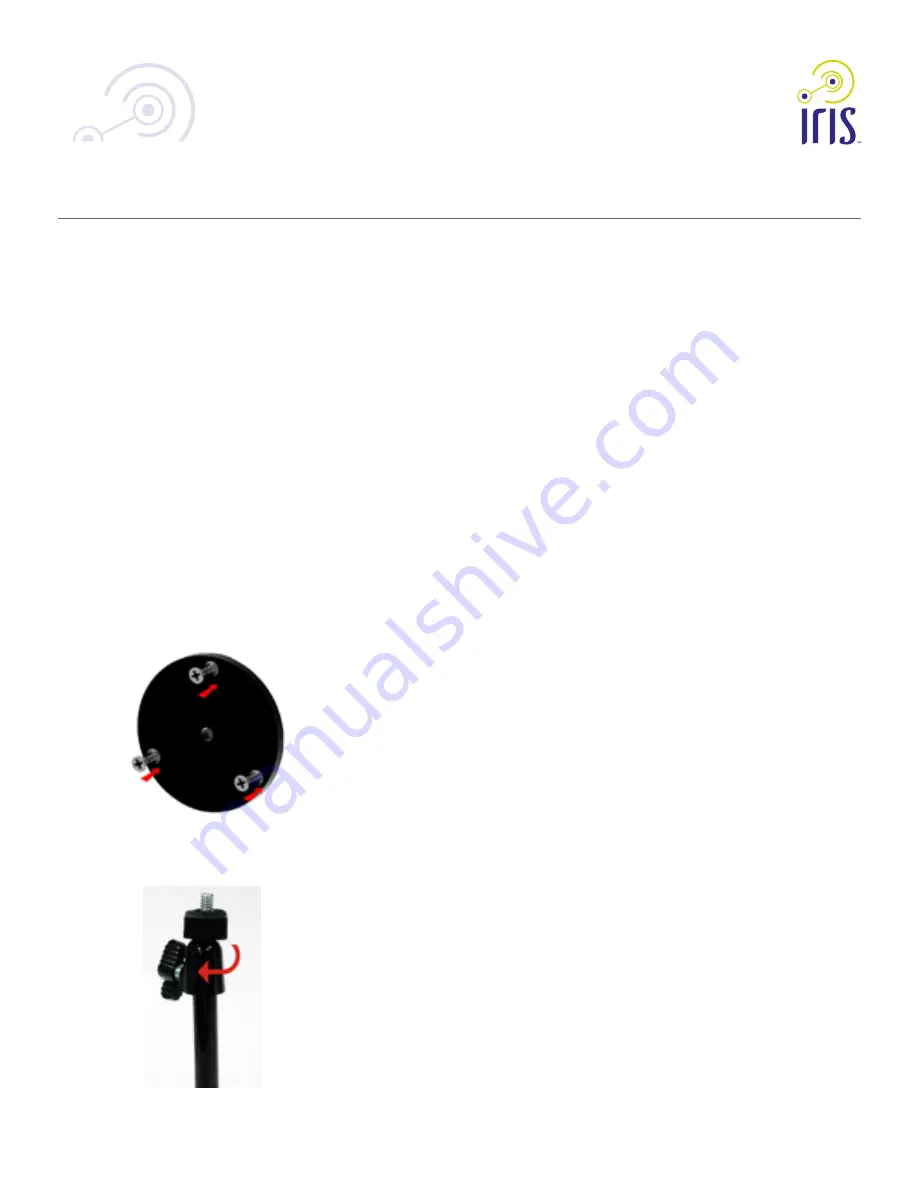
Step 1: Install the base

a. Hold the base on the wall at the desired location.

b. Screw the three mounting screws through the base into the wall through

Step 2: Attach the stand and swivel connector together

a. Ensure the stand and swivel are secure before proceeding

Summary of Contents for OC821

Page 1: ...OC821 Iris Outdoor Camera Set Up Guide RC8221 Iris Camera Set Up Guide ...

Page 2: ...ris Camera 2 OC821 Iris Outdoor Camera RC8221 Iris Camera Set Up Guide C Package Contents A Outdoor Camera B Power Adapter C Camera Mounting Bracket Base Stand and Swivel Connector D Mounting Screws E Antenna x2 F Power Extension with water sealing cap G Ethernet Cable with water sealing cap H 10 ft Power Extension Cable I Water Sealing LAN Port Cover Chapter 1 Introduction This chapter provides d...

Page 3: ... camera 3 External Input Output GPIO terminal block including 1 input port and 1 output port The GPIO block is NOT used by Iris 4 Memory Card Slot The memory card slot is not used with the Iris service and is disabled for all installations RC8221 Iris Camera 3 OC821 Iris Outdoor Camera RC8221 Iris Camera Set Up Guide Chapter 2 Basic Setup This chapter provides details on how to setup and mount the...

Page 4: ...d for all installations RC8221 Iris Camera 4 OC821 Iris Outdoor Camera RC8221 Iris Camera Set Up Guide Rear Panel 1 Antenna The antennae are adjustable Best results are usually obtained with the antennae positioned vertically however they can be adjusted to best fit the camera install location 2 Power Port The supplied 12V power adapter plugs in here to power on the Outdoor Camera Do not use any o...

Page 5: ...mera a Plug the end of the Ethernet cable with water sealing cap into the back of the camera b Secure the water sealing cap to create a water tight seal c Plug the other end of the Ethernet cable into an available LAN port on your router NOTE Using the wired Ethernet interface is required for initial camera configuration with Iris After configuration of the wireless network from the Iris website o...

Page 6: ...t use other power adapters doing so may damage the camera 3 External Input Output GPIO terminal block including 1 input port and 1 output port The GPIO block is NOT used by Iris 4 Memory Card Slot The memory card slot is not used with the Iris service and is disabled for all installations RC8221 Iris Camera 6 OC821 Iris Outdoor Camera RC8221 Iris Camera Set Up Guide Mounting the Outdoor Camera NOT...

Page 7: ...onnected when the camera is powered OFF Attaching or detaching the LAN cable while the camera is powered on does NOT switch the interface between wired and wireless The LAN cable is only used while pairing the camera to Iris After pairing is complete the LAN cable is no longer required for video data transmission Please visit lowes com iris to learn more about pairing your camera with Iris 2 Power...

Page 8: ...and is disabled for all installations RC8221 Iris Camera 8 OC821 Iris Outdoor Camera RC8221 Iris Camera Set Up Guide Appendix A Specifications Camera Model Network Camera OC821 Dimensions 103 mm W x 94 mm H x 43 mm D Video compression H 264 MPEG4 and MJPEG Image resolution 1280 x 720 720p 640 x 480 VGA system default 320 x 240 QVGA 160 x 120 QQVGA Network Protocols TCP IP HTTP HTTPS DHCP NTP SMTP ...

Page 9: ...ect the supplied 12V power adapter here Do not use other power adapters doing so may damage the camera 3 External Input Output GPIO terminal block including 1 input port and 1 output port The GPIO block is NOT used by Iris 4 Memory Card Slot The memory card slot is not used with the Iris service and is disabled for all installations RC8221 Iris Camera 9 OC821 Iris Outdoor Camera RC8221 Iris Camera...

Reviews: