background image

English English

Mac OS

1. Insert the 

IRIScan™

 disc in the DVD-ROM drive of the computer.

2. Click the 

IRIScan™ Pro 3 Cloud

 icon that appears on the Desktop.

3. Open the 

IRIScan™ Pro 3 Cloud Driver

 folder, and run the installer.


Follow the on-screen instructions. 

4. Return to the DVD-ROM content and install the other software applications.


Note:

 all license numbers required to activate the software can be found on the license sheet included in the box.

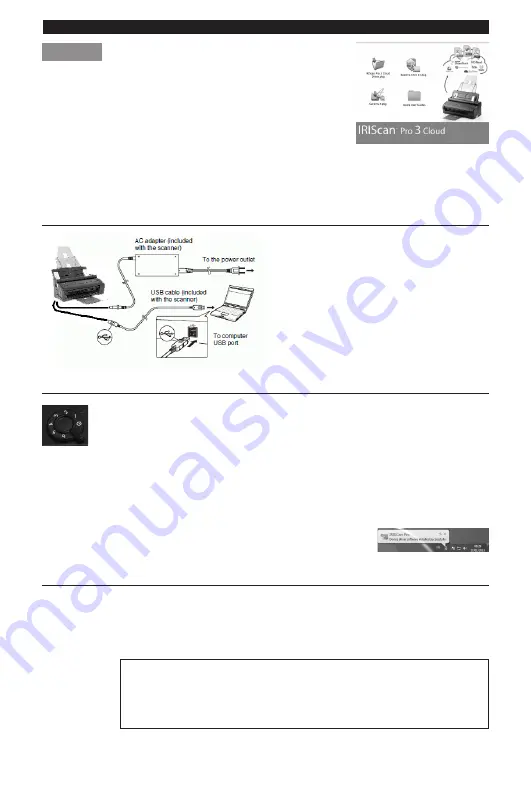
Step 3: Connect the Scanner to the Computer


Notes:


• 

 Make sure the scanner power is OFF 

before connecting it.


• 

 Instead of the regular power cable, you 

can also use the USB power cable.

Step 4: Power ON the Scanner


•  Turn the power knob clockwise to any of the numbers.


•  The LED will light up red, and then turn green.


Note:

 if the LED stays red while the scanner is connected to your computer, this means a 

problem occurred. Refer to our website 

www.irislink.com/support

 for help.


 Note:

 on Mac OS, the LED does not turn green automatically. You need to select the 

IRIScan™ as scan  source inside a scanning application first.


•   If the driver is installed successfully, a balloon message appears on the task bar 

(in Windows).

Step 5: Scanning Documents

The 

IRIScan™ Pro 3 Cloud

 can scan documents of different sizes, ranging from business cards to  

A4/Legal.

You can use it to scan stacks of documents using the document feeder, or scan sheets separately using 

the detachable base unit.

IMPORTANT:

 the scanner must be used from within scanning applications, such as 

Readiris™ and Cardiris™. Pushing the 

Scan

 button as such does not work, unless 

the Button Manager (PC only) is installed and configured correctly. Refer to the 

Readiris™ and Cardiris™ 

Quick User Guides

 on the DVD-ROM to learn how to use 

these applications with the scanner.

Summary of Contents for IRIScan Pro 3 Cloud

Page 1: ...canning Documents Step 6 Using the Button Manager PC only Tips Step 1 Check the Accessories Step 2 Install Readiris the Scanner Driver and the other Software Applications Important First install Readiris before you install the scanner driver or Button Manager Then install the scanner driver and software applications before connecting the scanner to the computer Make sure you have the required admi...

Page 2: ...s red while the scanner is connected to your computer this means a problem occurred Refer to our website www irislink com support for help Note on Mac OS the LED does not turn green automatically You need to select the IRIScan as scan source inside a scanning application first If the driver is installed successfully a balloon message appears on the task bar in Windows Step 5 Scanning Documents The...

Page 3: ... Center the document using the paper size marks on the tray Detaching the base unit from the document feeder The base unit can be detached from the document feeder That way it can be used as a convenient portable scanner 1 Press and hold down the release button at the bottom right side of the scanner 2 Tilt the base unit towards you and then detach it from the feeder Step 6 Using the Button Manage...

Page 4: ...es Readiris Corporate 14 5 Name the application 6 Select a file format supported by the application then click OK IMPORTANT to scan multiple pages into a single file select Tagged Information File TIF 7 Select Readiris and click the Add button in the middle of the window 8 Add a configuration 9 Select a color mode and resolution and click OK TIP a resolution between 300 and 600 dpi is recommended ...

Page 5: ...lot 4 If that is not the case use your fingers to press and hold the two sides of the pad assembly to remove it 5 Insert the rubber part into the slot and re attach the pad assembly Note you find an extra pad assembly in the IRIScan package should the current one need replacing recommended after 20 000 scans or in case of repeated paper jams Should you experience issues when using IRIScan Pro 3 Cl...

Reviews: