www.iReliev.com
5
SET UP PROCEDURES
For best results, we recommend using the heating pad in either a lying or
sitting position. To start, set the heating pad on the lowest setting.
For minor aches and pain, a low settingmight be more than enough
to reduce pain and stiffness. You can gradually increase the
intensity of heat, if needed.
1.
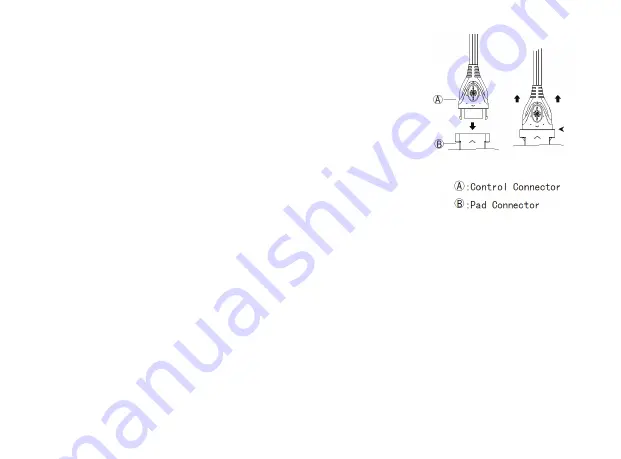
After control is connected to pad, plug into 120V AC electrical
outlet. The LCD display lights up and goes out immediately.
2.
To turn the pad on, press the Power Button. The LCD display
lights up. The default temperature setting is the Lowest setting
(113F) and the default timer setting is 1h.
3.
Press Temp Button to select temperature settings.
The setting grid increases one by one each time you press
the button. The temperature changes accordingly: (113F/122F/131F/140F/149F/158F).
The pad starts heating immediately when you loose the button. When heated to the temperature of
selected setting, it stays at a stable status.
4.
Press Timer Button to select Auto-Off timing. The default setting is 1:00. The timing sequence is:
15min/30min/45min/60min/90min/120min. When you loose the button, it starts countdown timing
automatically by minute.
5.
Press Temp Button for 2 to 3 seconds, it switches freely between Fahrenheit and Celsius.
6.
If there is no more selection on the settings, the pad will turn into operation status. The pad will shut
off automatically when time reaches the selected setting. LCD display goes completely dark as well.
7.
DURING USE, NEVER PLACE THE CONTROLLER UNDER THE PAD.
8.
THE CONTROLLER MUST MATCH CORRESPONDENT MODEL. NEVER INSERT TO DIFFERING PAD.
locate and align arrows
Summary of Contents for HC-2412-S
Page 13: ...www iReliev com 13 OTHER PRODUCTS...
Page 22: ...www iReliev com 22...
Page 23: ...www iReliev com 23...


