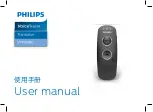
background image

© 2018 Copyright Philip Morris Products S.A.

BATTERY REMOVAL INSTRUCTIONS 

(FOR DISPOSAL AND RECYCLING)


Batteries must not be removed by the consumer. At end of product life, only an authorized 

recycler may safely remove batteries by using the following steps.

IQOS 3 Multi (A1405):

Step 1:  Check the voltage: The device should be fully discharged before disassembling it.
Step 2:  Rear  housing  removal  (the  use  of  a  jig  is  recommended):  Remove  the  housing 

hooks, which are located on the lower side of the device (on the side, close to the 

USB socket). The rear housing can now be removed.

Step 3:  Sub-assembly removal: Enlarge both sides of the extruded chassis, then remove 

the core sub-assembly.

Step 4:  Battery  removal:  Gently  pull  the  battery  away  from  the  adhesive  backing. 

Remove the screws which secure the PCB, then carefully remove the battery and 

PCB  from  the  casing.  Disconnect  the  battery  cable  by  using  the  relevant  tool 

(AVX 06-9296-7001-01-000).

Step 5:  Disposal: Recycle the battery, assembly and PCB according to local regulations.

Hereby, Philip Morris Products S.A. declares that IQOS 3 Multi is in compliance with the 

essential requirements and other relevant provisions of Directive 2014/53/EU. The official 

Declaration of Conformity may be found at: www.pmi.com/declarationofconformity

IQOS 3 Multi Model A1405 operates within the 2.402 – 2.480GHz frequency band with a 

maximum RF output power below 10.0 dBm.
Designed  and  manufactured  under  the  authority  of  Philip  Morris  Products  S.A.,  Quai 

Jeanrenaud 3, 2000 Neuchâtel, Switzerland.

The Bluetooth® word mark and logos are registered trademarks owned by the Bluetooth SIG, Inc. 

and any use of such marks by Philip Morris Products S.A. and its affiliates is under license. Other 

trademarks and trade names are those of their respective owners.

Summary of Contents for 3 MULTI

Page 1: ...IQOS 3 MULTI User Guide...

Page 2: ...RN ON Press and hold IQOS Multi Button for 4 seconds then release Battery Status Light and Button Status Light will flash 2 OPEN Rotate Lid counter clockwise Charging Port Battery Status Light Button...

Page 3: ...ptor 3 INSERT TOBACCO UNIT Insert and gently press the compatible heated tobacco unit to the line on filter 4 START HEATING Hold Button until IQOS Multi vibrates and Button Status Light pulses white H...

Page 4: ...l 5 BEGIN USE Start using once IQOS Multi vibrates twice and Button Status Light is solid white 6 NEARLY COMPLETE To signal the last 30 seconds IQOS Multi will vibrate twice and Button Status Light pu...

Page 5: ...ool and rotate gently Clean daily for optimal experience How to use your IQOS Multi ENGAGE WITH IQOS For the full user guide and Customer Care support visit www iqos com Download the IQOS Connect App...

Page 6: ...then release Battery Status Light and Button Status Light will fade in blink twice then progressively fade in to confirm a reset LIGHT BLINKS WHITE TWICE IQOS Multi is outside operating temperature 0...

Page 7: ...of IQOS and units reported experiencing abdominal pain chest pain choking sensation cough difficulty breathing dizziness dry mouth dry throat gingivitis headache malaise nasal stuffiness nausea mouth...

Page 8: ...using Safety Extra Low Voltage See the Technical Data section of this User Guide for details on voltage Do not use IQOS where the use of electronic devices is prohibited Only charge the IQOS 3 Multi i...

Page 9: ...ing or ingest food or drink If vapor from leaking battery liquid is inhaled get fresh air and seek medical attention If fluid from leaking battery is in contact with skin wash hands and do not touch e...

Page 10: ...luding batteries must not be disposed of with your other household waste Instead it is your responsibility to dispose of your waste equipment by taking it to a designated collection point for the recy...

Page 11: ...the PCB then carefully remove the battery and PCB from the casing Disconnect the battery cable by using the relevant tool AVX 06 9296 7001 01 000 Step 5 Disposal Recycle the battery assembly and PCB a...

Reviews: