background image

Installation of the Smart 

Life App

1.

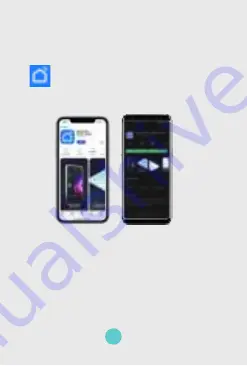
 Open the Google Play or App Store and 

   download the Smart Life App. The Smart Life  
   App can be recognized by the app icon

2. Create an account in the Smart Life App

Installation of the Smart Plug

Step 1 - Prepare Smartphone

1. Connect your smartphone to your 2.4Ghz WiFi 

    network. If you find two WiFi networks in your house, 

    the WiFi network without “5Ghz” in the network 
    name is usually the 2.4Ghz network.
2. Enable bluetooth on your smartphone.
3. Open the Smart Life App on your Smartphone.

05

Summary of Contents for IQ154

Page 1: ...SMART PLUG Slimme Stekker User Manual Gebruikershandleiding Thank you for choosing Iqonic Please read these instructions carefully before using Model IQ154 ...

Page 2: ...n or have any other questions about the product please contact us at info brightinnovations nl Intended Use This Iqonic smart plug connects to your 2 4Ghz WiFi network via the free Smart Life app Once installed the smart plug can be turned on and off through your smartphone or tablet from anywhere in the world You can also set timers and automations to automatically turn on or off the smart plug a...

Page 3: ...Table of Contents Product schema 04 Product parameter 04 Installation of the Smart Life App 05 Installation of the Smart Plug 05 How to use 07 Troubleshooting 07 03 ...

Page 4: ...ema ON OFF button Product Parameter Model number IQ154 IoT Platform Tuya Voltage AC100 240V Ampere 16A Max AC frequency 50 60Hz Working temperature 20 60 C WiFi frequency 2 4Ghz only Maximum power output 3680W 04 ...

Page 5: ...Create an account in the Smart Life App Installation of the Smart Plug Step 1 Prepare Smartphone 1 Connect your smartphone to your 2 4Ghz WiFi network If you find two WiFi networks in your house the WiFi network without 5Ghz in the network name is usually the 2 4Ghz network 2 Enable bluetooth on your smartphone 3 Open the Smart Life App on your Smartphone 05 ...

Page 6: ...ton to continue installation 4 Follow the steps on the screen wait for your device to be added and finalize installation 5 Your device is ready for use 1 Connect the smart plug to the power socket and wait for the indicator light to start blinking If the indicator light does not start blinking press and hold the ON OFF button for 5 seconds until the indicator light starts blinking 2 Tap the blue si...

Page 7: ... smart plug to Smart Life App Ensure that your smartphone is connected to the 2 4Ghz WiFi network If there is no 2 4Ghz WiFi network available you can activate this via your router settings Please refer to your router manual for instructions to activate the 2 4Ghz WiFi network Cannot add smart plug to Google Home or Alexa While adding your smart plug to services from external vendors you have to e...

Page 8: ...ebt over het product neem dan contact met ons op via info brightinnovations nl Bedoeld gebruik Deze slimme stekker van Iqonic verbindt met jouw 2 4Ghz WiFi netwerk via de gratis Smart Life App Eenmaal geïnstalleerd kan de slimme stekker overal ter wereld worden in en uitgeschakeld via jouw smartphone of tablet Je kunt ook timers en automatiseringen instellen om de slimme stekker op een bepaald tij...

Page 9: ...Inhoudsopgave Informatie schema 10 Product specificaties 10 Installatie van de Smart Life App 11 Installatie van de Smart Plug 11 Hoe te gebruiken 13 Probleemoplossing 13 09 ...

Page 10: ...hema AAN UIT knop Product Specificaties Modelnummer IQ154 IoT Platform Tuya Voltage AC100 240V Ampère 16A Max AC frequentie 50 60Hz Werktemperatuur 20 60 C WiFi frequentie alleen 2 4Ghz Maximum power output 3680W 10 ...

Page 11: ... 4 Creëer een account in de Smart Life app Installatie van de Smart Plug Stap 1 Smartphone voorbereiden 1 Verbind je smartphone met je 2 4 Ghz WiFi netwerk Als je twee wifi netwerken in je huis aantreft is het wifi netwerk zonder 5Ghz in de naam meestal het 2 4 Ghz netwerk 2 Zet bluetooth aan op je smartphone 3 Open de Smart Life app op je smartphone 11 ...

Page 12: ...pen op het scherm wacht tot het apparaat is toegevoegd en voltooi de installatie 5 Het apparaat is klaar voor gebruik Optie 1 Automatische herkenning aanbevolen 1 Sluit de slimme stekker aan op het stopcontact en wacht tot het indicatielampje begint te knipperen Als het indicatielampje niet begint te knipperen houd dan de AAN UIT knop 5 seconden ingedrukt totdat het indicatielampje begint te knipp...

Page 13: ...an Tuya Smart Life te raadplegen Probleemoplossing Kan stekker niet toevoegen aan Smart Life App Zorg ervoor dat jouw smartphone met het 2 4Ghz WiFi netwerk is verbonden Als er geen 2 4Ghz netwerk in jouw woning actief is kun je deze via de router settings activeren Raadpleeg hiervoor de handleiding van jouw router Kan stekker niet aan Google Home of Alexa toevoegen Bij het toevoegen van de smart ...

Page 14: ...hat the device cannot be disposed of as household waste but it must be disposed of according to the European Directive 2012 19 EC Waste Electrical and Electronics Equipment WEEE and the national derivatives legislation to prevent potential negative consequences for the environment and to human health 14 ...

Page 15: ...Bright Innovations B V Amandelstraat 33 2564EV Den Haag The Netherlands info brightinnovations nl ...

Reviews: