


QTi02 User Manual
QTi02 User Manual
4.Power On/Off
Press and hold the power button for 3 seconds to turn on/off the product.
Note: After the product starts the shutdown procedure, it takes 5 to 6 seconds.
Please try to avoid turning on and off the product continuously to avoid damage.
5.Menu Introduction
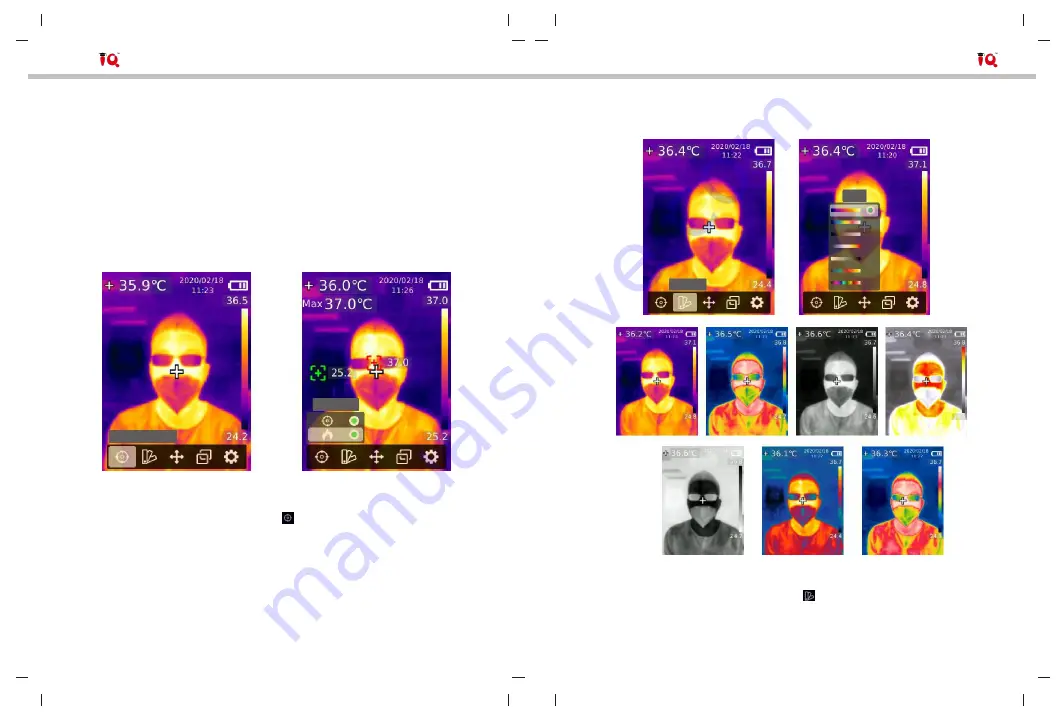
5.1 Measurement
HiLo spot
Measurement
5.2 Palette
Iron
Palette
1. Press the SET button to open the main menu.
2. Press the left/right button to select the
option.
3. Press the SET button to enter the Measurement menu.
4. Press the up/down button to select Center Spot (center point measurement)
or HiLo Spot (maximum and minimum temperature measurement).
5. Press the SET button to turn on/off Center Spot or HiLo Spot.
6. Press the back button to exit.
7
1. Press the SET button to open the main menu.
2. Press the left/right button to select the
option.
3. Press the SET button to enter the Palette menu.
4. Press the up/down button to select the desired palette.
5. Press the SET button to apply the palette.
6. Press the back button to exit.
8