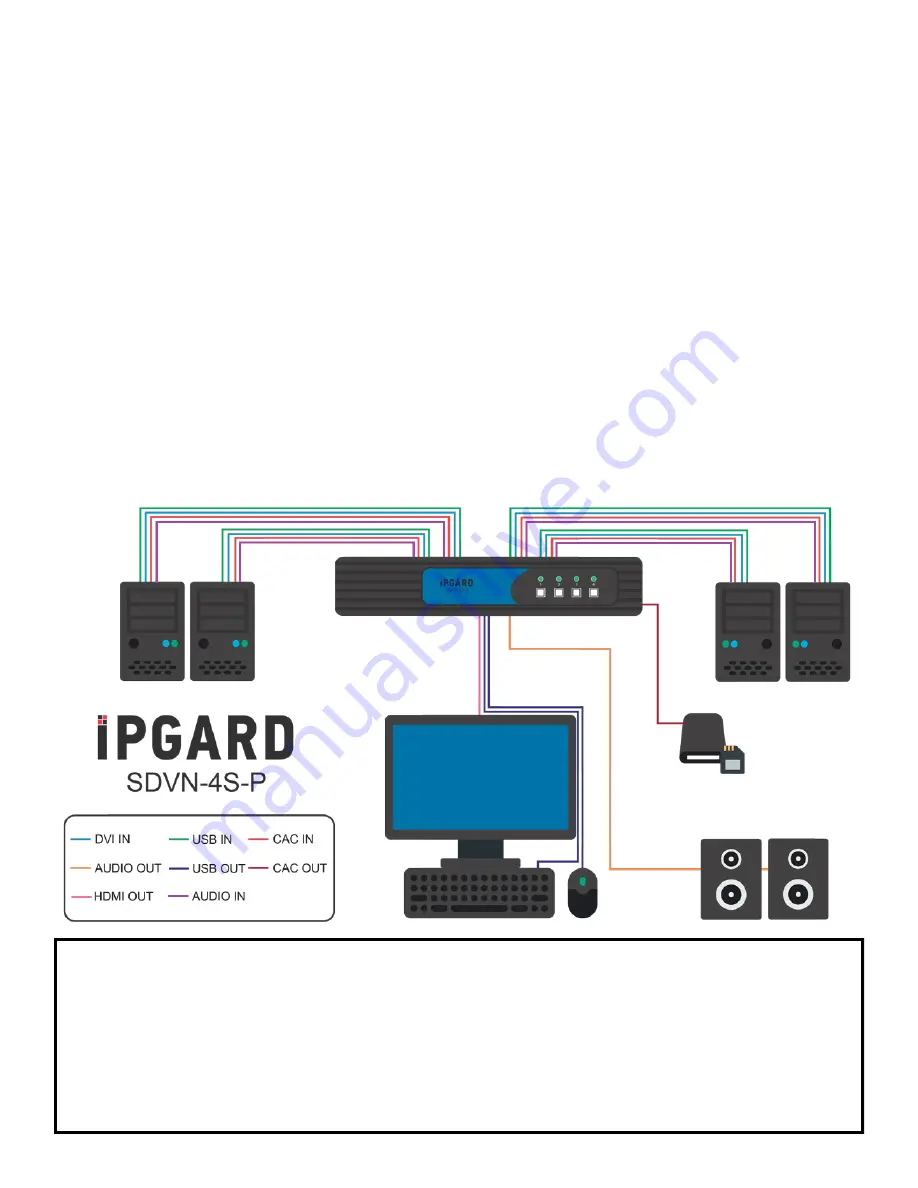
Advanced 2/4-Port DVI-I Secure KVM Switch
6
INSTALLATION
Single-Head Units:
1. Ensure that power is turned off or disconnected from the unit and the computers.
2. Use a DVI cable to connect the DVI output port from each computer to the corresponding DVI-
I IN ports of the unit.
3. Use a USB cable (Type-A to Type-B) to connect a USB port on each computer to the respective
USB ports of the unit.
4. Optionally connect a stereo audio cable (3.5mm to 3.5mm) to connect the audio output of
the computers to the AUDIO IN ports of the unit.
5. Connect a monitor to the DVI-I OUT console port of the unit using a DVI cable.
6. Connect a USB keyboard and mouse in the two USB console ports.
7. Optionally connect stereo speakers to the AUDIO OUT port of the unit.
8. Optionally connect CAC (COMMON ACCESS CARD, SMART CARD READER) to the CAC port in
the user console interface. For –P Models.
9. Finally, power on the KVM by connecting a 12VDC power supply to the power connector, and
then turn on all the computers.
Note: The computer connected to port 1 will always be selected by default after power up.
Note: You can connect up to 2 computers to the 2 port KVM and up to 4 computers to the 4 port KVM.
Figure 6-1
IMPORTANT WARNINGS - For security reasons:
This product does not support wireless devices. Do not attempt to use a wireless keyboard or
a wireless mouse with this product.
This product does not support keyboards with integrated USB hubs or USB ports. Only use
standard (HID) USB keyboards with this device.
This product does not support microphone audio input or line input. Do not connect any mi-
crophones or headsets with microphones to this device.
Connection of authentication devices (CAC) with external power sources is prohibited.


