


iOptron Corp. | 6E Gill Street | Woburn, MA 01801 USA | (781) 569-0200 | Toll Free (866) 399-4587 | www.iOptron.com
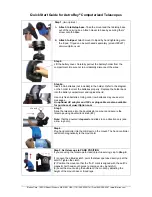
Step 6.
Press the I/O power switch to turn the mount on (controller will light up).
Now “Set Local Time:” is displayed at the top. A blinking cursor is on the
second line.
.
Use
▲
/
▼
keys to change the numbers. Use
◄
/
►
keys to scroll through
the fields.
The last field of this screen is for setting “Daylight Time saving”.
Use
▲
/
▼
keys to switch between “Y” (yes) and “N” (no).
Press ENTER when finished.
Step 7.
Now “Setup Site Info:” is displayed at the top. A blinking cursor is on the
second line. (“Longi” means longitude; “Lat” means latitude.)
Use
▲
/
▼
keys to change the numbers and letters. Use
◄
/
►
keys to
scroll through the fields.
The last line of this screen is for setting time zone information
(
add or
subtract
60 minutes (Mins.)
per time zone
).
Examples: minutes “behind” UT or “ahead” of UT
New York: 300 Mins. “behind” UT
Los Angeles: 480 Mins. “behind” UT
Rome: 60 Mins. “ahead” of UT
Sydney: 600 Mins. “ahead” of UT
Press ENTER when finished.
The mount is now ready to observe
Use the 4 Arrow keys (
▲▼◄►
) to rotate the scope Up, Down, Left, and
Right. Use the SPEED key to change the slew rate from the slowest (2X)
to the fastest (MAX).
Step 8. Find (GOTO) and track objects.
Press Menu button.
Scroll to “Select and Slew”
Press ENTER.
Step 9.
Select a category (ex. “Planets, Sun, Moon”) by scrolling with the arrow
keys.
Press ENTER.
Then select an object (ex. “Moon”) by scrolling with the arrow keys.
Press ENTER.
The telescope will automatically slew to the object and lock on. It will
automatically begin to track once it locks on to the object.
Step 10. Sync to Target (Use this to center and synchronize the object
selected in Step 15).
Press MENU. Scroll to “Sync. To Target”. Press ENTER. Next use the
arrow keys (
▲▼◄►
) to center the object in the eyepiece. Then press
ENTER again to synchronize the object with the memory.
To slew to other objects simply repeat steps 8 and 9. You do not need to
repeat step 10 except for adjustments as needed.
(Refer to the full online manual for 1-star and 2-star alignments. Sync to
Target is the same as 1-star Alignment except that you choose the
object to align to.)