background image


                   12


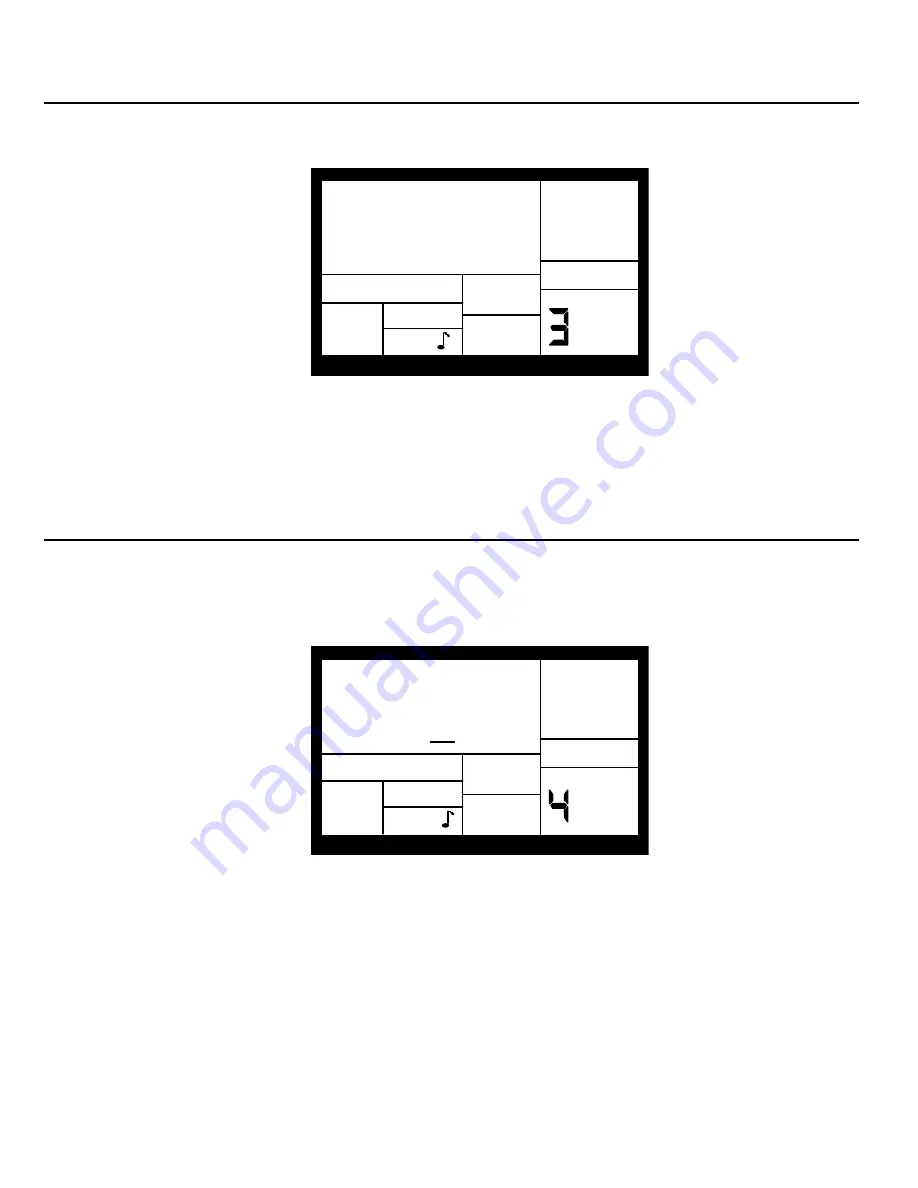
2.3  PAGE 3: ENABLE CLICK (METRONOME) AND SET RHYTHM  (CLICK SELECT) 
 

The display shows 

CLICK SELECT

; the Click window shows the click's rhythmic value.  


CLICK

PAGE

SELECT

SETUP

RECORD

CLICK


Enter the click value with the INC/DEC or number buttons (1 = quarter note, 2 = quarter note 
triplet, 3 = 8th note, 4 = 8th note triplet, 5 = 16th note, 6 = 16th note triplet, 7-0 = Click Off).  
 
The click is audible only in Compose mode. 


2.4  PAGE 4: SET CLICK (METRONOME) VOLUME (CLICK VOL) 
 

The display shows 

CLICK VOL

 and a two-digit number representing click volume (

00

 = 

inaudible, 

99

 = maximum volume). Enter the desired click level with the INC/DEC or number 

buttons.  
 

PAGE

CLICK
VOL 70

SETUP

RECORD

CLICK

PERFORM


Summary of Contents for Electronic Drum Kit

Page 1: ...1 Electronic Drum Kit Quick Start Owner s Manual ...

Page 2: ...2 ...

Page 3: ...reinstalled horizontal clamp C as shown in the picture 2 Insert two vertical bars B2 to the remaining slots facing up as shown Insert two clamps C to the ends of one horizontal bar B2 Slide on the two vertical bars as shown 3 Slide one clamp D down the left hand vertical bar which will be used for snare drum pad Slide one small bar B3 into the clamp D as shown in the figure ...

Page 4: ...l bars as shown Now slide another clamp D down the left hand vertical bar which is going to be used for the Hi Hat Then slide one small bar B3 into the clamp D as shown 5 Insert three small bars B3 in the remaining clamps C on the top horizontal bar 6 Attach five part A3 to each of the five drum pads Attach the bolt and nut F as shown ...

Page 5: ...s shown in the figure Attach to lower horizontal bar as shown in figure and angle accordingly The iDM01 Drum Machine will rest on top of this 8 This is how the finished assembly will look 9 Attach the iDM01 Drum Machine on top of the iET01 Trigger Box using the velcro strips ...

Page 6: ...indicated in the diagram 7 Connect the outputs to headphones and or powered amplifier stereo system 8 Plug in both power adapters and other devices into AC power 9 Switch everything on in the following order a iET01 Drum Trigger Box b iDM01 Drum Machine c Any external speakers 10 When turning off always reverse this operation by a Any external speakers b iDM01 Drum Machine c iET01 Drum Trigger Box...

Page 7: ... 4 The display will then show the current preset Rock 1 by default c Use the up and down arrows in section 3 to shuffle through the 50 different patters d Press PLAY in section 3 to hear the preset pattern e Tempo can be adjusted by the tempo up and down buttons in section 5 shown on the above diagram f You can play along with the preset samples on the drum kit To add a fill press the FILL button ...

Page 8: ...Reference Manual Stereo Drum Machine ...

Page 9: ...LECT THE SWING VALUE SWING SELECT 11 2 3 PAGE 3 ENABLE CLICK METRONOME AND SET RHYTHM CLICK SELECT 12 2 4 PAGE 4 SET CLICK METRONOME VOLUME CLICK VOL 12 2 5 PAGE 5 ADJUST VELOCITY RESPONSE VELOCITY 13 2 6 PAGE 6 ADD REMOVE BEATS FROM PATTERN END LENGTH 14 2 7 PAGE 7 ADD REMOVE BEATS FROM PATTERN BEGINNING START 14 2 8 PAGE 8 OFFSET A PATTERN OR DRUM PART 15 2 9 PAGE 9 STEP MODE RECORDING STEP MODE...

Page 10: ...PAGE 4 SET PAD STEREO POSITION PANNING 30 4 5 PAGE 5 SET PAD TUNING TUNING 31 4 6 PAGE 6 SET TRIGGERING MODE ASN MODE 31 4 7 PAGE 7 CHOOSE OUTPUT JACKS OUTPUT 32 4 8 PAGE 8 SAVE DRUM SET SAVE SET 33 4 9 PAGE 9 MANUAL DRUM SET OVERRIDE SET MODE 34 CHAPTER 5 SONG MODE 35 5 1 SONG MODE BASICS 35 5 1A Select Songs and Enter Exit Song Mode 35 5 1B Set Song Tempo 35 5 1C Continue Re start or Jump to Nex...

Page 11: ...GE 3 VERIFY DATA RECORDED ON TAPE VERIFY TAPE 51 7 7 PAGE 4 LOAD DATA FROM TAPE LOAD IN TAPE 52 7 8 PAGE 5 LOAD ONE PATTERN FROM TAPE LOAD IN PATT 53 7 9 PAGE 6 LOAD ONE SONG FROM TAPE LOAD IN SONG 53 7 10 PAGE 7 CHECK AVAILABLE MEMORY FREE MEM 54 7 11 CLEAR MEMORY RE INITIALIZE PARAMETERS 55 7 12 CHECK SOFTWARE VERSION 55 CHAPTER 8 APPLICATIONS 56 8 1 MIDI SYNC APPLICATIONS 56 8 1A IDM01 As MIDI ...

Page 12: ...ay back the part and edit it in various ways Data is retained in memory even if the power is turned off If the memory fills up with drum Patterns and Songs this data can be saved permanently to standard cassettes or to MIDI System Exclusive storage devices The IDM01 also includes a library of preset rhythm Patterns prepared by professional drummers for those who want to start creating Songs in the...

Page 13: ...terial tailored specifically for beginners These sections are identified as background and set in a smaller type size 1 2 GROUND RULES The IDM01 drum machine consists of two main elements The drum sounds themselves recorded using16 bit resolution the same resolution as CDs For additional realism many sounds use advanced dynamic articulation techniques so that these sounds when hit loudly have a di...

Page 14: ... a Preset Pattern is to copy it to a User Pattern where it can be edited There are 50 of each type of Pattern numbered 00 49 However each numbered Pattern actually contains four different sub Patterns A pair of independent Main Patterns A and B selected by their respective buttons A pair of associated Fill Patterns A Fill and B Fill selected by pressing the FILL button when either A or B is select...

Page 15: ...ic articulation techniques mentioned earlier the timbre will often change as well just like real drums There are eight levels of pad volume resolution from soft to loud However when using the IDM01 as a drum sound expander and triggering sounds via MIDI they respond to all 127 MIDI volume levels 1 2E About Defaults A default is a setting that is automatically assumed until you purposely change it ...

Page 16: ... Tape recorder buttons These control playback and stop and work similarly to a tape recorder Display and data entry buttons The display informs you of the instrument s status and also prompts you for data from time to time A detailed description of the display follows shortly The data entry buttons include number entry buttons 0 9 and up arrow increment or INC and down arrow decrement or DEC The l...

Page 17: ...ows the current tempo and includes a visual metronome block that flashes on the beat For functions that have multiple pages of parameters Drum Set Record Setup MIDI Setup and Backup this portion of the display shows the currently selected page number Compose Perform This indicates whether the IDM01 is in Compose or Perform mode Click In Compose mode shows the current click rhythm in standard music...

Page 18: ...t but save you from potential problems as you become more familiar with the machine If all the required digits of a number aren t entered within two seconds the display will revert back to the previous number with the cursor under the first digit of the previous number This is handy because if you start to enter a new number but then change your mind halfway through you don t have to key in or rem...

Page 19: ...mplifier or PA The amp and IDM01 volume controls should be all the way down counter clockwise 2 Leave the MIDI jacks rear panel disconnected for now 3 Plug the IDM01 s AC adapter into the wall The smaller plug inserts in the 9V AC Power jack on the back 4 Turn on the rear panel On Off switch then turn on the amplifier 5 The LCD will show a sign on message The upper right of the display should say ...

Page 20: ...e number keys then press PLAY Press the INC up arrow button to select the next higher numbered Preset Pattern It will play at the end of the current Pattern Press the DEC down arrow button to select the next lower numbered Preset Pattern Press the B button to select the B variation of the selected Pattern Press the A button to select the A variation of the selected Pattern Press FILL briefly while...

Page 21: ... 2 1 PAGE 1 SELECT THE QUANTIZATION VALUE QUANTIZE SELECT The display shows QUANTIZE SELECT and a note icon in the lower left Quantize window PAGE QUANTIZE SELECT SETUP RECORD QUANTIZE The note icon displays the quantization value in standard rhythmic notation Enter the desired quantization value with the INC DEC or number buttons 1 quarter note 2 quarter note triplet 3 8th note 4 8th note triplet...

Page 22: ...nt sounds happening within a few milliseconds of each other A good way to simulate this effect yet still have a rock solid rhythm is to record a quantized hand claps part then turn off quantization and try to double the part Sometimes what you overdub will be right on the beat but sometimes it will be off by just enough to add that human touch 2 2 PAGE 2 SELECT THE SWING VALUE SWING SELECT The dis...

Page 23: ...r buttons 1 quarter note 2 quarter note triplet 3 8th note 4 8th note triplet 5 16th note 6 16th note triplet 7 0 Click Off The click is audible only in Compose mode 2 4 PAGE 4 SET CLICK METRONOME VOLUME CLICK VOL The display shows CLICK VOL and a two digit number representing click volume 00 inaudible 99 maximum volume Enter the desired click level with the INC DEC or number buttons PAGE CLICK VO...

Page 24: ...Referring to the diagram soft response weights the response toward softer sounds with medium response the level is directly proportional to how hard you tap the pad loud response weights the response toward louder sounds Fixed volume plays back the associated drum sound at one of eight possible volume levels With Fixed Volume 1 all drums assume the level of the softest possible tap regardless of h...

Page 25: ... this must be a three digit number enter leading zeroes if necessary To prevent accidental length alteration you must press PLAY before the IDM01 will store the new Pattern length The display shows CHANGED LENGTH for as long as PLAY is pressed Background Odd time signatures are not a problem since Patterns can be any number of beats up to 128 Example For a measure of 13 4 followed by a measure of ...

Page 26: ...DM01 should be in Pattern mode and stopped The display says OFFSET which will be 00 384 no offset 2 Press the pad to be offset as confirmed by the display If you don t select a pad offset affects the entire Pattern 3 Enter the two digit offset value with the INC DEC or number buttons Positive numbers shift events ahead of the beat lead negative numbers shift events behind the beat lag The default ...

Page 27: ...rn one step at a time stop at each event as desired and delete the event add an event or change an event s volume While occasionally somewhat tedious Step Edit mode allows editing drum parts to your exact specifications Each step also called a sub beat is 1 96th of a beat in duration so at maximum resolution it takes 96 steps to move through a quarter note To save time you can step through the Pat...

Page 28: ...Drum Sound s Volume in a Given Step Use the PAGE buttons to select the step containing the drum whose volume needs to be changed Either press a number button from 1 8 1 softest 8 loudest use the INC DEC buttons or tap the displayed drum pad at the desired level If you play a pad to change the level and there are several events on the same step the display need not show the specific drum whose volu...

Page 29: ...nfirmed by the display PATTERN A PRESS PLAY TEMPO PERFORM ROCK 1 3 1A The Dual Purpose Fill Button In addition to calling up Fill Patterns as described in the Introduction the FILL button can also be used while recording to create a series of notes at the desired quantization rate as described in section 3 1K 3 1B Perform Compose Modes The IDM01 doesn t have a record button Instead press PLAY to s...

Page 30: ...ve a tempo the display will update the tempo with each tap If a footswitch is plugged into the Count A B Fill jack tapping the footswitch at the desired rate is equivalent to tapping the STOP button These techniques work only if the IDM01 is stopped Use the TEMPO PAGE up and down buttons Press once to increment decrement 1 BPM at a time or press and hold to scroll through the tempo values Backgrou...

Page 31: ...vailable at most music stores for remote or foot control of the stop and start functions The IDM01 checks the footswitch on power up to determine whether it is normally open or normally closed so make sure the footswitch is plugged in and you re not pressing it down when you turn on power 3 1G Select New Patterns While in Perform Playback Mode In Perform mode you can select a new Pattern number wi...

Page 32: ...ills do not have to be transitional Patterns If you press the FILL button or footswitch before the Fill has finished playing and hold it down until after the Fill has played i e past the downbeat of the next Pattern the IDM01 will return to the original Main Pattern Example Suppose an 8 beat A Main Pattern is playing and you press the FILL button on beat 4 but hold it down past beat 8 The A Fill P...

Page 33: ...IDM01 is not recording i e the IDM01 serves as a drum sound expander module the drum sounds respond to 127 different levels of dynamics However if MIDI is used as a trigger during the recording process the Pattern will quantize the incoming level to the nearest of eight levels the same eight levels produced by tapping the pads at various levels 3 1J Select New Patterns and Fills While in Compose R...

Page 34: ...o fix up errors Erasure occurs only on those beats that coincide with the current quantization and swing values turn quantization off to erase a drum wherever it occurs 1 The IDM01 should be in Compose mode and recording 2 Press and hold ERASE 3 While holding down ERASE press the pad corresponding to the sound to be erased just before the first event to be erased and release just after the last ev...

Page 35: ...n to another Main Pattern copies the Fill along with it Other combinations take the following rules into account Copying a Main Pattern to a non empty Pattern or to itself appends the Fill to the existing Fill as well as appends the Main Pattern to the existing Main Pattern If you copy from Main to Fill or vice versa within a particular numbered Pattern the destination will be erased and replaced ...

Page 36: ...u stack multiple drum sounds together to create monster composite sounds See section 8 3 Sound Stacking 1 The IDM01 should be in Pattern mode and stopped 2 Select the Pattern containing the drum part to be copied 3 Press and hold the COPY button and keep holding it down until step 7 The display says COPY TO PATT 4 Tap the pad to be copied The display shows the pad number e g D8 if you hit pad 8 5 ...

Page 37: ... appended to the receiver s Main and Fill Patterns If the receiver was set to Fill the Fill will replaced by that of the source Pattern to maintain the same Main and Fill Pattern lengths 5 Release the COPY and PLAY buttons 3 3E Copy a Single Drum Pad s Part to a Drum Pad in Another IDM01 Via MIDI The IDM01 can send system exclusive information for a drum part to another IDM01 via MIDI If you have ...

Page 38: ...e Drum Set to be copied 3 Press and hold the COPY button and keep holding it down until step 5 4 Press DRUM SET to send the data out over MIDI the display says SET OUT MIDI 5 Release the COPY and PLAY buttons The current Drum Set parameters including changes you may have made will reside in the destination IDM01 s Drum Set memory buffer To save the Drum Set you must save it to a user Drum Set memo...

Page 39: ... are 1 Press the DRUM SET button 2 Use the Page up and down buttons to select different pages of functions the display s lower right window shows the page number These pages are described below 3 Adjust values on pages if necessary as described for each page 4 After making all needed changes save the Drum Set if desired Page 8 then press DRUM SET again to exit or choose another page 4 1 PAGE 1 SEL...

Page 40: ...ad number 2 Enter the desired drum sound number with the number or INC DEC buttons When using the number buttons enter a leading zero if necessary The chart included with the IDM01 describes each of the over 230 drum sounds 3 When the display confirms your choice either store the edited Drum Set see section 4 8 or do more assignments by tapping another pad to select it and assigning a drum sound t...

Page 41: ...e desired pan position from full left to full right using either the number or INC DEC buttons The seven available pan positions correspond to the number buttons shown in parenthesis hard left 1 soft left 2 left of center 3 center 4 right of center 5 soft right 6 and hard right 7 3 When the display confirms your choice either store the edited Drum Set see section 4 8 or do more assignments by tapp...

Page 42: ... pitch to 4 most flat 3 When the display confirms your choice either store the edits see section 4 8 or do more assignments by tapping another pad to select it then assigning the new tuning 4 6 PAGE 6 SET TRIGGERING MODE ASN MODE The display shows ASN MODE short for Assignment Mode the currently selected pad number and the mode assigned to that pad PAGE ASN MODE MULTI DRUM SET DRUM To change the m...

Page 43: ...notes and have lots of pads in the Multi assign mode If 16 sounds are playing and you ask the IDM01 to play another one the sound that s closest to finishing its decay cycle will be stolen so that the most recent sound can be played In practice it s difficult and usually not artistically desirable to create drum parts so complex that voice stealing becomes a problem However if this is a problem tr...

Page 44: ...hese to the Aux outputs and all other drums panned as desired to the Main outputs Pan the kick full left and the snare full right Thus the kick will appear in the left aux output and the snare will appear in the right aux output These outputs can feed different signal processors and then sent to a mixing board Make sure that the drums selected for individual outputs are panned to the extreme left ...

Page 45: ...AL DRUM SET OVERRIDE SET MODE The display says SET MODE Use the INC DEC buttons to select PATT each Pattern uses its assigned Drum Set or MANUAL the IDM01 will retain the currently selected drum assignments regardless of which Pattern is chosen SET MODE PAGE PATT DRUM SET Note If changing Patterns doesn t call up different Drum Sets this parameter is probably set to MANUAL instead of PATT Backgrou...

Page 46: ...Exit Song Mode 1 The IDM01 should be in Song mode 2 Select PERFORM mode 3 Enter a two digit Song number with the number or INC DEC buttons Song numbers must always include two digits enter a leading zero if necessary 4 Press PLAY to begin playback Press STOP to stop playback 5 To exit Song mode and return to Pattern mode first stop the Song with the STOP button then press the PATTERN SONG button 5...

Page 47: ...nother few bars Another use is if two Songs share the same tempo Follow the first Song with a blank Pattern then append the second Song Between Songs hold down the footswitch on the blank Pattern song step then release to start the second Song 5 1E Start from the Middle of a Song You need not start a Song from the beginning each time in Compose mode a Song can start at any Song step 1 Make sure th...

Page 48: ...e original Pattern keep playing it will add a new Song step with its Pattern number every time it repeats 7 In addition to selecting different Patterns you can press FILL at any time The IDM01 will remember where you pressed FILL As in Pattern mode pressing FILL will automatically transition to the B Pattern if the A Pattern is currently playing and vice versa or will continue playing the same Pat...

Page 49: ...ons respectively It is not necessary to press PLAY the step will remember where the Fill is to occur 4 As the Song plays the step where the Fill occurs the display will show FILL when the Fill begins playing 5 3C Remove a Fill While in Compose mode there are two ways to remove a Fill from a Song When the Fill step appears press the A button for an A Pattern or press the B button for a B Pattern an...

Page 50: ...teps occurs 5 3G Erase an Entire Song 1 The IDM01 should be in Song and Perform modes 2 Use the number buttons to select the Song to be erased 3 Press and hold the ERASE button The display says SONG ERASE 4 While holding down the ERASE button press PLAY The display says SONG ERASED and erasure is complete 5 Release the ERASE and PLAY buttons 5 3H Copy a Song to Itself Double Song Length Copying a ...

Page 51: ...h would exceed 254 steps after copying the copy will not take place and the display will say SONG TOO LONG 5 4J Copy a Song to Another IDM01 Via MIDI The IDM01 can send Song system exclusive information to another IDM01 via MIDI If you have only one IDM01 you can skip this section 1 The source IDM01 should be in Song mode and stopped Connect the source IDM01 MIDI out to the destination IDM01 MIDI ...

Page 52: ...NI SETUPMIDI PERFORM The display shows the MIDI CHannel 1 16 or Omni Enter the desired value with the number or INC DEC buttons With the number buttons enter a leading zero if necessary 00 selects Omni mode Background The IDM01 can receive and transmit MIDI data in Omni mode receives data appearing on any of the 16 MIDI channels transmits data over channel 1 or Poly mode transmits and receives ove...

Page 53: ... expander module or want to play real time drum controllers into the IDM01 as it plays a Pattern or Song Select OFF if you re using the IDM01 as a drum machine slaved to a sequencer when OFF the IDM01 follows the sequencer timing data but not note data you don t want it to play other parts Note that Clock In page 5 must be on 6 3 PAGE 3 TRANSMIT MIDI DRUM NOTES DRUM OUT DRUM OUT PAGE OFF SETUPMIDI...

Page 54: ...Pad Number PAGE Play the drum pad to be assigned to a MIDI note as confirmed by the Drum Pad Number display Enter the note number name with the number or INC DEC buttons Background Note assignments are global and affect every Pattern MIDI note assignments are not individually selectable for each Pattern The default note assignments are Drum Pad MIDI Note Key Name Kick 036 C1 Snare 038 D1 Cls Hat 0...

Page 55: ...e IDM01 as an expander module set CLOCK IN to OFF so that timing signals don t start playing a Pattern Background The IDM01 can have its tempo set by another device this overrides the internal clock tempo if The external device sequencer drum machine etc generates MIDI timing signals These signals go from the external device s MIDI out to the IDM01 s MIDI in CLOCK IN is ON 6 6 PAGE 6 SEND CLOCK DA...

Page 56: ...applications Example Assume a MIDI keyboard connects to the IDM01 MIDI in The IDM01 serves as the master clock for an MMT 8 sequencer the IDM01 MIDI out connnects to the MMT 8 MIDI in With MIDITHRU set to ON the keyboard note data will be passed through the IDM01 and appear at the MMT 8 MIDI in Other IDM01 settings should be DRUM IN OFF so the IDM01 doesn t respond to your keyboard playing and CLO...

Page 57: ...d the IDM01 is in MULTI DRUMSET mode see section 6 9 below and a program change is received in the 00 49 range the IDM01 will automatically select the drumset group corresponding to the program change number For example if program 36 is received with the above conditions met the note map will change to drumset group 30 39 6 9 PAGE 9 MAP DRUM NOTES NOTE MAP Within each Pattern MIDI notes can either...

Page 58: ... 8 9 10 11 12 1 2 3 4 5 6 7 8 9 10 11 12 1 2 3 4 5 6 7 8 040 041 042 043 044 045 046 047 048 049 050 051 052 053 054 055 056 057 058 059 060 061 062 063 064 065 066 067 068 069 070 071 072 073 074 075 076 077 078 079 06 06 06 06 07 07 07 07 07 07 07 07 07 07 07 07 08 08 08 08 08 08 08 08 08 08 08 08 09 09 09 09 09 09 09 09 09 09 09 09 9 10 11 12 1 2 3 4 5 6 7 8 9 10 11 12 1 2 3 4 5 6 7 8 9 10 11 1...

Page 59: ...t lasts long enough for the IDM01 to think the tape has stopped the transfer will be cancelled the display says TAPE IN CANCEL Background The IDM01 can save the data in memory by converting this data into audio tones and recording these tones on a standard audio tape machine usually cassette Data can also be converted into a special type of MIDI code and stored in a MIDI data storage device such a...

Page 60: ...s tape in out VOLUME Speaker Out Tape Tape Recorder 7 3 PAGE 1 SEND DATA AS MIDI TO A MIDI SYS EX STORAGE DEVICE SEND OUT MIDI The display shows SEND OUT MIDI To convert the IDM01 s Pattern and Song information into MIDI system exclusive data and send this data through the MIDI out press the PLAY button The display will say SENDING MIDI to confirm that data is being sent Typically the MIDI out wou...

Page 61: ...d 6 To prevent future confusion name the DD file using the DD NAME function 7 4 RECEIVE DATA DIRECTLY FROM ANOTHER MIDI DEVICE The IDM01 will automatically load IDM01 system exclusive data present at its MIDI input Therefore there is no associated function page since reception can occur at any time that a sys ex storage device or another IDM01 sends data through its MIDI out into the IDM01 s MIDI ...

Page 62: ...ngs the operation is finished when the display says DONE It s a good idea to save data several times in case part of the tape becomes damaged To cancel the saving operation at any time press STOP The display says TAPE OUT CANCEL Remember that you can save data to any tape medium For example recording drum part data at the head of a multi track master is often convenient as it stores the drum parts...

Page 63: ...e same data as what s in the machine In other words the verify function does not work by checking the tape data and IDM01 data for similarities Therefore you can verify tape data at any time 7 7 PAGE 4 LOAD DATA FROM TAPE LOAD IN TAPE LOAD IN PAGE BACKUP TAPE PRESS PLAY This loads all data stored in the tape dump being loaded The display says LOAD IN TAPE Press PLAY the display says START TAPE Pre...

Page 64: ...n from tape rather than all data A Pattern being loaded from tape will take its original position in memory e g PATT 01B will reload back into PATT 01B and will overwrite any data currently stored in that location Remember that loading a Pattern also loads its associated Fill 7 9 PAGE 6 LOAD ONE SONG FROM TAPE LOAD IN SONG LOAD IN PAGE BACKUP SONG01 PRESS PLAY This loads a single Song of Patterns ...

Page 65: ...It is important to check memory from time to time because the IDM01 always requires some free memory for proper operation If the available memory falls below 15 or so immediately save the IDM01 s data as previously described in this chapter Some operations may not be possible even if a small amount of memory is left This is because the IDM01 duplicates a Pattern before it is modified length change...

Page 66: ... turn off power and wait a few seconds Press and hold the PLAY and ERASE buttons while turning on power Continue holding these buttons down for at least three seconds after turning on power 7 12 CHECK SOFTWARE VERSION VERSION 1 00 To determine the software version in your IDM01 press the FILL button at any time you re in the Backup menu The display will show VERSION and the current software number...

Page 67: ...sition Pointer if it is available or it may be available all the time and not need to be specifically enabled as is the case with the Alesis HR 16 and MMT 8 3 Press PLAY on the IDM01 The slave units should start at the same time and progress at the same tempo If the slaves respond to Song Position Pointer you can start an IDM01 Song at any point and after a few seconds the slaves will catch up and...

Page 68: ... If the master generates Song Position Pointer you can start the master at any point and both units will synchronize from that point on The following diagram shows an IDM01 slaved to the MIDI system master clock provided in this case by a keyboard workstation on board sequencer VOLUME MIDI In MIDI Out MIDI Clock In On Keyboard workstation 8 1C Synching to Synthesizer Sequencers Many synthesizers i...

Page 69: ...Suppose you have a 16 measure figure where the first three groups of four measures are identical and the final group of four measures provides some sort of variation Recording this as one 16 measure Pattern will take up more memory than recording two Patterns one of the first group of four measures and one of the last group of four measures and while in Song mode repeating the first group three ti...

Page 70: ...nd tune functions you can customize the drum sound to the specific needs of the song you are working on This kind of flexibility makes the IDM01 a powerful production tool in the critical decision making process that gives personality to recorded music 8 3B Sound Stacking when Using the IDM01 as a Drum Machine When used as a drum machine one pad s rhythm can be copied to another pad so that as the...

Page 71: ...ver there are some cases where you want to divide a beat into thirds giving three notes per beat Dividing a quarter note by three results in eighth note triplets The reason why we use the term eighth note triplets is because the eighth note is closest to the actual rhythmic value Dividing an eighth note by three results in 16th note triplets Dividing a 16th note by three results in 32nd note tripl...

Reviews: