background image


19.


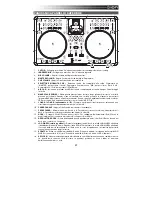
CUE – 

The CUE button will return and pause the track at the last set cue point.  For temporary play of 

the cue point, you can hold down the CUE button.  The track will play for as long as the button is held 
down and will return to the cue point once it has been released. 

You can hold down CUE and PLAY / PAUSE simultaneously to start playback from the cue point.  
Release both buttons to allow playback to continue. 

20.


SYNC – 

Automatically matches the corresponding Deck's tempo with the other Deck's tempo. 

21.


PITCH FADER –

 Controls the track's playback speed.  An LED next to the fader will light up when set 

at 0%.


22.


PITCH BEND ( + / – ) –

 Press or hold down either of these buttons to temporarily adjust the track's 

playback speed.  When released, the track playback will return to the speed designated by the PITCH 
FADER.


23.


CHANNEL BASS –

 Adjusts the low (bass) frequencies of the corresponding channel. 

24.


CHANNEL MID – 

Adjusts the mid-range frequencies of the corresponding channel. 

25.


CHANNEL TREBLE – 

Adjusts the high (treble) frequencies of the corresponding channel. 

26.


EQ KILL SWITCH – 

Pressing down on these buttons removing that frequency band (BASS, MID, or 

TREBLE) from the music on that deck.  The button will illuminate when the EQ kill feature is engaged.  
To disengage it, press the button again. 

27.


REVERSE PLAY – 

Reverses playback of the Deck.  Press the button again to resume normal forward 

playback.


28.


AUTOLOOP – 

Automatically creates a 1-, 2-, 4-, or 8-beat loop from the current location in the track.


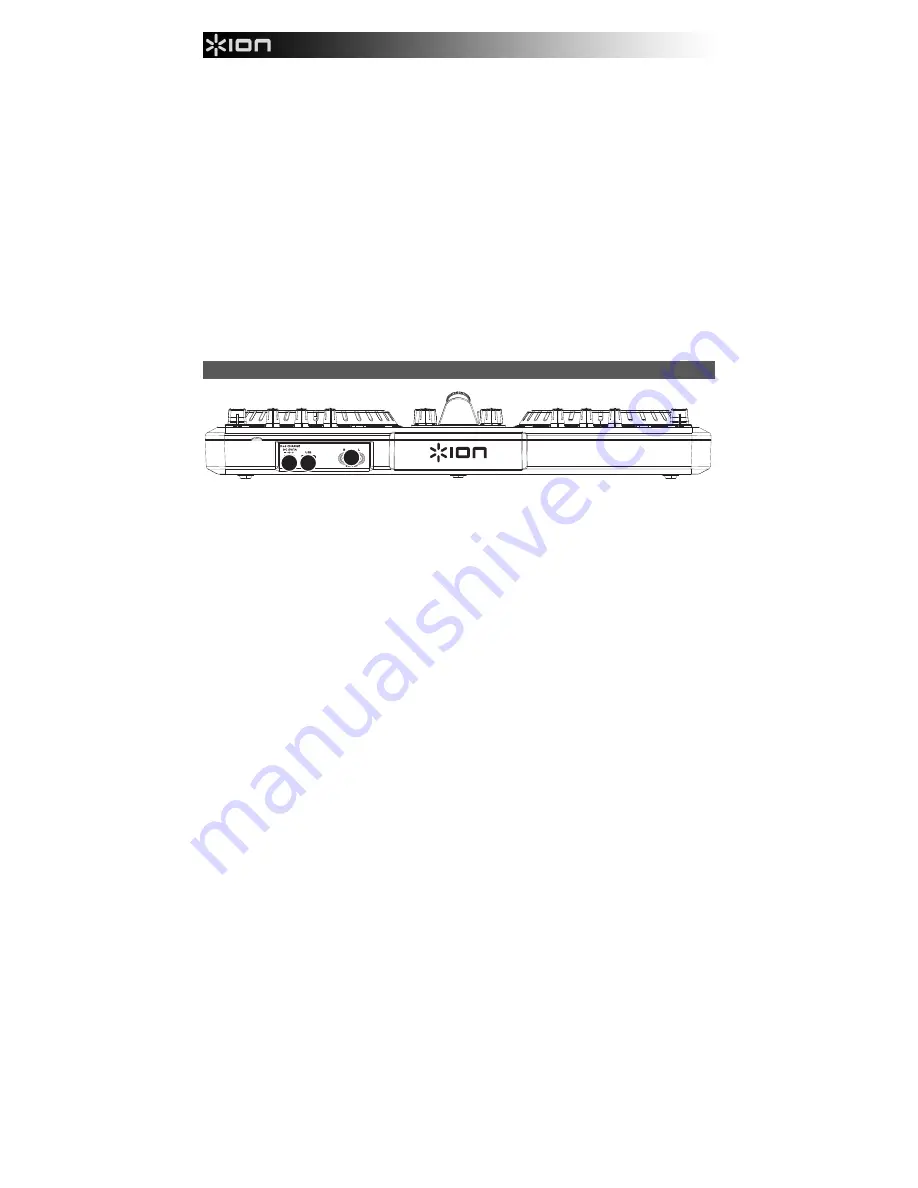
REAR PANEL FEATURES 


1 2

3


1.


CHARGE – 

Connect the 6V-1A power adapter if you want to charge an iPod/iPhone while using 

DISCOVER DJ PRO.   

2.


USB – 

This USB connection sends and receives control information to/from a connected computer.  

When plugged into your computer, the unit will draw power from the USB connection. 

3.


MASTER OUTPUT (RCA) –

 Use standard RCA cables to connect this output to a speaker or amplifier 

system.  The level of this output is controlled by the MASTER VOLUME knob on the top panel.   

Summary of Contents for DISCOVER DJ PRO

Page 1: ...QUICKSTART GUIDE ENGLISH 3 6 GUÍA DE INICIO RÁPIDO ESPAÑOL 7 10 GUIDE D UTILISATION RAPIDE FRANÇAIS 11 14 GUIDA RAPIDA ITALIANO 15 18 KURZANLEITUNG DEUTSCH 19 22 SNELSTARTGIDS NEDERLANDS 23 26 ...

Page 2: ......

Page 3: ...J PRO to an available USB port on your computer If possible use a USB port on the rear panel of your computer 2 Open Virtual DJ LE by double clicking the icon on your computer s Desktop if you created a Desktop shortcut or by going to Start All Programs Virtual DJ For more information on how to use Virtual DJ LE see the manual on the CD located in the Manual folder MAC Before you can begin using t...

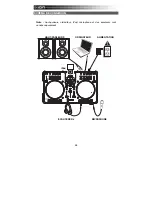
Page 4: ...4 CONNECTION DIAGRAM SPEAKERS COMPUTER POWER iPod HEADPHONES MICROPHONE Note Speakers computer iPod microphone and headphones are sold separately ...

Page 5: ...s the audio level on the corresponding channel 11 CROSSFADER Blends audio playing between Decks A and B Sliding this to the left plays Deck A and sliding to the right plays Deck B 12 DOCK Connect your iPod iPhone here Gently rock the iPod iPhone back and forth over the connector when attaching or removing it 13 DOCK ADJUSTER Turn this knob accordingly so your docked iPod iPhone rests against the s...

Page 6: ...24 CHANNEL MID Adjusts the mid range frequencies of the corresponding channel 25 CHANNEL TREBLE Adjusts the high treble frequencies of the corresponding channel 26 EQ KILL SWITCH Pressing down on these buttons removing that frequency band BASS MID or TREBLE from the music on that deck The button will illuminate when the EQ kill feature is engaged To disengage it press the button again 27 REVERSE P...

Page 7: ... use un puerto USB del panel trasero de la computadora 2 Abra Virtual DJ LE haciendo doble clic en el icono del escritorio de la computadora si creó un acceso directo desde el escritorio o yendo a Start All Programs Virtual DJ Inicio Todos los Programas Virtual DJ Para más información acerca de cómo usar Virtual DJ LE consulte el manual ubicado en la carpeta Manual del CD MAC Para poder usar el DI...

Page 8: ...8 DIAGRAMA DE CONEXIÓN ALTAVOCES COMPUTADORA ALIMENTACIÓN iPod AURICULARES MICRÓFONO Nota Los altavoces computadora iPod micrófono y auriculares se venden por separado ...

Page 9: ...peta Si hay una pista seleccionado en ese momento se enciende el LED FILE Archivo 9 CARGAR A CARGAR B Pulse uno de estos botones mientras está seleccionada una pista para asignarla a la bandeja A o B respectivamente 10 FADER DE CANAL Ajusta el nivel de audio en el canal correspondiente 11 CROSSFADER Combina el audio entre las bandejas A y B Si se desliza a la izquierda se reproduce el bandeja A Si...

Page 10: ... CANAL Ajusta las bajas frecuencias graves del audio que se reproduce en el canal correspondiente 24 MEDIOS DE CANAL Ajusta las frecuencias medias del audio que se reproduce en el canal correspondiente 25 TREBLE DE CANAL Ajusta las altas frecuencias agudos del audio que se reproduce en el canal correspondiente 26 INTERRUPTOR DE SUPRESIÓN DEL ECUALIZADOR Pulsando estos botones se eliminan las banda...

Page 11: ... Si possible utilisez un port USB situé sur la partie arrière de votre ordinateur 2 Ouvrez Virtual DJ LE en double cliquant sur l icône affichée sur le Bureau si vous avez créé un raccourci sur votre Bureau ou en cliquant sur Start All Programs Virtual DJ Démarrer Tous les programmes Virtual DJ Pour plus de renseignements concernant l utilisation de Virtual DJ LE reportez vous à la notice située d...

Page 12: ...12 SCHÉMA DE CONNEXION HAUT PARLEURS ORDINATEUR ALIMENTATION iPod ÉCOUTERS DJ MICROPHONE Note Haut parleurs ordinateur iPod microphone et des écouteurs sont vendus séparément ...

Page 13: ...ectionnée la DEL FILE du fichier sera allumée 9 LOAD A LOAD B Cette touche permet d assigner la piste sélectionnée au module A ou B 10 CHANNEL FADER Utilisez cet atténuateur pour ajuster le niveau de l audio du canal correspondant 11 CROSSFADER Effectue un fondu entre les modules A et B Lorsqu il est déplacé vers la gauche le module A joue Lorsqu il est déplacé vers la droite le module B joue 12 S...

Page 14: ...e par le PITCH FADER 23 BASS DU CANAL Permet d ajuster le niveau des basses fréquences de l audio du canal correspondant 24 MID DU CANAL Permet d ajuster le niveau des fréquences moyennes de l audio du canal correspondant 25 TREBLE DU CANAL Permet d ajuster le niveau des hautes fréquences du canal correspondant 26 EQ KILL SWITCH Appuyer sur cette touche permet de retirer cette bande de fréquence B...

Page 15: ...ibile servirsi di una porta USB sul pannello posteriore del computer 2 Aprire il Virtual DJ LE facendo doppio clic sull icona presente sul Desktop del computer se è stata creata un icona di scelta rapida sul Desktop oppure recandosi su Start Tutti i programmi Virtual DJ Per maggiori informazioni su come utilizzare il Virtual DJ LE fare riferimento al manuale contenuto nel CD nella cartella Manual ...

Page 16: ...16 SCHEMA DEI COLLEGAMENTI ALTOPARLANTI COMPUTER ALIMENTAZIONE iPod CUFFIE MICROFONO Nota Altoparlanti computer iPod microfono e le cuffie sono venduti separatamente ...

Page 17: ...nto A B Premere uno di questi tasti dopo aver selezionato una traccia per assegnarla rispettivamente al deck A o al deck B 10 FADER CANALE Regola il livello audio del canale corrispondente 11 CROSSFADER Miscela l audio tra i deck A e B Facendolo scorrere verso sinistra viene riprodotto il deck A Facendolo scorrere verso destra viene riprodotto il deck B 12 DOCK Collegare l iPod l iPhone a questo l...

Page 18: ...ata dal FADER del PITCH 23 CHANNEL BASS bassi di canale Regola le frequenze basse bass del canale corrispondente 24 CHANNEL MID medi di canale Regola le frequenze medie del canale corrispondente 25 CHANNEL TREBLE acuti di canale Regola le frequenze alte treble del canale corrispondente 26 INTERRUTTORE EQ KILL Premendo questi tasti si rimuove quella banda di frequenza BASS MID o TREBLE dalla musica...

Page 19: ...mputers an Wenn möglich verwenden Sie einen USB Anschluss an der Rückseite Ihres Computers 2 Öffnen Sie Virtual DJ LE mittels Doppelklick auf das entsprechende Symbol auf Ihrem Desktop falls Sie eine Desktop Verknüpfung erstellt haben oder indem Sie Start Alle Programme Virtual DJ wählen Weitere Informationen zur Verwendung des Virtual DJ LE finden Sie in der Anleitung auf der CD im Ordner Manual ...

Page 20: ...20 ANSCHLUSSÜBERSICHT LAUTSPRECHER COMPUTER STROMVERSORGUNG iPod KOPFHÖRER MIKROFON Hinweis Lautsprecher Computer iPod Mikrofon und Kopfhörer sind separat erhältlich ...

Page 21: ...ein ausgewähltes Verzeichnis zu gelangen den Regler drücken Mit BACK kann auf die vorherige Ebene zurückgeschaltet werden Bei Anwahl eines Verzeichnisses leuchtet die Anzeige FOLDER LED auf Ist eine Musikdatei gewählt leuchtet die Anzeige FILE LED auf 9 LOAD A LOAD B Eine dieser Tasten drücken während ein Musikstück gewählt ist um dieses jeweils Deck A oder Deck B zuzuordnen 10 KANAL FADER Bestimm...

Page 22: ...en um die Wiedergabegeschwindigkeit des Musikstücks zeitweise zu verändern Wird die Taste losgelassen kehrt die Geschwindigkeit des Musikstücks zu dem durch den PITCH FADER eingestellten Wert zurück 23 KANAL BÄSSE Stellt die Bässe des Signals im entsprechenden Kanal ein 24 KANAL MITTEN Stellt die Mitten des Signals im entsprechenden Kanal ein 25 KANAL HÖHEN Stellt die Höhen des Signals im entsprec...

Page 23: ... uw computer Gebruik best een USB poort op het achterpaneel van uw computer 2 Dubbelklik op het pictogram op het bureaublad van uw computer om Virtual DJ LE te openen als u een snelkoppeling hebt aangemaakt of ga naar Start Alle programma s Virtual DJ Voor meer informatie over het gebruik van Virtual DJ LE zie de handleiding op de cd beschikbaar in de map Manual MAC Voordat u DISCOVER DJ PRO op uw...

Page 24: ...24 AANSLUITDIAGRAM SPEAKERS COMPUTER VERMOGENSBRON iPod KOPTELEFOON MICROFOON Opmerking Speakers computer iPod microfoon en koptelefoon worden apart verkocht ...

Page 25: ...track is geselecteerd om deze toe te wijzen aan respectievelijk Deck A of Deck B 10 CHANNEL FADER Past het geluidsniveau aan van het desbetreffende kanaal 11 CROSSFADER Mengt de geluidsbronnen van Deck A en B Als u deze toets naar links schuift hoort u Deck A als u hem naar rechts schuift hoort u Deck B 12 DOCK Sluit hier uw iPod iPhone aan Beweeg bij het aansluiten of verwijderen de iPod iPhone z...

Page 26: ...ITCH FADER 23 CHANNEL BASS Past de lage frequenties bassen van het desbetreffende kanaal aan 24 CHANNEL MID Past de middenfrequenties van het desbetreffende kanaal aan 25 CHANNEL TREBLE Hiermee worden de hoge treble frequenties van het desbetreffende kanaal aangepast 26 EQ KILL SWITCH Door te drukken op één van deze knoppen verwijdert u het overeenkomstige frequentiebereik BASS MID TREBLE uit de m...

Page 27: ......

Page 28: ...www ionaudio com MANUAL VERSION 1 0 ...

Reviews: