background image

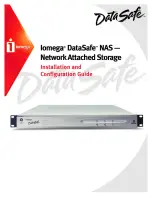
DataSafe NAS

Table of Contents

About This Guide- - - - - - - - - - - - - - - - - - - - - - - - - - - - - - - - - - - - - - - - - - -  i

Who Should Use This Guide - - - - - - - - - - - - - - - - - - - - - - - - - - - - - - - - - - - - - - - - - - - - - - - - -  i
Box Contents  - - - - - - - - - - - - - - - - - - - - - - - - - - - - - - - - - - - - - - - - - - - - - - - - - - - - - - - - - - - -  i
Overview- - - - - - - - - - - - - - - - - - - - - - - - - - - - - - - - - - - - - - - - - - - - - - - - - - - - - - - - - - - - - - - -  i
System Information  - - - - - - - - - - - - - - - - - - - - - - - - - - - - - - - - - - - - - - - - - - - - - - - - - - - - - - -  ii
Typographical Conventions - - - - - - - - - - - - - - - - - - - - - - - - - - - - - - - - - - - - - - - - - - - - - - - - -  ii
Related Documents  - - - - - - - - - - - - - - - - - - - - - - - - - - - - - - - - - - - - - - - - - - - - - - - - - - - - - - -  ii

1 Pre-Installation Planning  - - - - - - - - - - - - - - - - - - - - - - - - - - - - - - - - - - -  1

Equipment Required for Installation  - - - - - - - - - - - - - - - - - - - - - - - - - - - - - - - - - - - - - - - - - -  1
Site Planning  - - - - - - - - - - - - - - - - - - - - - - - - - - - - - - - - - - - - - - - - - - - - - - - - - - - - - - - - - - - -  1
Familiarizing Yourself with Your DataSafe NAS  - - - - - - - - - - - - - - - - - - - - - - - - - - - - - - - - - -  3

 2 Installing the DataSafe NAS  - - - - - - - - - - - - - - - - - - - - - - - - - - - - - - - -  4

Connect DataSafe NAS to Your Network- - - - - - - - - - - - - - - - - - - - - - - - - - - - - - - - - - - - - - - -  4
Turning on the Power - - - - - - - - - - - - - - - - - - - - - - - - - - - - - - - - - - - - - - - - - - - - - - - - - - - - - - 4
Installing DataSafe Wizard Software - - - - - - - - - - - - - - - - - - - - - - - - - - - - - - - - - - - - - - - - - - 5
Completing DataSafe Wizard Installation  - - - - - - - - - - - - - - - - - - - - - - - - - - - - - - - - - - - - - - 6

3 Configuring Your DataSafe NAS  - - - - - - - - - - - - - - - - - - - - - - - - - - - - - -  9

First Login- - - - - - - - - - - - - - - - - - - - - - - - - - - - - - - - - - - - - - - - - - - - - - - - - - - - - - - - - - - - - - -  9
Network Setup  - - - - - - - - - - - - - - - - - - - - - - - - - - - - - - - - - - - - - - - - - - - - - - - - - - - - - - - - - - -  10
Setting Time & Date - - - - - - - - - - - - - - - - - - - - - - - - - - - - - - - - - - - - - - - - - - - - - - - - - - - - - - -  13
Notes for Advanced Users  - - - - - - - - - - - - - - - - - - - - - - - - - - - - - - - - - - - - - - - - - - - - - - - - - -  15
System Reboot - - - - - - - - - - - - - - - - - - - - - - - - - - - - - - - - - - - - - - - - - - - - - - - - - - - - - - - - - - -  15

Index- - - - - - - - - - - - - - - - - - - - - - - - - - - - - - - - - - - - - - - - - - - - - - - - - - - -  17

Summary of Contents for 1562

Page 1: ......

Page 2: ...techemail html 2001 Iomega Corporation All Rights Reserved Iomega is a registered trademarks of Iomega Corporation DataSafe and QuikSync are trademarks of Iomega Corporation Other product company names and logos are trademarks or registered trademarks of their respective owners Part Number 000001562 ...

Page 3: ...pment Required for Installation 1 Site Planning 1 Familiarizing Yourself with Your DataSafe NAS 3 2 Installing the DataSafe NAS 4 Connect DataSafe NAS to Your Network 4 Turning on the Power 4 Installing DataSafe Wizard Software 5 Completing DataSafe Wizard Installation 6 3 Configuring Your DataSafe NAS 9 First Login 9 Network Setup 10 Setting Time Date 13 Notes for Advanced Users 15 System Reboot ...

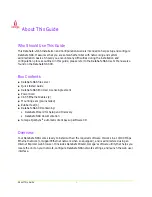
Page 4: ...uick Install Guide n DataSafe NAS End User License Agreement n Power Cord n CAT 5 Ethernet Cables 2 n Mounting ears pre installed n Rubber feet 4 n DataSafe NAS CD containing DataSafe Wizard for Setup and Discovery DataSafe NAS documentation n Iomega QuikSyncTM automatic client backup software CD Overview Your DataSafe NAS comes ready to install with all the required software It works in a 10 100 ...

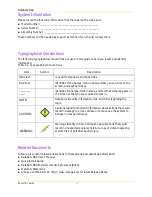
Page 5: ...e NAS End User License Agreement EULA n Warranty Statement n Also see our Web site at http www iomega com for latest Release Notes Table 1 1 Typographical Conventions Item Symbol Description Italic text is used for emphasis and book titles Bold text identifies menu names menu options items you can click on the screen and keyboard keys Courier font identifies file names folder names and text that e...

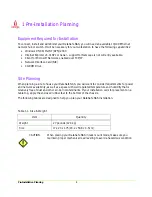
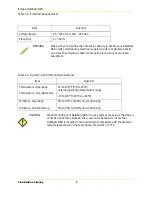
Page 6: ...nning When planning a site to house your DataSafe NAS you will want to consider requirements for power and network availability as well as a space with well regulated temperature and humidity that is relatively free of dust and other air born contaminants If your installation calls for placement on a table top apply the enclosed rubber feet to the bottom of the chassis The following tables are des...

Page 7: ... the air vents do not become blocked Also care must be taken to insure that DataSafe NAS is installed in an environment compatible with the ambient temperatures stated in the table above Maximum of 40º C Item Quantity Voltage Range 95 135 VAC or 180 265 VAC Frequency 47 63 Hz Table 1 3 Operating Environment Requirements Item Quantity Temperature Operating Temperature Non Operating 41º to 104º F 5º...

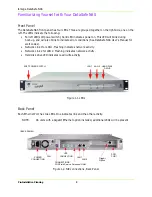
Page 8: ... User s Manual for alert codes Network Link 1 for LAN 1 Flashing indicates network activity Network Link 2 for LAN 2 Flashing indicates network activity Hard disk drive LED indicates read write activity Figure 1 1 LEDs Back Panel Each Ethernet Port has two LEDs One indicates link and the other activity NOTE On units with a Gigabit Ethernet option installed additional LEDs will be present Figure 1 ...

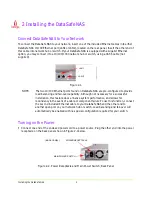
Page 9: ... provide load balancing and fail over capability Although not necessary for a successful installation this feature does enhance system performance and allows for redundancy in the event of a cable or component failure To use this function connect the second included Ethernet cable to your DataSafe NAS and the other end to another open port on your network hub or switch Load balancing and fail over...

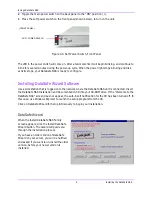
Page 10: ...he network where the DataSafe NAS unit is connected Insert the DataSafe NAS Installation and Documentation CD into your CD ROM drive If the Welcome to the DataSafe NAS screen does not appear the auto insert notification for the CD has been turned off In this case use Windows Explorer to launch the setup program from the CD Click on DataSafe Wizard for Setup Discovery to begin your installation Dat...

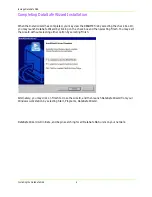
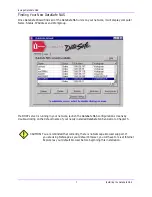
Page 11: ... DataSafe Wizard by clicking on the check box and then selecting Finish You may exit the wizard without selecting either option by selecting Finish Alternately you may click on Finish to close the wizard and then launch DataSafe Wizard from your Windows workstation by selecting Start Programs DataSafe Wizard DataSafe Wizard will initiate and begin searching for all DataSafe NAS units on your netwo...

Page 12: ... If a DHCP server is running in your network launch the DataSafe NAS configuration screens by double clicking on the default name of your newly installed DataSafe NAS and skip to Chapter 3 CAUTION You are reminded that currently there is no Netscape browser support If you are using Netscape as your default browser you will have to re set Internet Explorer as your default browser before beginning t...

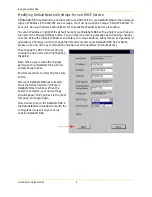
Page 13: ...Address and enter your unique address subnet mask and gateway if applicable Should you wish to change the default computer name DataSafe NAS Server Name please do so now with any combination of alpha numeric characters without spaces Then change the DHCP Client setting by clicking the down arrow and highlighting Disabled Next click Apply to make the changes permanent Your DataSafe NAS will now aut...

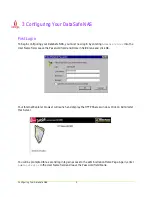
Page 14: ...to the User Name field Leave the Password field and Domain field blank and click OK Your Internet Explorer browser will launch and display the HTTP Shares window Click on Administer this Server You will be prompted for a second login to gain access to the administration Home Page Again enter Administrator in the User Name field and leave the Password field blank ...

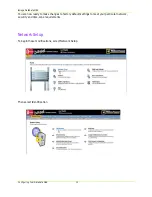
Page 15: ...ega DataSafe NAS You are now ready to make changes to factory default settings to meet your particular network security and time zone requirements Network Setup To begin these modifications select Network Setup Then select Identification ...

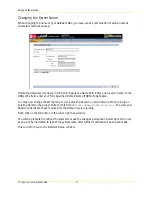
Page 16: ... applicable You may now change the Workgroup or join a existing Domain on your network When joining an existing Domain the proper entry for this field is DomainName Administrator The User and Password fields are those required for the Domain you are joining Next click on the OK button in the lower right hand corner You will be prompted to reboot the system to make the changes permanent Select Canc...

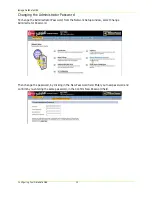
Page 17: ...r Password To change the Administrator Password from the Network Setup window select Change Administrator Password Then change the password by clicking in the New Password field Enter your new password and confirm by re entering the same password in the Confirm New Password field ...

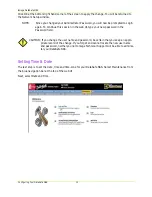
Page 18: ...eb UI type your new password in the Password field CAUTION If you change the user name and password be certain that you keep an appro priate record of the change If you forget and cannot locate the new user name and password neither you nor Iomega Technical Support will be able to adminis ter your DataSafe NAS Setting Time Date The last step is to set the date time and time zone for your DataSafe ...

Page 19: ...ataSafe NAS Enter the correct year month date time and time zone by clicking on the down arrow button in each field and highlighting the appropriate entry NOTE Even if the correct date and time are displayed you must verify this by clicking OK ...

Page 20: ... JBOD or RAID 1 it is recommended you make this change prior to beginning normal operations If you later decide to change the drive configuration the drive will be reformatted and all data will be erased For more information on changing drive configurations consult the DataSafe NAS User s Manual System Reboot Once you have completed your changes you must reboot your DataSafe NAS for those changes ...

Page 21: ...work Neighborhood or create additional shares by following the instructions in the User s Manual For further information on modifying or configuring other areas of your DataSafe NAS unit see the DataSafe NAS User s Manual provided on the CD Normal Power Down To power down your DataSafe NAS under normal conditions you may use the web interface by selecting Maintenance on the menu bar and then Shutd...

Page 22: ...work i Gigabit Ethernet option 3 4 H Hard disk drive LED 3 Hardware requirements 1 Home page 9 HTTP Shares 9 Humidity 1 I Identification 10 Installation environment 1 Installation planning 1 Installing the DataSafe NAS 4 Internet Explorer 1 J JBOD 15 L LEDs 3 Load balancing 4 Login 9 M Main power switch 4 Main switch 3 N Name changing 11 Netscape 1 Netscape browser support 7 Network activity indic...

Page 23: ...16 Sharing files 16 Shutdown 16 Site planning 1 Soft power switch 3 4 16 Software CD i Software requirements 1 System reboot 15 T Table top installation 1 Temperature 1 Time and date setting 13 U UPS connection 3 W Web site ii Workgroup 11 ...

Reviews: