6
Operation
PREPARING FOR OPERATION
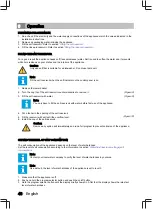
1. Do a check if the electricity and the water supply connections of the appliance match the values indicated in the
installation instructions.
2. Remove all packaging material inside the appliance.
3. Fill the salt reservoir. Refer to section
.
4. Fill the rinse aid reservoir. Refer to section
'Filling the rinse aid reservoir'
FILLING THE SALT RESERVOIR
For a good result the appliance needs soft (less calcareous) water. Salt is used to soften the water and it prevents
white lime residues on your dishes and the interior of the appliance.
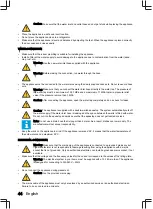
Caution:
Only use salt that is suitable for a dishwasher. Do not use table salt.
Note:
Fill the salt reservoir when the salt indicator on the control panel is on.
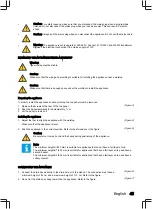
1. Remove the lower basket.
2. Turn the cap (A) of the salt reservoir counter-clockwise to remove it.
3. Fill the salt reservoir with water.
Note:
You only have to fill the salt reservoir with water before first use of the appliance.
4. Put a funnel in the opening of the salt reservoir.
5. Fill the reservoir with salt until the overflow level.
6. Install the cap of the salt reservoir.
Caution:
Remove any spilled salt immediately and run a full program to prevent corrosion of the appliance.
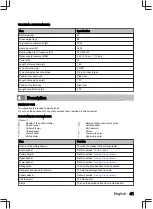
SETTING THE LEVEL OF SALT CONSUMPTION
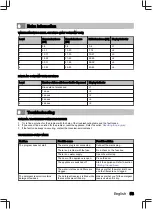
The salt consumption of the appliance depends on the level of water hardness.
Set the level of salt consumption according to the information in section
'Water hardness level settings (salt
.
Note:
Contact your local water company to verify the level of water hardness in your area.
Note:
As a default, the level of water hardness of the appliance is set to level 3.
1. Make sure that the appliance is off.
2. Push and hold the program selector button and push the on/off button.
3. Hold the program selector button until the display briefly shows SL. After that the display shows the latest set
level of water hardness.
(Figure 8)
(Figure 9)
(Figure 10)
46
•
English
Summary of Contents for VVW6035AS
Page 2: ......
Page 3: ...B F D C E G H L K J I A 1 ...
Page 4: ...A B C D E F G H I J K 2 1 2 3 4 Min 570 Min 600 H 570 H1 min A H2 B1 H3 B2 598 5 ...
Page 5: ...min 50 cm min Ø 4 cm max 110 cm 6 0 5 1 1 m 7 A 8 9 10 A 11 B 12 A 13 B 14 15 16 17 ...
Page 6: ...18 19 A 20 1 2 A 21 C B C B 22 23 1 A 2 24 A 25 A B 26 C 27 A 28 A B C 29 ...
Page 7: ...A B C 30 ...


