4 INSTALLATION
Invacare® TheraPure™ Recessed Whirlpool Tubs
18
Part No. 1167458
4.4
Plumbing Installation
1.
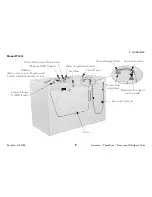
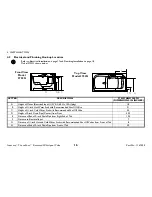
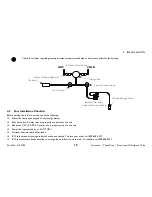
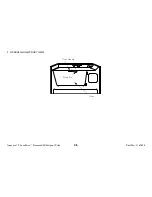
Refer to Electrical and Plumbing Hook-up Locations on page 16 for the location of the hot water stub and cold water stub.
2.
Measure the location of the drain on the unit.
3.
Install the drain in the floor in the appropriate location determined in STEP 2.
4.
Purge water lines. Hot and cold lines MUST be purged (blown down) prior to connection, to clear lines of debris.
5.
Install On/Off valves at wall and use unions between valves and stubs.
6.
Connect hot and cold supply lines to ¾-inch copper pipes found on back of tub in accordance with applicable building codes.
7.
Connect 2-inch drains in accordance with local plumbing codes.
8.
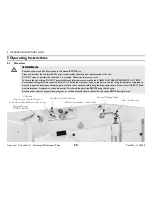
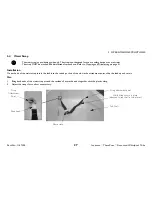
Attach the shower/massage wand and flow valve. Be sure to use the washers supplied.
9.
Check for leaks in supply or drain lines and check operation of tub. Refer to Operating Instructions on page 20.
DANGER - RISK OF SCALDING
The hot water supply to the tub MUST NOT exceed 110°
F (43° C) to protect the user from scalding.
WARNINGS
Be certain all plumbing work is performed by a qualified plumber and is in compliance with local codes.
Some state and local plumbing codes require the installation of a “reduced pressure zone” (RPZ) assembly on both the incoming hot and
cold supply lines to prevent back flow contamination into the potable water system. Invacare recommends you check local plumbing
code requirements to determine if RPZs are required on your tub installation. RPZs are NOT supplied by Invacare and are to be
provided by the customer if required.
CAUTIONS
Purge water lines. Hot and cold lines MUST be purged (blown down) to clear lines of debris prior to connection. Valves and spray heads
may become inoperable and/or damaged if lines are not properly cleared. Items damaged in this way are not covered under the warranty.
When operating water pressure exceeds 55 PSI, pressure regulators (similar to the ¾-inch Watts U5) MUST be installed.


