G E T T I N G S TA R T E D
NAVIGATING MENUS TO ADJUST SETTINGS
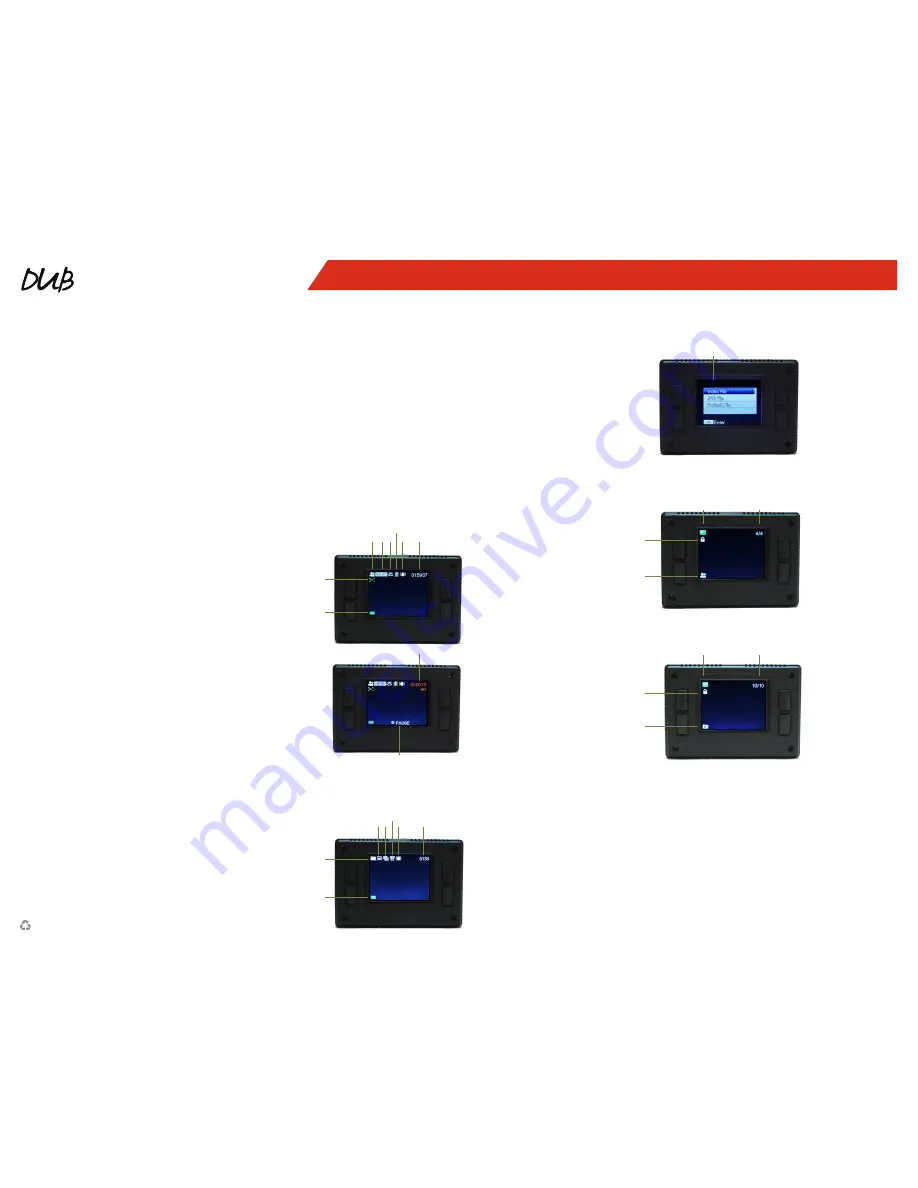
VIDEO STATUS SCREEN
PLAYBACK SELECTION SCREEN
VIDEO PL AYBACK STATUS SCREEN
PHOTO PL AYBACK STATUS SCREEN
TR ANSFERRING FILES TO A COMPUTER
PHOTO STATUS SCREEN
QUICK START GUIDE
INSERT # 1207 - 7/16
For complete instructions go to
www.intova.com
.
HOUSING REMOVE/REPLACE
Unlock Housing: Flip the housing lock (marked by OPEN) away from the
housing and unhook the latch from the back door. Push the thumb press
mechanism to pop open backdoor if there is a vacuum seal.
Lock Housing: Close back door, hook latch and push lock towards housing.
CHARGE
Prior to charging, remove the camera from its housing.
Charge the battery by connecting the camera to a computer or other USB
charging adapter using the included USB cable. When the camera turns on,
press the power button to turn camera off. The red LED indicator light turns
on during charging and turns off when charging is complete.
When charging with a computer, be sure that the computer is connected to
a power source. If the LED indicator light does not turn on, use a different
USB port.
The camera does not come fully charged. No damage occurs to the camera
or battery if used without a full charge.
For more battery information, see Battery.
MICRO SD CARD USE
The DUB camera is compatible with microSD memory cards with a capacity
up to 32GB (sold separately). Intova recommends using our Intova memory
cards for maximum reliability.
Insert the microSD Card: Slide the memory card into the card slot with the
label facing the front of the camera. When fully inserted, the card clicks into
place. Note: The card must be formatted prior to use. To remove the micro
SD Card: Place your fingernail against the edge of the memory card and
lightly press it further into the camera. The card springs out far enough to
be removed.
NOTICE:
The camera is not equipped with built-in memory. A memory card
is required. Use care when handling memory cards. Avoid liquids, dust and
debris. As a precaution, power off the camera before inserting or removing
the card. Check manufacturer guidelines regarding use in acceptable
temperature ranges.
POWER ON/OFF
Power-on: press and hold POWER button for 3 seconds, the screen starts up
and the camera enters video mode.
Power-off: press and hold POWER button for 3 seconds, the camera turns off.
CHOOSE MODE
The camera is equipped with three modes: video, photo and playback. The
default mode is video.
ALERTS & IMPORTANT MESSAGES
Missing SD card Notification:
Notification that there is no memory card in the camera. A microSD card is
required to capture videos, photos and to playback images. Insert microSD
card and this notification will vanish.
Operation indicator:
The LED light on top and front of camera illuminates blue when the camera
is turned on, connected to a computer to download images, and blinks
when recording video.
Charger indicator:
The LED light on top of the camera illuminates red when the camera is
charging.
WARNING:
Do not drop, disassemble, open, crush, bend, deform,
puncture, shred, microwave, incinerate or paint the camera.
Do not insert foreign objects into the battery opening on the
camera. Do not use the camera or the battery if it has been
damaged—for example, if cracked, punctured or harmed by
water. Disassembling or puncturing the battery can cause an
explosion or fire.
TO NAVIGATE THE SETTINGS FOR A GIVEN MODE
:
1. Verify that the camera is in the desired camera mode.
2. Press the
MENU
button to open the menu selection screen.
3. Press the
MODE
button to toggle between video or photo menu and
settings menu.
4. Press the
OK
button to enter the selected menu.
5. Use the
UP/DOWN
buttons to cycle through the menu choices. (Continue
to press the UP/DOWN buttons for additional choices)
6. Press the
OK
button to enter sub menu.
7. Use the
UP/DOWN
buttons to cycle through the setting options. (Continue
to press the up/down buttons for additional options)
8. Press the
OK
button to select the desired setting in the sub menu.
9. Press the
MENU
button to go back/exit.
1: Battery level
2: Motion detection mode
3: Video mode
4: Video resolution
5: Recording interval
6: Voice recorder
7: Image stabilizer
8: Video recording time remaining
9: Video recording time
10: Pause or restart video recording
1: Battery level
2: Photo mode
3: Photo resolution
4: Photo burst or self timer icon
5: Exposure compensation
6: Image stabilization
7: Number of photos remaining
1: Video or photo file
selection
1: Video file icon
2: File lock indicator icon
3: Playback icon
4: File number
5: Photo file icon
6: File lock indicator icon
7: Playback icon
8: File number
Your DUB camera displays the following information about modes and
settings.
Your DUB camera displays the following information.
Your DUB camera displays the following information.
Your DUB camera displays the following information.
The DUB camera is plug and play.
1. Make sure camera is powered off.
2. Connect camera to computer with USB cable.
3. Camera will power on and enter MSDC (download) mode.
Your DUB camera displays the following information about modes and
settings
3
2
1
4 5 7
8
1
6
9
10
2
1
3 4 6
7
5
4
3
2
1
8
7
6
5
NOTE:
You can also
transfer files to a computer
using a card reader (sold
separately). Connect
the card reader to your
computer and insert the
micro SD card into the
reader. You can then
transfer files to your
computer or delete
selected files on your card.


