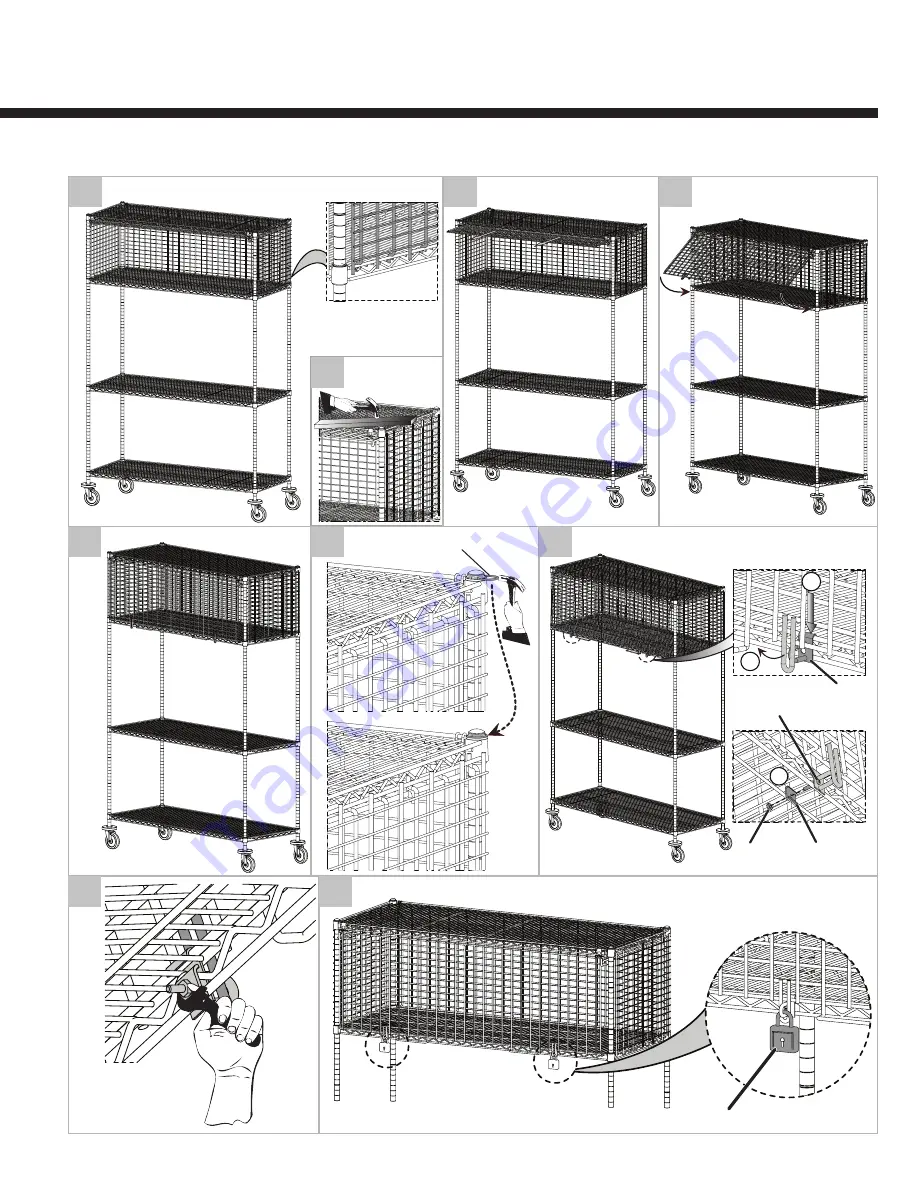
24
26
25
27
29
Retaining Ring
(TYP)
28
A
B
C
30
Latch
Nut
Tapped
Clamp
Screw
31
32
Lock
Secure the Unit with Lock
Each Corner
Page 1: ...hington Street Wilkes Barre PA USA 18705 For Product Information Call 1 800 992 1776 Visit Our Web Site www metro com INSTRUCTIONS FOR USE SECURITY MODULE INSTRUCTIONS FOR USE Security Module SECM 2430 SECM 2448 SECM 2460 SECURITY MODULE MOUNTED ...
Page 2: ...48 SECM 2460 Two People Required to Assemble Unit TOP VIEW 1 3 Top Shelf Removed from Unit 2 Third Wire Right Slide 4 Slide Clamp 5 Carriage Bolt Elastic Stop Nut Do Not Tighten the Bolt Security Module is Installed on SES Cart 6 Left Slide Right Slide 20 Grooves ...
Page 3: ...9 11 Cart Post Split Sleeves Tapered End Up Top Groove 12 Top Groove TYP 13 Top Shelf with Enclosure Door 14 15 16 Tap the Slides for Free Movement of Enclosure Door Under Top Shelf FRONT REAR Do Not Seat Top Shelf Firmly Yet Handles Face Down ...
Page 4: ...Security Module 17 18 A B A Tighten Elastic Stop Nuts 19 End Panel 20 Left End Panel Right End Panel 21 22 Top Shelf with Enclosure Door Back Panel 23 ...
Page 5: ...24 26 25 27 29 Retaining Ring TYP 28 A B C 30 Latch Nut Tapped Clamp Screw 31 32 Lock Secure the Unit with Lock Each Corner ...
Page 6: ...2 1776 Visit Our Web Site www metro com L01 057 Rev A 06 11 Information and specifications are subject to change without notice Please confirm at time of order Save this document for future application load rating and or safety reference Security Module THIS COMPLETES THE ASSEMBLY OF SECURITY MODULE MOUNTED ON SES CART 33 ...