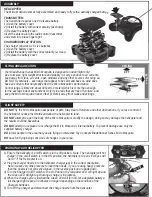
HELICOPTER
The Micro Mosquito comes fully assembled and ready to fly with a partially charged battery.
ASSEMBLY
TRANSMITTER:
The transmitter requires one 9V alkaline battery.
1) Open the battery cover.
2) Install the battery with correct polarity (as shown).
3) Replace the battery cover.
Insert the antenna into the radio control transmitter
and screw in to place finger tight.
.
CHARGER/DISPLAY STATION
The charger requires six C size batteries.
1) Open the battery cover.
2) Install the battery with the correct polarity
(as shown).
3) Replace the battery cover.
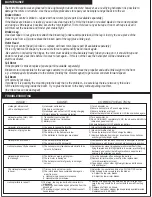
Your BladeRunner Series Micro Mosquito is designed for indoor flight only!
Due to its size, light weight structure and stability it is very sensitive to air currents,
keep away from fans, air vents, open windows and any other sources of moving air.
DO NOT fly outdoors – even days that appear to be calm and have no wind does
have air currents that will greatly effect the Micro Mosquito’s performance.
Control range is limited to about 30 feet (10 meters) which is more than enough
for the average indoor environment. Only fly in areas that are free of furniture, and
keep the Micro Mosquito at least 3 feet (1 meter) away from walls and ceilings.
FLYING AREA/LOCATION
CEILING
W
A
L
L
3 FT
3 FT
FLIGHT SAFETY
DO
inform people in the area that you are flying an Interactive Toy Concepts BladeRunner Series Micro Mosquito.
DO NOT
fly the Micro Mosquito near people or pets. Stay clear of furniture and other obstructions. If you lose control of
the helicopter, reduce the throttle and allow the helicopter to land.
DO NOT
attempt to replace or overcharge the Micro Mosquito’s internal battery. To prevent damage use only the
supplied battery charger.
DO
have fun flying being conscious of changes in your area.
DO NOT
attempt to open the body of the Micro Mosquito or modify the design, doing so may damage the helicopter and
the results could be hazardous.
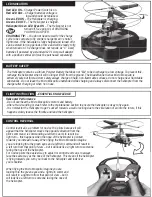
CHARGING YOUR HELICOPTER
1) Ensure the helicopter’s on/off switch is in the off position. Note: The helicopter will not
charge “if” the on/off switch is in the ON position, the helicopter’s Green LED Eyes will
be On “if” the Helicopter is on.
2) Plug the charger nozzle into the helicopter charger jack in the correct orientation.
Note: it takes very little pressure to insert the nozzle, if you are using heavy pressure
then the nozzle is not correctly aligned, in the reverse position or upside down.
3) Turn the Charger On/Off switch to the On Position, the red power LED will light up and
the Green LED will light up showing a charge is in progress.
4) When the charge cycle is finished the Green LED will turn off, for a depleted battery a
full charge might require 30 minutes or longer depending on the condition of the
Chargers batteries.
5) Turn off the Charger and disconnect the charge nozzle from the helicopter.
OFF
ON
PLUG IN
LED INDICATORS
Red LED ON
– Charger Power Switch is on.
Red LED Dim
– Charger batteries voltage is
low and should be replaced.
Green LED ON
– The Helicopter is charging.
Green LED OFF
– The Helicopter is charged.
Helicopter Green LED Eyes ON
– The Helicopter is not
turned off. See point #1 of CHARGING
YOUR HELICOPTER.
CHARGING TIP:
– You do not need to wait for the charge
cycle to be compete to fly, shorter charge timed = shorter
flight times. If the helicopter is fully charged and turned off it
can be stored for long periods of time and will be ready to fly
when turned on. The charger does not require six “C” sized
batteries if powered by a standard 12V 1 Amp wall adaptor
with a positive central pin (must be purchased separately).
FLIGHT INSTRUCTION
The Helicopter contains a Lithium Polymer Battery that does not “like” to be discharge to a low voltage. To prevent this,
recharge the helicopter when it will no longer lift off from the ground. The BladeRunner Series Micro Mosquito is
extremely safe but for maximum safety always charge on hard, non-flammable surfaces, do not charge near flammable
substances. Do not leave the Micro Mosquito unattended while charging and always disconnect the helicopter from the
charger after charging or when not in use.
BATTERY SAFETY
-ESSENTIAL KNOWLEDGE
Helicopter Performance
- Do not overheat the Micro Mosquito’s motors and battery.
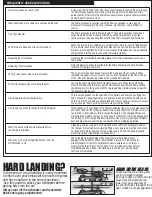
- After a Hard Landing or crash refer to the maintenance section to ensure the helicopter is okay to fly again.
- It is normal for the Helicopter to get “sucked” towards a wall or ceiling due to the circulation of air into the rotors, if this
happens slowly reduce the throttle and land the helicopter.
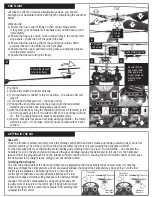
CONTROL REVERSAL
Control reversal is a problem for novice R/C pilots because it will
appear that the helicopter moves the opposite direction from the
pilot’s command, ie commanding a left turn seems to result in a
right turn – this happens when the nose of the helicopter is pointed
towards you instead of away. When flying the Micro Mosquito imagine
you are looking thru the green eyes and a left turn command will result in
a left turn from that point of view – but it will look like a right turn to someone
facing the nose of the helicopter.
For novice pilots the easiest way to adjust for control reversal is to always
face the same way as the nose of the helicopter. This means if the helicopter
is flying towards you, turn your back to the helicopter and look over
your shoulder.
When flying the Micro Mosquito imagine you are
looking thru the green eyes and a right turn command
will result in a right turn from that point of view – but it
will look like a left turn to someone facing the nose of
the helicopter.
OFF


